


Connections
To connect the 566 to your system, refer to the following steps:
¥ Turn off all equipment before making any connections.
¥ Mount the 566 in a rack with the rack screws provided. The 566 can be mounted above or below
anything that does not generate excessive heat. Ambient temperatures should not exceed 95¡F
(35¡C) when equipment is in use. Although the unit is shielded against radio frequency and elec-
tromagnetic interference, extremely high fields of RF and EMI should be avoided where possible.
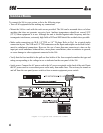
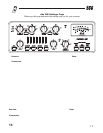
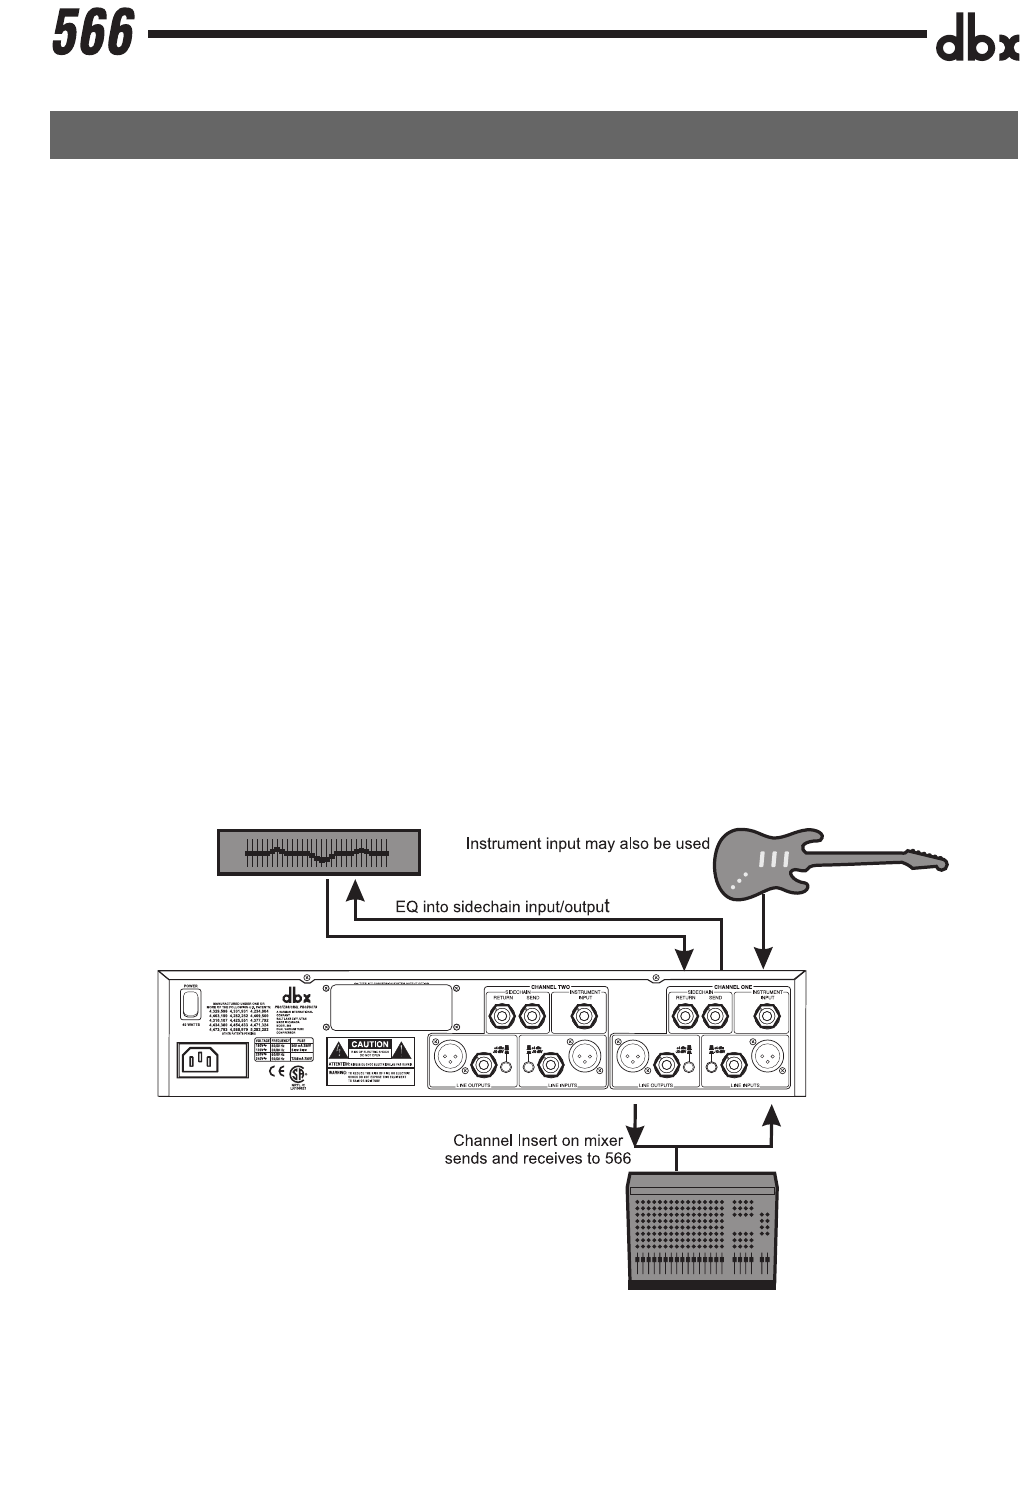
¥ Make audio connections via XLR, 1/4Ó TRS, or 1/4Ó TS plugs. Refer to Fig.1 for a typical studio
connection layout. The XLR and 1/4Ó TRS connectors on the inputs and outputs can be used for bal-
anced or unbalanced connections. However, the use of more than one connector at a time on the
input pair could unbalance balanced lines, cause phase cancellations, short a conductor to ground,
or cause damage to other equipment connected to the 566.
¥ Verify that the fuse installed in the pull-out fuse holder of the fuse receptacle matches the type and
rating corresponding to the voltage in use as indicated on the rear panel of the 566.
¥ Apply power. Connect the AC power cord to the AC power receptacle on the back of the unit. Route
the AC power cord to a convenient power outlet away from audio lines. The unit may be turned on
and off from the rear panel power switch or from a master equipment power switch.
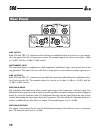
Figure 1: A typical 566 connection scheme
4