


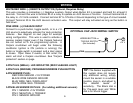
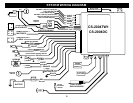
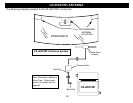

OPERATION
ACTIVE ARMING
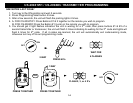
To arm the alarm and lock the doors, press the #1 Button on any remote. You will hear a single siren chirp and the
lights will flash once. The system will arm, the doors will lock (optional) and the starter will be disabled. The red in-
dash LED in the vehicle will begin to flash. After a short delay of 10-15 seconds to allow vehicle and electronics to
stabilize the system will be completely armed.
DISARMING
To disarm the alarm and unlock the doors, press the #2 Button on any remote. You will hear 2 siren chirps and the
lights will flash twice. The in-dash LED stops flashing dome light turns on (Optional). If the alarm is currently
tripped, then the #2 Button will have to be pressed two times. The first press will only reset the trigger and the
second press will Disarm the system. See “ARMED CYCLE RESET”.
ALARM TRIGGERING
If there is an intrusion into the vehicle such as an open door/hood/trunk, the alarm siren will sound and flash the
lights for 1 minute. This is known as a cycle. After the cycle, the system will automatically reset and continue to
protect the vehicle. If a door is left open then the unit will cycle for the Maximum of 5 minutes, reset, and continue to
protect the other un-tampered zones.
ALARM CYCLE RESET
If and when the alarm system is triggered, pressing the #2 button on any remote will reset the unit’s cycle (lights,
siren) condition without disarming it. Pressing the button a #2 button second time will Disarm/Unlock the system.
REMOTE PANIC PROTECTION
To sound the alarm upon command (panic), press and hold the Button #1 on any transmitter for at least 3 seconds
until the siren sounds and lights flash. Press Button #2 to reset the panic mode.
SILENT ARM/DISARM
Press and release Button #4 (SLNT) on any remote to arm or disarm the system without the siren chirp. The light
flash will be your only confirmation on Arm/Disarm.
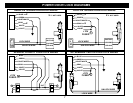
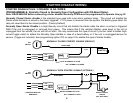
REMOTE AUX. OUTPUT 1 (OPTIONAL, MAY REQUIRE RELAY)
To activate an optional feature such as a trunk/hatch pop (if vehicle is properly equipped), press and release Button
#3 (AUX) on any remote. This provides a ½ second auxiliary pulse to activate a relay for power trunk release or
other optional feature. (Extra parts and/or labor may be required for this feature.)
16