


Page 4
INSTALLATION
WARNING: Failure to follow these instructions exactly may result in poor performance, property damage,
personal injury, or loss of life. Installation must be done by a qualified service person.
STEP 1. PREPARING TO INSTALL HEATER
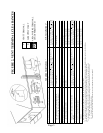
a) Open carton and carefully remove heater and all additional parts.
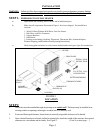
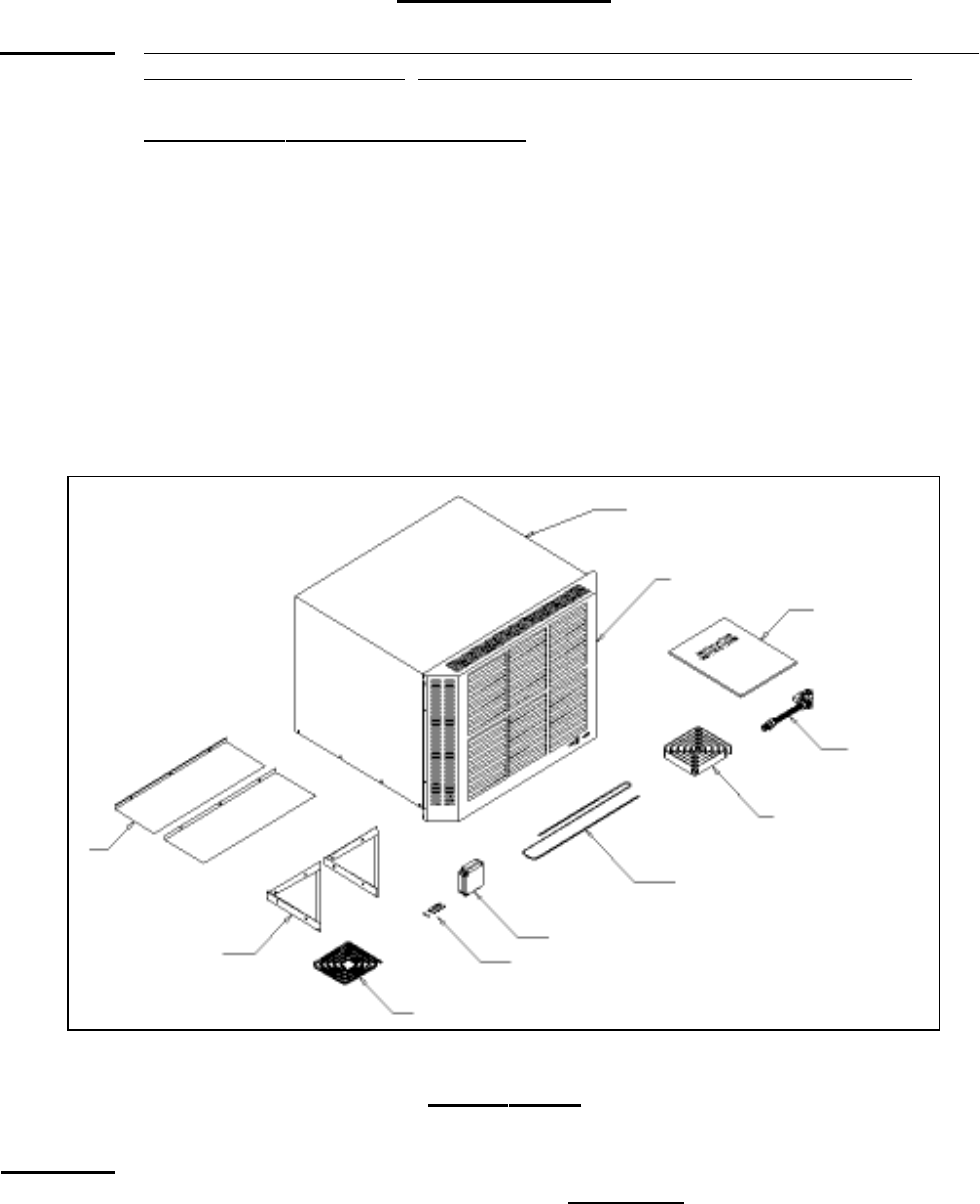
b) Make sure all components illustrated in Figure 1 have been shipped. You should have
received:
1 - Wind-O-Warm Window/Wall Direct Vent Gas Heater
1 - Ball Valve with Flex Connector
2 - Support Brackets
2 - Side Panels
1 - Packing set including (Caulking, Thermostat, Thermostat Wire, Insulated Staples,
Weather Stripping, and Installation and Operating Instructions)
c) Check rating plate on heater to verify correct model number and type of gas for intended use.
LOCATION
STEP 2
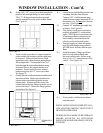
1. This heater must be installed through an opening on an outside wall. The heater may be installed in an
existing window or opening cut through a wooden, brick, or masonry wall.
2. For most efficient performance, locate heater as centrally as possible in the area to be heated.
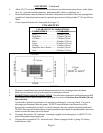
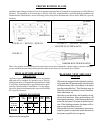
3. Once a desired location is selected, and before cutting hole, check the outside of the structure for required
clearances to vent exhaust and air intake. See Figure 2. (Cont’d. on next page. . . )
CAULKING
FIGURE 1
HEATER
FRONT PANEL
INSTALLATION
INSTRUCTIONS
FLEX GAS LINE
WITH SHUTOFF
WEATHER STRIPPING
THERMOSTAT WIRE
THERMOSTAT
STAPLES (10)
SUPPORT
BRACKET (2)
WINDOW
TRIM (2)