


0
1
2
2
3
4
Peg
Peg
Tubes
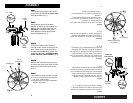
ASSEMBLY
Step 4)
The assembly is now complete for use.
a) Turn the unit right-side up and place
it on a dry, level surface.
b) Plug the power cord into a standard
120VAC wall outlet.
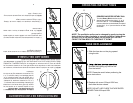
Step 2)
Attach the two pieces of the base
together by matching and inserting the
pegs on the front base piece into the
peg tubes on the back base piece.
Push together until the two parts are
securely attached (Fig. 1).
Step 1)
Turn the fan body and the base pieces
upside down and thread the power cord
through the base (Fig. 1).
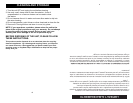
Step 3a)
Line up the 4 holes on the bottom of
the body to the 4 holes on the top of the
base. Use a Phillips head screwdriver
to tighten the screws (4) to secure the
base to the fan body. PLEASE DO NOT
OVER TIGHTEN THE SCREWS (Fig. 2).
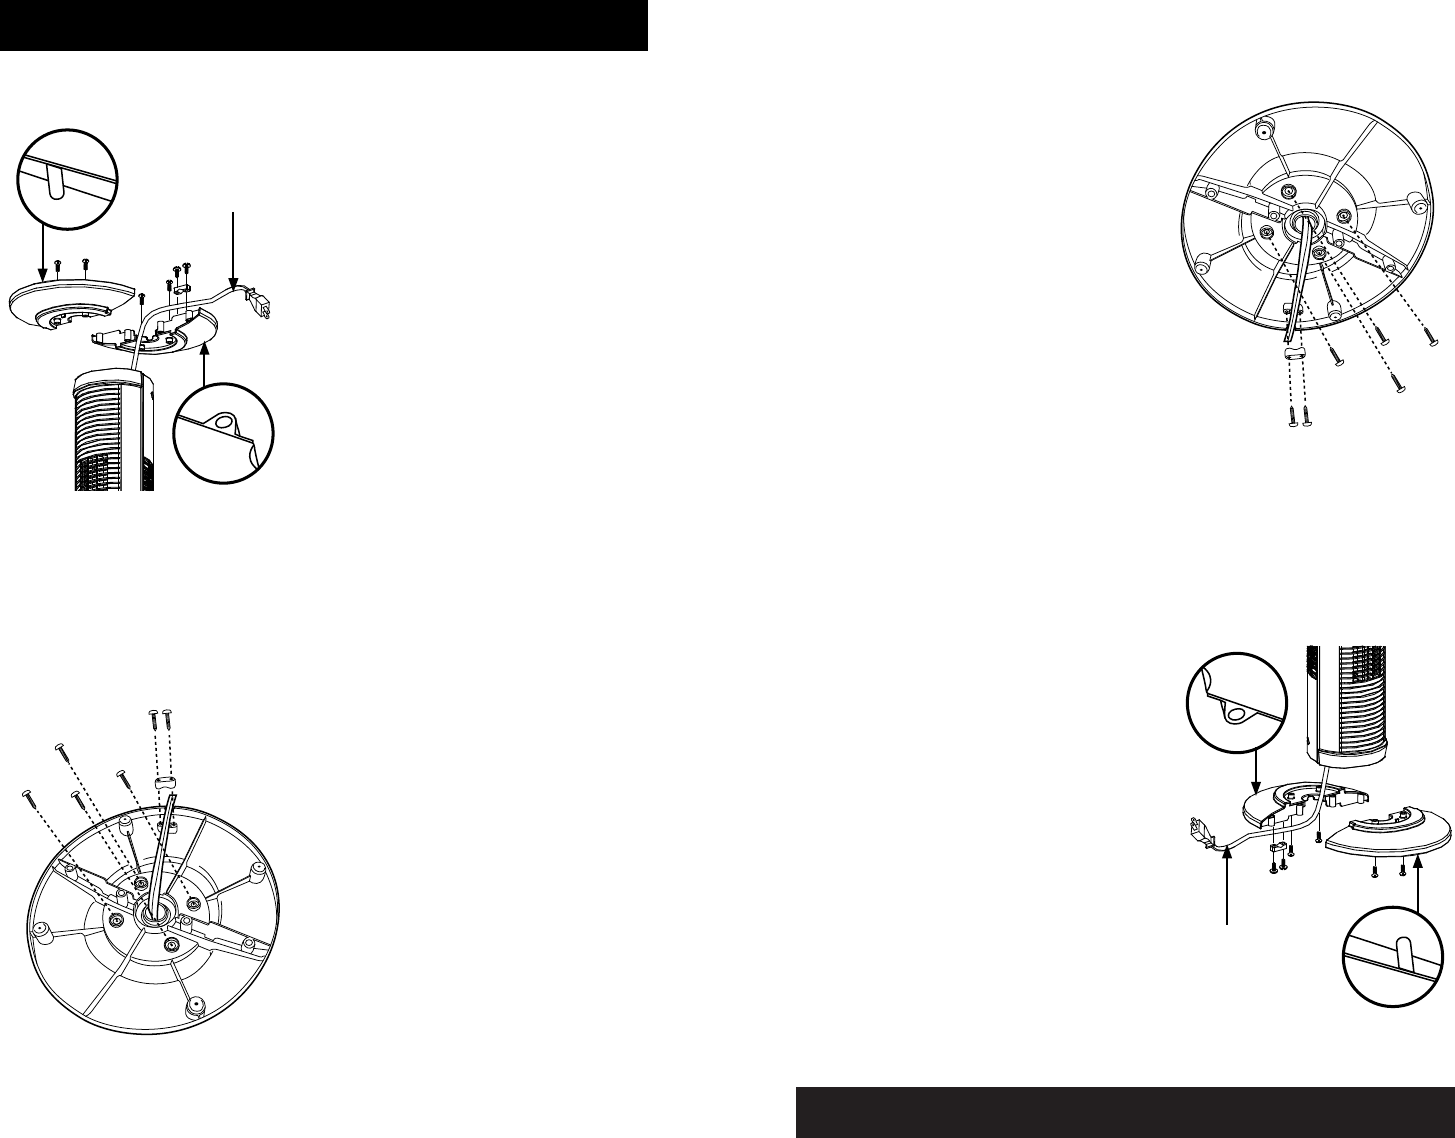
Step 3b)
Remove the 2 Screws and Cord Clasp
and place the power cord under the cord
clasp and re-secure with the 2 screws.
(Fig. 2).
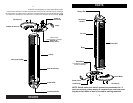
Power
Cord
Screws (4)
Cord
Screws (2)
Fig. 1
Fig. 2
ARMADO
Paso 1
Coloque el armazón del ventilador y las piezas
de la base de cabeza y proceda a enroscar o
pasar el cordón a través de la base (Fig. 1)
Paso 2
Acople las dos piezas de la base juntándo-
las una con otra haciendo que concuerden e
insertando las clavijas en la pieza de la base
delantera con los tubos para las clavijas en la
pieza de la base posterior. Presione hasta que
ambaspartesquedenjamenteaseguradas.
(Fig. 1).
Paso 3a
Alinee los cuatro agujeros en la parte inferior
del armazón con los cuatro agujeros en la parte
superior de la base. Utilice un destornillador
de cabezal Phillips para ajustar los tornillos (4)
y asegurar la base al armazón del ventilador.
NO AJUSTE DEMASIADO LOS TORNILLOS.
(Fig. 2).
Paso 3b
Retire los dos tornillos y el sujetador del cordón
y coloque el cordón por debajo del sujetador
volviendo a colocar y a ajustar los dos tornillos.
(Fig. 2).
Paso 4
Con este paso se ha terminado el armado y ya
se puede utilizar el ventilador.
a) Vuelva a colocar el aparato en posición verti-
calycolóquelosobreunasuperciesecay
nivelada.
b) Conecte el enchufe a un tomacorriente de
pared estándar de 120V AC.
1
Clavija
Clavija para
los tubos
Cable de
Corriente
Tornillos (4)
para fijar el Cable
Tornillos (2)
Fig. 1
Fig. 2
4