


26
Dutchwest
7001135
Remove and Inspect the Combustor
• Wear safety glasses, a dust mask, and gloves.
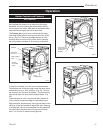
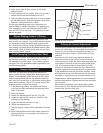
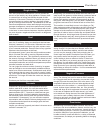
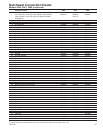
• Remove the four bolts that secure the stove top
plate. There are two each on both the left and the
right side, just under the top plate overhang. With
the bolts removed, lift the top.
• For a visual inspection for blockage that can be
performed without removing the combustor, have an
assistant shine a bright flashlight beam up through the
combustor from inside the stove’s firebox.
• If combustor removal is necessary for cleaning or
closer inspection, lift it gently out of its chamber. You
may have to work it back and forth carefully to remove
it. Check the combustor and the bottom of the refractory
chamber for a build-up of fly ash, and remove any ash
by gently blowing air through the combustor. Do not
brush the surface, as this could damage the element.
• Inspect the combustor, referring to the information
in the “Catalytic Combustor Appendix” on Page 27 for
information on what to look for. Although small hair-
line cracks will not affect performance, the combustor
should be essentially intact. If the combustor is broken
in pieces or has sections missing, it should be replaced.
Call your local Dutchwest dealer for a replacement
combustor, item #CB56. Consult the warranty section
at the back of this manual for further information on
catalytic combustor replacement.
• If the combustor is in good condition and clean, re-
install it. Be sure first to carefully wrap a new Interam
gasket (an extra was provided with your stove) around
its perimeter before replacement. Insert the gasketed
combustor gently back into position, and replace the
refractory package.
• Before replacing the stove top, check the damper. If
the gasket is intact, but the damper isn’t locking tightly,
adjustment should be made. Also check the gasket that
seals the top plate.
• Gasket should be replaced only if damaged or miss-
ing. The top plate uses a 3/8” gasket and the damper
is sealed with a 3/8” gasket. The procedure for remov-
ing the old gasket and installing the new is the same as
that described for door gaskets on Page 19.
• Replace the stove top, and tighten the four top plate
bolts that secure it. Be sure that the top plate seats
properly before tightening, and tighten the bolts alter-
nately as you would tighten the bolts that secure a car
tire.
Watch for Better Results
Finish up by cleaning the chimney connector. Then,
use the stove in your typical manner for two weeks and
note the stove’s performance, taking special note of the
performance tests described above.
If a problem persists, contact your Dutchwest dealer for
further advice about your particular situation.
ST443
top plate bolts
7/10/00 djt
Remove these bolts
ST443
Fig. 31 Remove four bolts securing stove top plate.
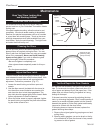
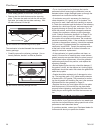
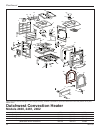
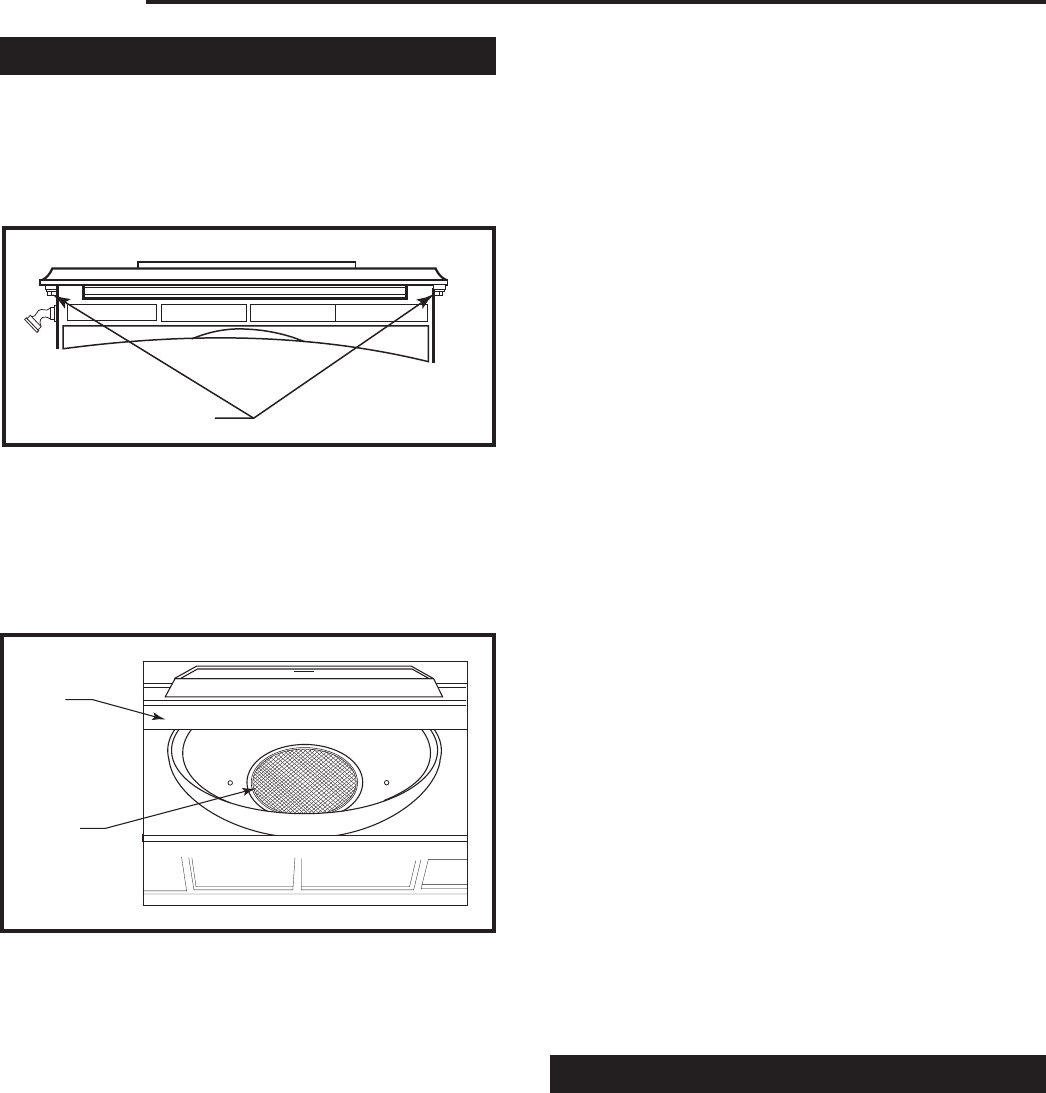
The combustor is located beneath the removable re-
fractory package.
• Carefully remove the refractory package. It is ex-
tremely delicate; handle it as little as possible.
ST444
catalytic burner
7/10/00 djt
Stove
Top
Catalytic
Burner
ST444
Fig. 32 Remove refractory package with care.