


Page 14 Clarke
®
BEXT
®
-100, 100H 150H, 300HV Operator's Manual
To prepare the machine for operation, follow this proce-
dure:
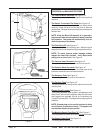
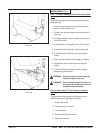
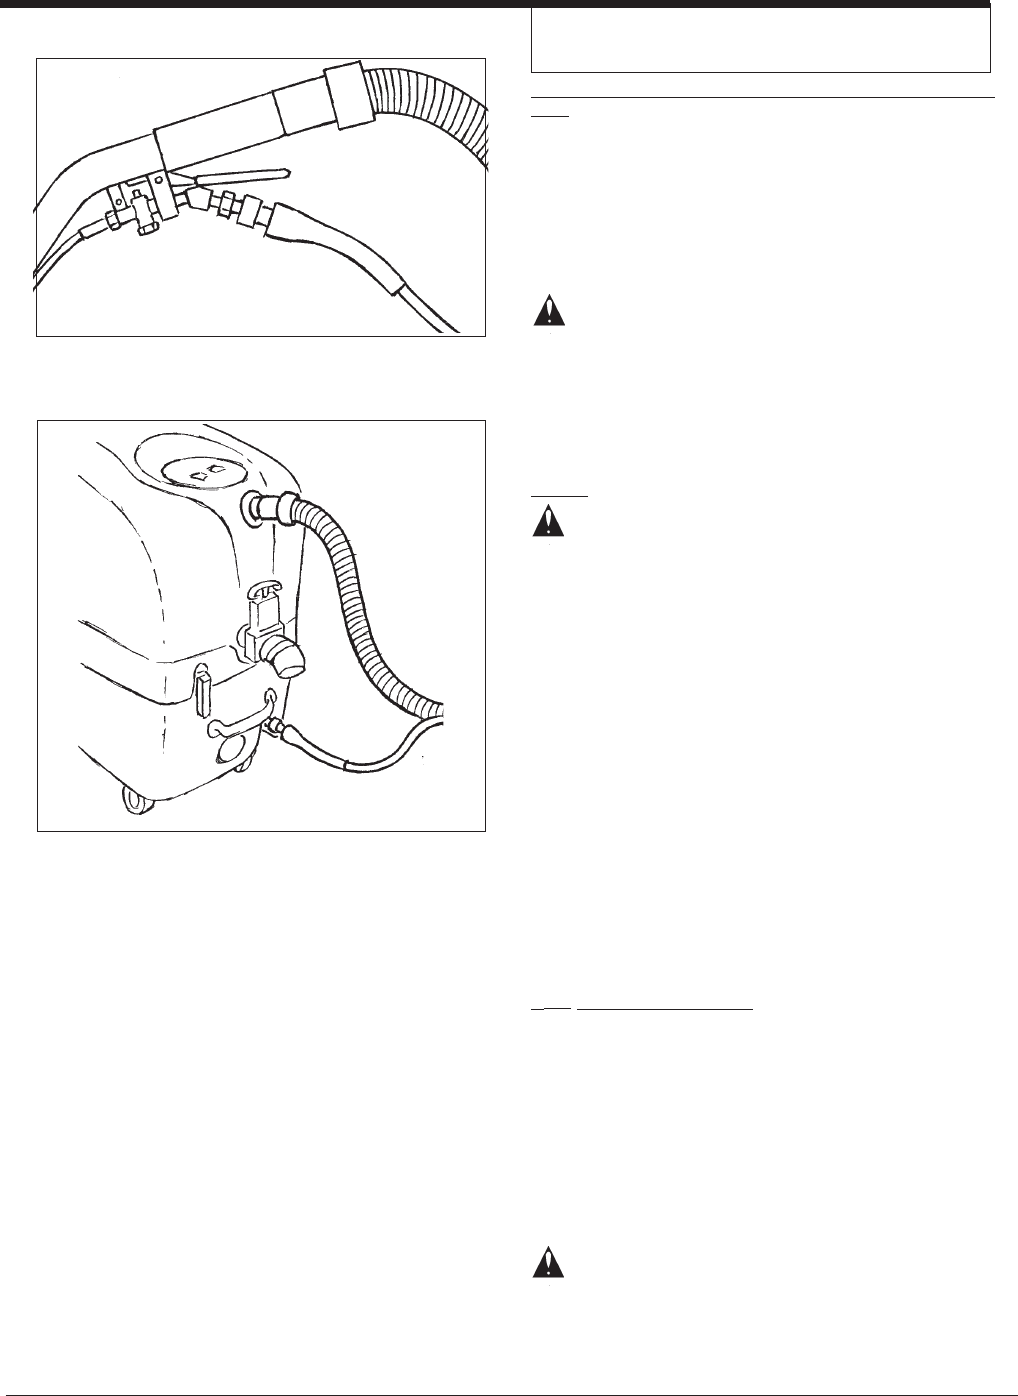
1. Connect the vacuum hose to the hose connector
on the extractor and to the end of the vacuum tube
on the floor tool. See Figure 1 D, E
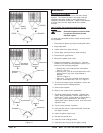
2. Connect the solution hose to the extractor and the
floor tool. To fasten the quick disconnect fitting,
slide the knurled collar on the female coupling
away from the opening. Push the male coupling
into the female coupling. See figure 3 A & B
WARNING: Do not use water that is hotter than
120°F (48°C).
3. Before moving the extractor onto the carpet, put
clean hot water into the solution tank.
4. Add a cleaning chemical, such as Clarkare
®
Ex-
tractor Concentrate, to the hot water. For the
correct amount, follow the directions shown on the
container.
Set-Up
WARNING: We recommend that you use liquid
cleaning chemicals. Powder can dam-
age machine. Powders can cause
build-up in the lines, heater, pump,
quick disconnects, etc., all of which
would void the warranty on those
items. A pH of 7-9 is strongly recom-
mended to avoid damage and prema-
ture wear to the pump, which would
void the warranty.
Fill the holding tank with clear water and the detergent of
your choice. Mix well. Although this machine is designed
to supply instant hot water, the addition of warm or hot water
to the holding tank is beneficial and will reduce pre-heat
times.
A. Plug in cord #1 (vac and pump), identified by the red "H"
on the end of the cord. Attach the priming hose to the
machine (on 300 HV only). Turn the pump on and set the
switch to the upholstery setting. Run until the pump is
fully primed, then turn off the pump. Remove the priming
hose and attach the cleaning hoses and tool.
B. Turn on the pump and spray through the cleaning tool
for a few seconds to fill the lines with solution.
BEXT
®
100H, 150H & 300HV
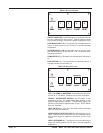
C. Plug in cord #2. The "Locator" light will illuminate when
the cords are plugged into separate circuits. Turn the
"Heat" switch on; wait two minutes for the heat ex-
changer to reach operating temperature. You may now
begin cleaning. It will take about 10 seconds for the
initial heat to reach the wand. The "Mode" light will turn
on when the heat exchanger is actively heating. (See
Figures 5, 6 and 7)
NOTE: If the "Locator" indicator light does not illuminate
when cord #2 is plugged in, then both cords are on the
same line. Try other outlets until the light comes on.
CAUTION: If both cords are plugged into the
same circuit breaker, the breaker may
blow when operating with the heater
on.
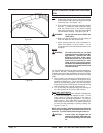
Figure 3A
Figure 3B
HOW TO PREPARE THE MACHINE FOR OPERA-
TION