


Page 8
SKU 03914
For technical questions, please call 1-800-444-3353.
Operation
Caution: To properly break-in your new sewing machine, and
avoid possible damage to the machine, sew at moderate to slow
speeds for the first 15 minutes of use.
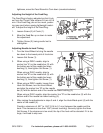
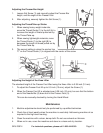
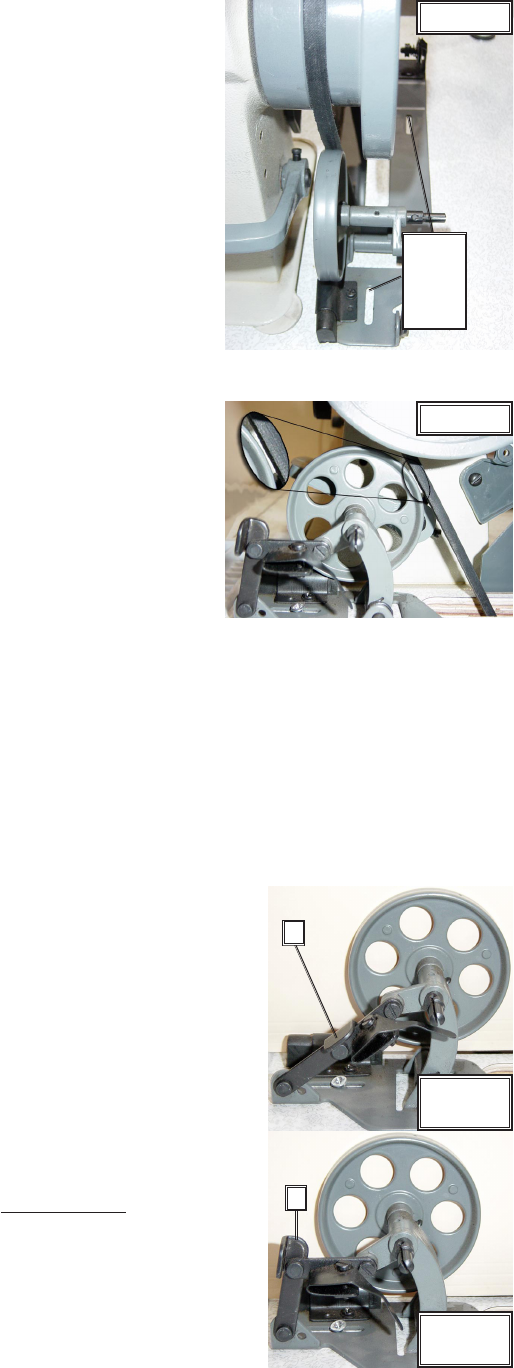
Bobbin Winder Operation
The Bobbin Winder assists in winding thread onto the
Bobbin. The Bobbin Winder has two positions, ‘ON’ and ‘OFF’:
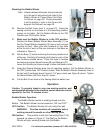
OFF Position The Bobbin Winder will not contact the belt.
WARNING: Shut the machine off completely before
working around the needle or other moving parts.
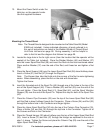
ON Position This position is with the Connecting Rod (10-6)
pressed, as shown in Figure C. The Shaft on the Bobbin
Winder will spin; winding thread onto the Bobbin.
OFF Po-
sition
ON Posi-
tion
6
6
OFF Po-
sition
ON Posi-
tion
6
6
REV 03/04; 04/05
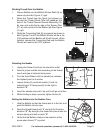
Mounting the Bobbin Winder
Note: Unless indicated otherwise, all parts referred
to in this set of instructions are listed in the
Bobbin Winder & Thread Stand Unit Parts
List found on page 28. During assembly,
it will be helpful to refer to that list and the
diagram that follows it on page 29.
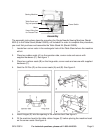
20. Remove the Belt Cover (part 4, on page 27). Swing the
sewing machine so the base is in the operating position,
resting on the table. Set the Bobbin Winder to the ‘ON’
Position-see ON Position, below.
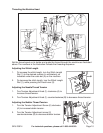
21. Make sure the Bobbin Winder is in the ‘ON’ position.
Position the Base (Bobbin Winder Base Assembly) (1) so
that the Thread Winder Assembly (3) lines up with and just
touches the belt. Mark pilot hole locations on the table
at the far end of each of the two channels in the Base as
indicated in Figure A.
22. Set the Base (1) aside and swing the sewing machine out
of the way. Carefully drill straight pilot holes for each of the
two locations marked above. Place the base in location
and secure using two Wood Screws (26) and Washers (27).
Leave the Screws just loose enough to allow the Base to slide.
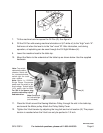
23. Swing the Sewing Machine back into it’s operating position. Put the Bobbin Winder in
the ‘OFF’ position-see OFF Position, below. Slide the Bobbin Winder Assembly close to
the belt until it just barely doesn’t touch it (
1
/
8
” gap or less)-see Figure B, above. Tighten
the Wood Screws (26) from step 22, above.
24. Put the Belt Cover back on the Sewing Machine before use.
Figure A
Figure B
Mark
Pilot
Holes
Here.
Figure A
Figure B
Mark
Pilot
Holes
Here.