


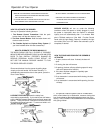
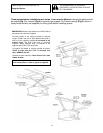
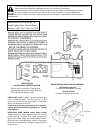
LOCATE DOOR CONTROL BUTTON (OR ANY ADDITIONAL PUSH BUTTONS) WHERE THE GARAGE DOOR IS VISIBLE.
AWAY FROM DOOR AND DOOR HARDWARE AND OUT OF THE REACH OF CHILDREN.
SERIOUS PERSONAL INJURY FROM A MOVING GARAGE DOOR MAY RESULT FROM MISUSE OF OPENER.
ALL OW CHILDREN TO OPERATE DOOR CONTROL BUTTON(S)
or REMOTE CONTROL TRANSMITTER.
FASTEN THE CAUTION LABEL ON THE WALL NEAR DOOR CONTROL BUTTON AS A REMINDER OF SAFE OPERATING
PROCEDURES.
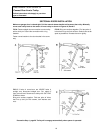
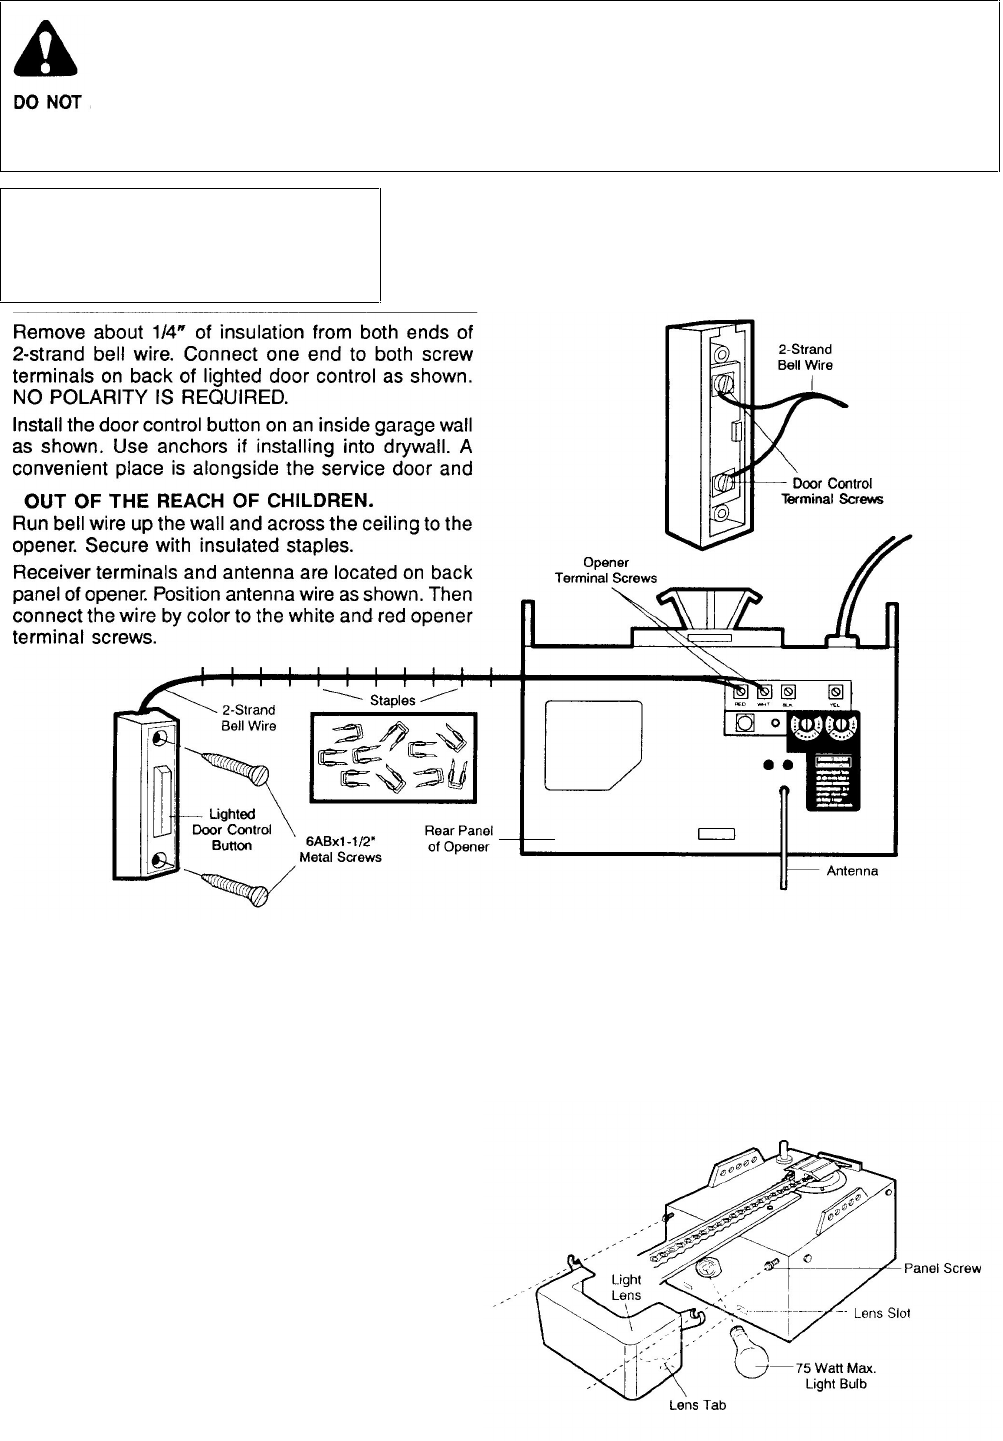
INSTALLATION STEP 5
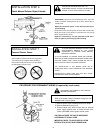
Install Lighted Door Control Button
Models 1156,1155, 1146,1145,1140
OPERATION OF
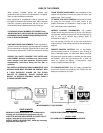
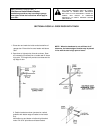
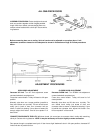
WIRING INSTRUCTIONS FOR ACCESSORIES
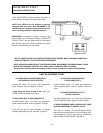
LIGHTED DOOR CONTROL BUTTON
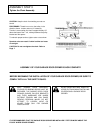
The Protector System
Press to open or close door. Press again to
REVERSE door during the CLOSING cycle or to
STOP door during
OPENING cycle.
To white and black opener terminals
Outside Keylock
To red and white opener terminals
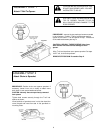
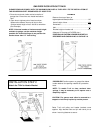
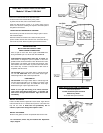
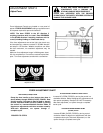
INSTALLING LIGHT: Install a 75 watt maximum light
bulb in socket as shown. The light will turn on and
remain lit for 4-1/2 minutes when power is connected.
After 4-1/2 minutes it will turn off.
If light bulb burns out prematurely due to vibration,
replace with bulb specifically packaged for "Garage
Door Openers".
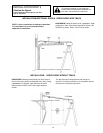
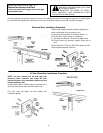
INSTALLING LENS (Models shown above except
1140): Locate (and loosen approximately 1/8") the two
screws near top of opener front panel. Position lens
against panel with slotted tabs directly below screws.
Slide lens up to seat tabs behind screws. Snap bottom
tabs of lens into panel slots. Retighten top panel screws
to secure lens.
14