10002789/0 -29- DBT33/DBT36/DBT39
OPTIONAL ACCESSORIES AVAILABLE
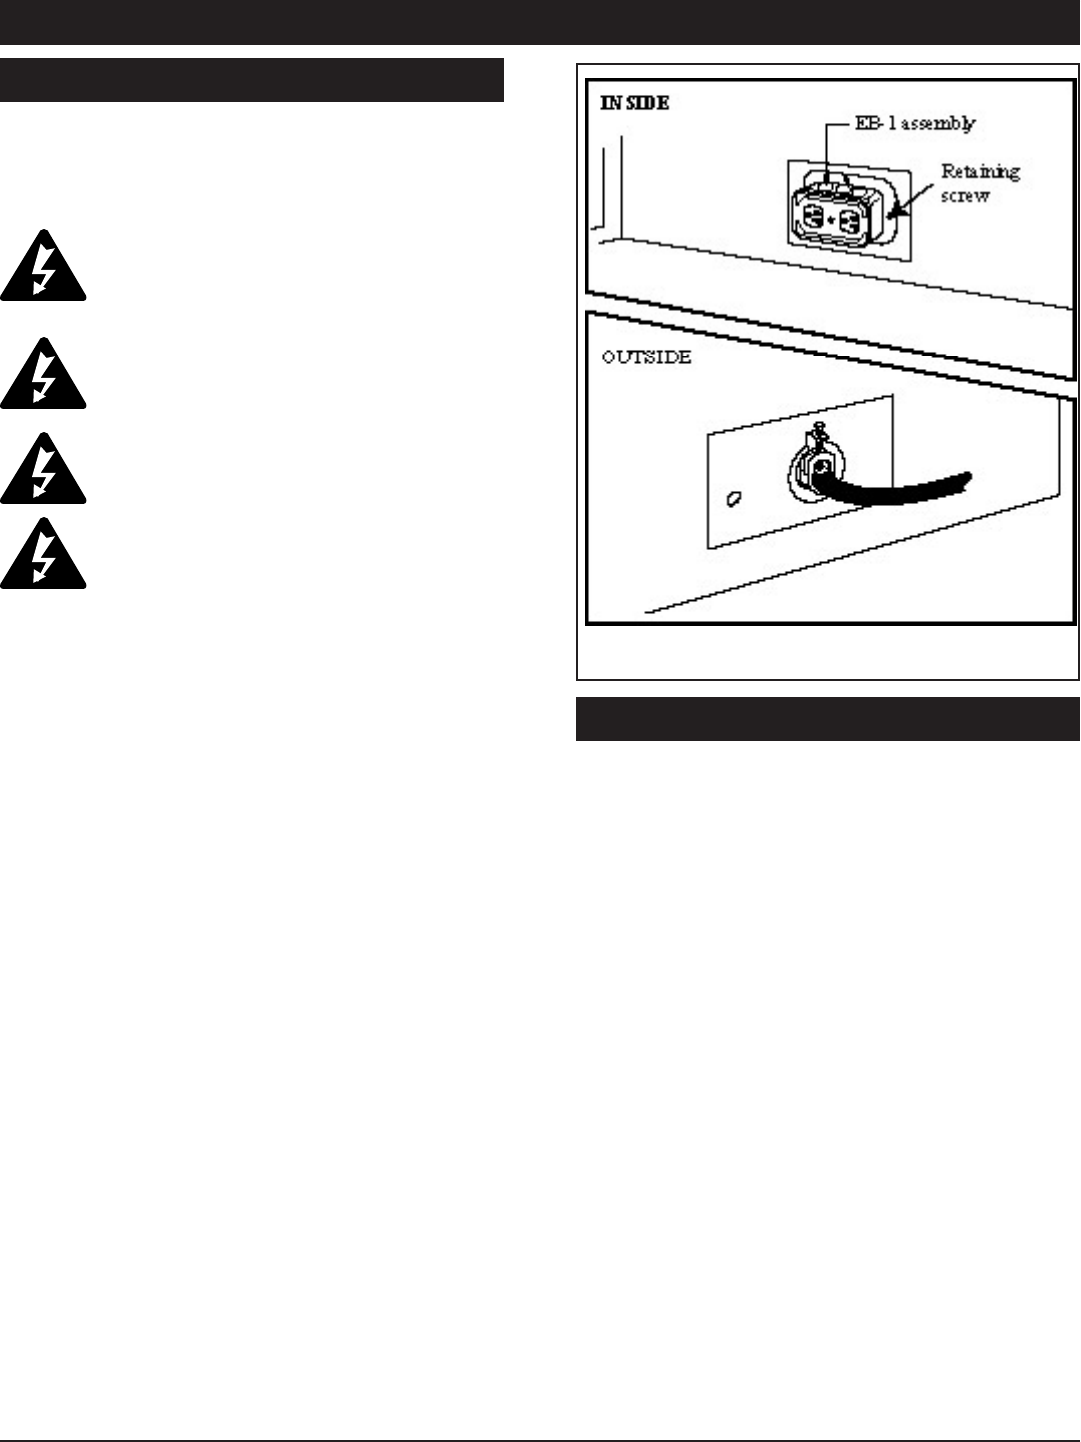
EB-1 ELECTRICAL BOX
The EB-1 Electrical junction box when tted and correctly
wired gives an easy and convenient power outlet for the
optioal fan kit.
If the EB-1 electrical junction box is being tted
the replace must be electrically connected and
grounded in accordance with local codes or, in
the absence of local codes, with the current CSA
C22.1 Canadian Electric Code.
For U.S.A. installations follow the local codes
and the national electrical code ANSI/NFPA No
70.
It is strongly recommended that the wiring of
the EB-1 Electrical Junction Box be carried out
be a licensed electrician.
Ensure that the power to the supply line has
been disconnected before commencing this pro-
cedure.
To install and connect the EB-1 box to the house electrical
supply follow the steps below.
1. Disconnect the power to the electrical supply line.
2. Remove the cover plate over the EB-1 knock-out the side
of the appliance, retain the screw that held the plate.
3. Remove the front cover of the EB-1 box.
4. Remove the plug socket assembly from the EB-1 box.
5. Feed the electrical supply line in through the EB-1 open-
ing in the side of the appliance and then through the back
of the EB-1 assembly, Fig ???.
6. Connect the ground wire of the supply line to the green
screw of the socket assembly.
7. Connect the white wire of the power line to the chrome
screw of the socket assembly.
8. Connect the black wire of the power supply line to the
brass screw (polarized) of the socket assembly.
9. Ret the socket assembly back into the electrical box and
replace the front cover plate. Secure the cable with the
clamp on the outside of the EB-1 base plate and ret the
EB-1 assembly to the appliance with the screw removed
in step 1.
FAN KITS
FK24 Fan Assembly
This auxiliary fan system increases the efciency of the circu-
lation of the heating air.
The FK24 fan kit allows variable speed control of the circula-
tion fan and also incorporates a heat sensor in the circuit.
Specications
115 Volt / 60 Hz / 56 Watts
Maintenance
The fan itself does not require regular maintenance, however
periodic cleaning of the fan and the surrounding area is
required.
Check the area under the control door (lower louvre assembly)
and in front of the fan and wipe or vacuum this area at least
once a month during the operating season.
Installation
The fan assembly and other components are supplied fully
wired eliminating the need for a licensed electrician to carry
out the installation
If hard wiring the fan using Method B (following) we strongly
recommend the use of a licensed electrician.
1 Open the lower Louvre assembly. Maneuver the fan &
bracket assembly around the gas valve and lines to locate
the unit onto the screw studs on the back of the replace
2 Install the thermal sensor under the bottom of the rebox,
locating it over the two 10 mm studs and secure it with
nuts.
