


37
Zipper Insertion
Pattern Stitch Length Foot
2 2-3 Zipper Foot
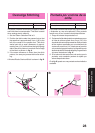
The zipper foot is used to sew various types of
zippers and can easily be positioned to the right or
left side of the needle.
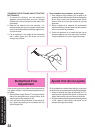
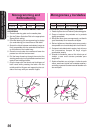
When sewing the right side of the zipper, attach the
shank to the left pin of the zipper foot. When sewing
the left side of the zipper, attach the shank to the right
pin of the zipper foot. See fig. A.
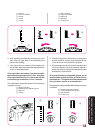
1. Set the Pattern Selection Dial to 2. Set the Stitch
Length between 2 and 3.
2. Lower the presser foot lever and fix either the left
or right pin of the zipper foot onto the shank.
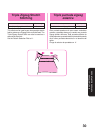
3. Fold the edge of the material 2 cm (3/4") and place
the zipper under the folded portion.
4. Lower the needle into the notch located either on
the left or right side of the zipper foot.
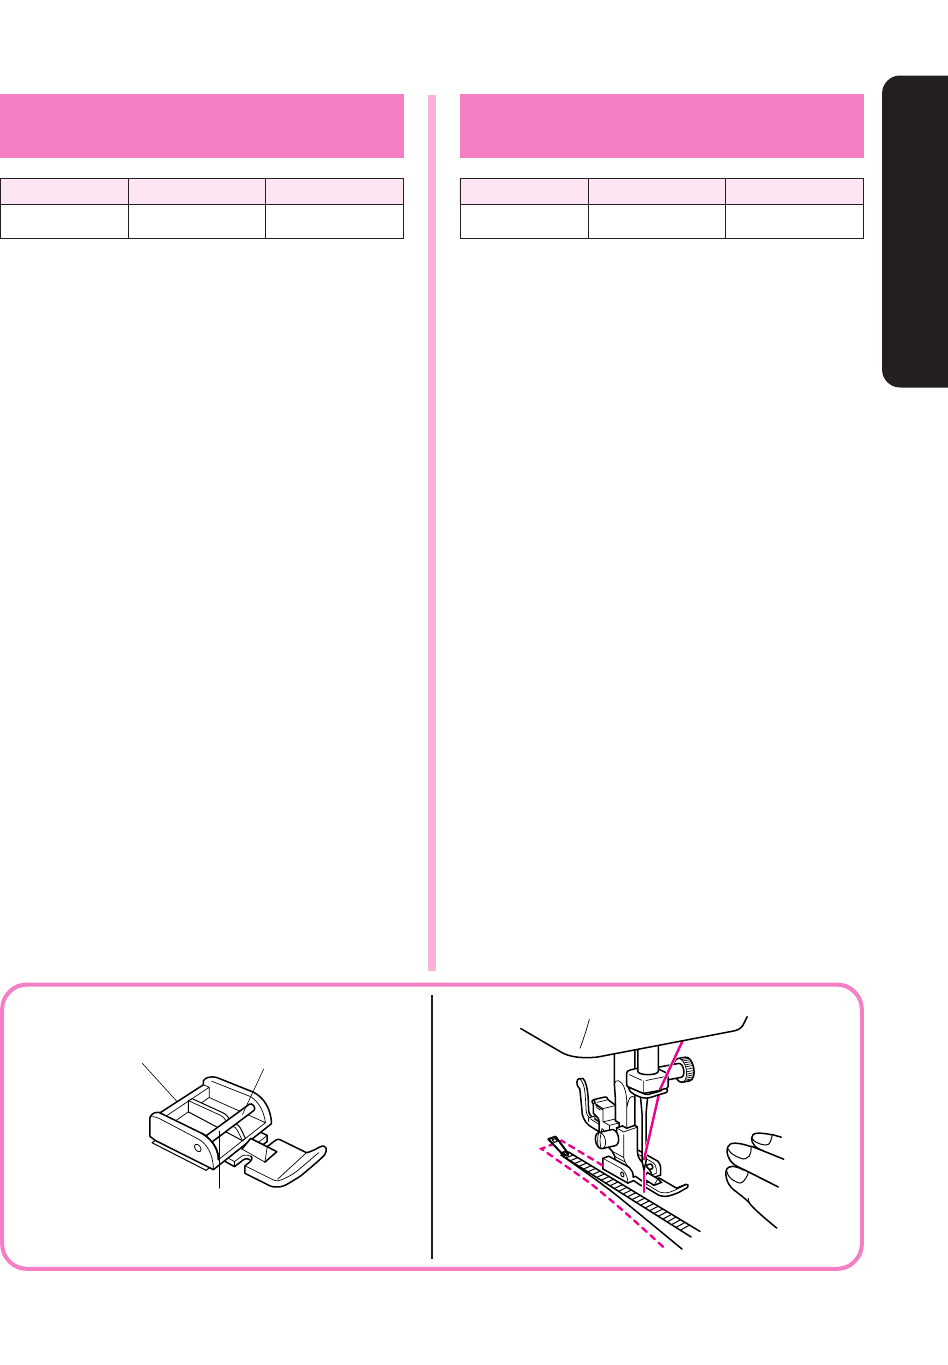
5. Sew from the bottom of the zipper toward the top
on both sides. The needle should be positioned
on the zipper side of the foot for best results. See
fig. B.
6. To sew the opposite side of the zipper, release
the foot by pressing the button located at the back
of the presser foot, install the zipper foot on the
other side of the zipper and continue sewing
using the other side notch.
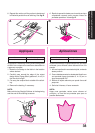
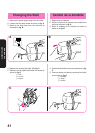
1 Zipper foot
2 Right pin for sewing the left side of the
zipper
3 Left pin for sewing the right side of the
zipper
AB
36
Inserción de cremalleras
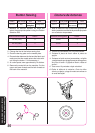
Puntada Largo de puntada Prensatelas
2 2-3
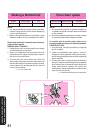
Pata de cremalleras
La pata de cremalleras sirve para coser varios tipos
de cremalleras y puede colocarse fácilmente hacia
la izquierda o derecha de la aguja.
Cuando la cremallera se cose por el lado derecho,
instale la pata deslizándola hacia la izquierda. Cuando
se cose la cremallera por el lado izquierdo, instale la
pata deslizándola hacia la derecha, tal como lo
muestra la fig. A.
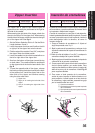
1. Ponga el selector de puntadas en 2. Ajuste el
largo de puntada entre 2 y 3.
2. Baje la palanca del prensatelas y coloque el eje
izquierdo o derecho de la pata de cremalleras en
la zanca.
3. Doble la orilla del tejido a 2 cm (3/4") y coloque la
cremallera debajo de la parte doblada.
4. Baje la aguja en la hendidura situada a la izquierda
o derecha de la pata de cremalleras.
5. Cuesa a partir de la parte inferior de la cremallera
hacia la parte superior, por ambos lados. Para
mejores resultados, se debe colocar la aguja del
lado de la pata y de la cremallera. Véase fig. B
para mayores detalles.
6. Para coser el lado opuesto de la cremallera,
suelte la pata al apretar el botón situado en su
parte posterior, instale la pata en el otro lado de
la cremallera y siga cosiendo, pasando la aguja
por la hendidura del otro lado.
1
Pata de cremalleras
2
Eje derecho para coser la parte izquierda
de la cremallera
3
Eje izquierdo para coser la parte derecha
de la cremallera.
1
2
3
USING ATTACHMENTS AND APPLICATIONS
USO DE ACCESORIOS Y APLICACIONES