


33
a
b
a
b
c
d
ac
a
c
b
ac
a
c
d
b
c
d
ac
a
c
ac
a
c
d
32
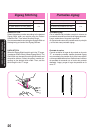
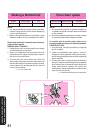
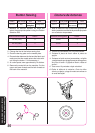
Cosido de un ojal
Pasos
Zona de cosido
Diseño Como coser
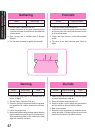
1. Ponga el selector de diseño en a.
2. Baje el prensatelas y cuesa 5 ó 6 puntadas.
3. Pare la máquina cuando la aguja se encuentre a la izquierda
de las puntadas y levántela del tejido.
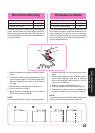
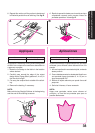
1. Ponga el selector de diseño en b.
2. Cosa el largo pre-definido de la línea con jaboncillo.
3. Pare la máquina cuando la aguja se encuentre a la izquierda
de la puntada y levántela.
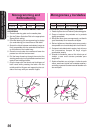
1. Ponga el selector de diseño en c.
2. Baje el prensatelas y cosa 5 ó 6 puntadas.
3. Pare la máquina cuando la aguja se encuentre a la derecha
de las puntadas y levántela del tejido.
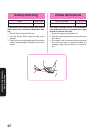
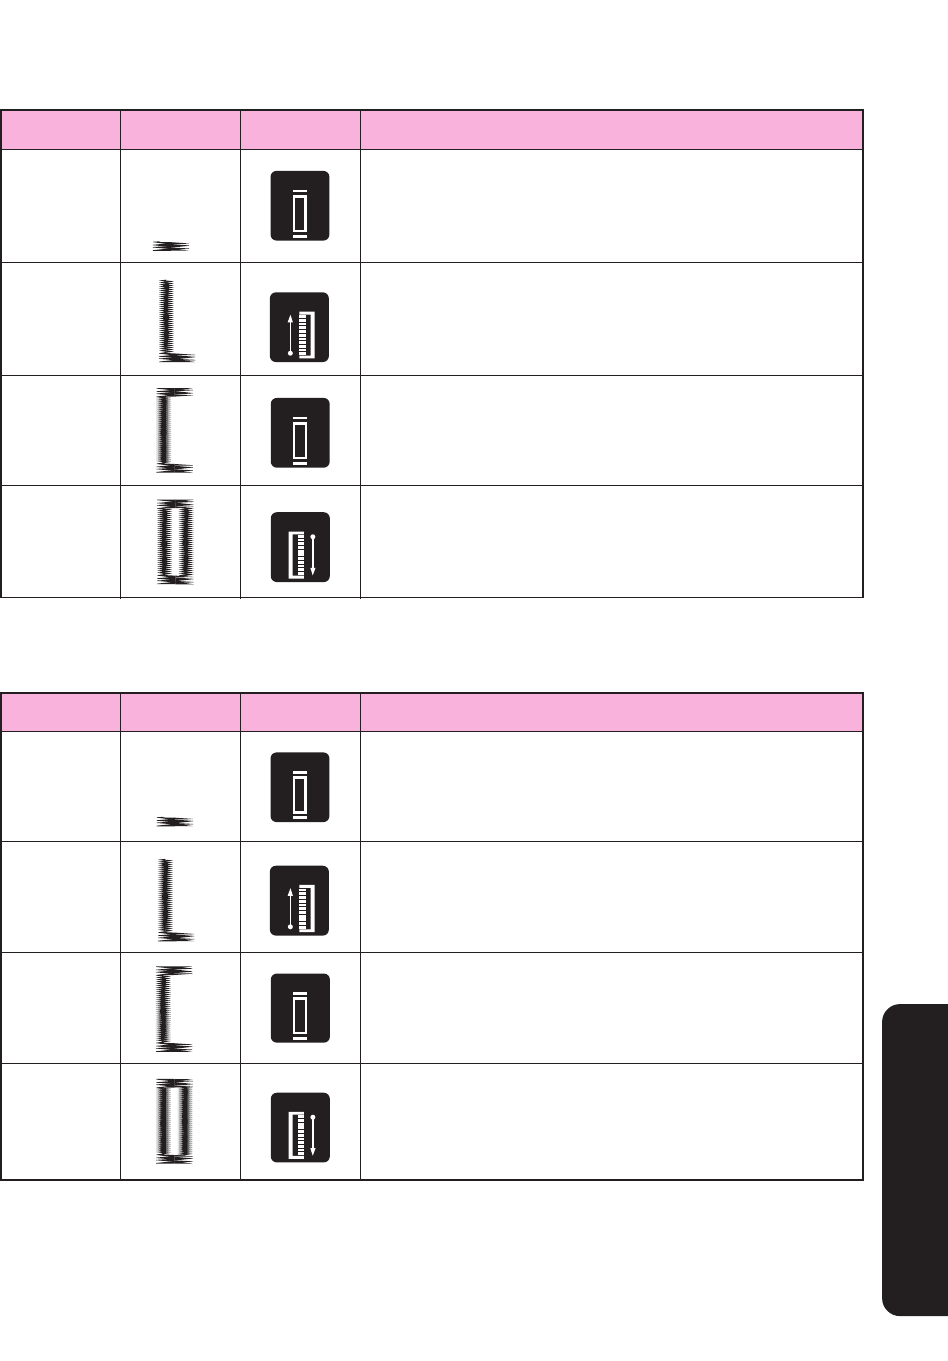
1. Ponga el selector de diseño en d.
2. Cosa el lado derecho hasta que la aguja alcance las
puntadas creadas en el primer paso (Paso a).
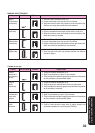
Paso a
(remate de la
parte delantera
del ojal)
Paso c
(remate de la
parte atrás
del ojal)
Paso d
(lado
derecho)
Paso b
(lado
izquierdo)
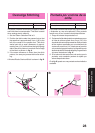
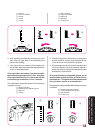
MAKING A BUTTONHOLE
Step Sewn Portion Pattern How to Sew
1. Set the Pattern Selection Dial to a.
2. Lower the presser foot and sew 5 to 6 stitches.
3. Stop the machine when the needle is at the left side of the
stitches and raise the needle from the material.
1. Turn the Pattern Selection Dial to b.
2. Sew the predetermined length of the tailor’s chalk line.
3. Stop the machine when the needle is at the left side of the
stitch and raise the needle.
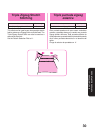
1. Turn the Pattern Selection Dial to c (same position as a).
2. Lower the presser foot and sew 5 to 6 stitches.
3. Stop the machine when the needle is at the right side of the
stitch and raise the needle from the material.
1. Set the Pattern Selection Dial to d.
2. Sew the right side until the needle reaches the stitches
formed in step a.
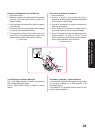
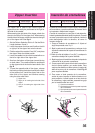
BUTTONHOLE AND BUTTON SEWING
OJALES Y COSTURA DE BOTONES
Step a
(Front end of
buttonhole)
Step b
(Left side)
Step c
(Back end of
buttonhole)
Step d
(Right side)