19
6
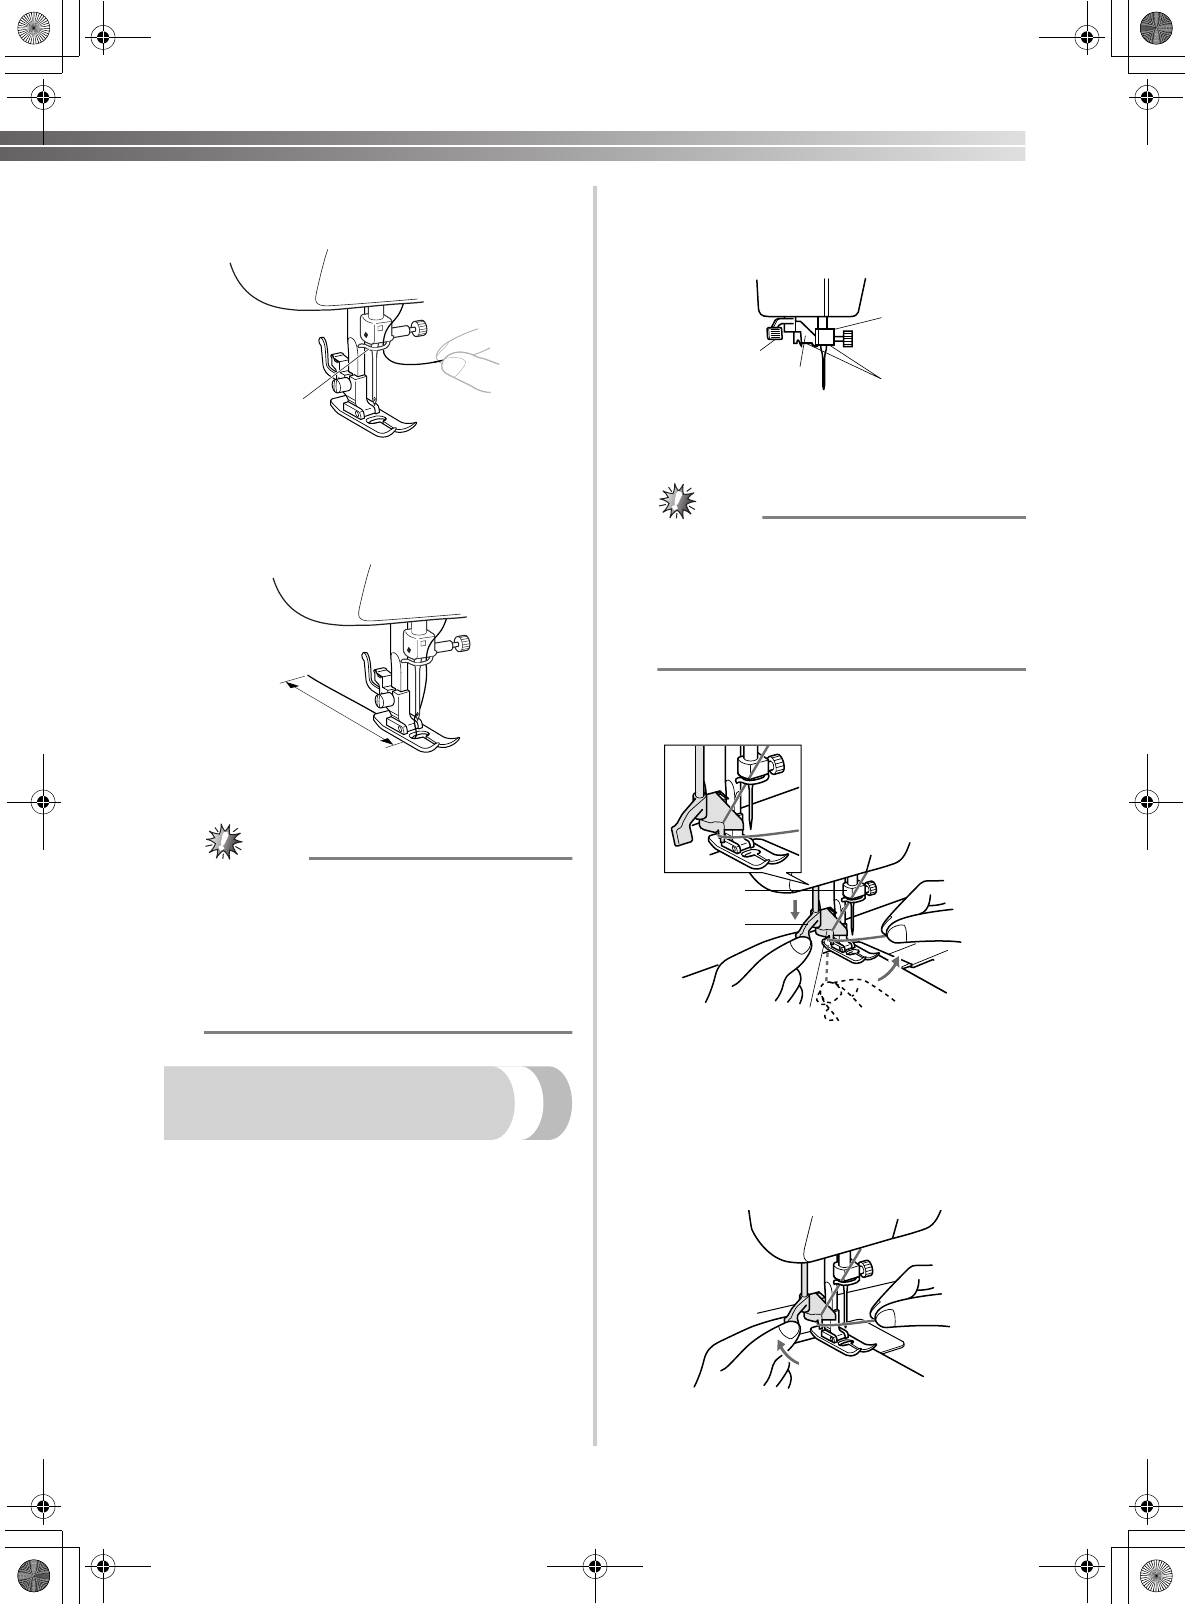
Bring the thread down and pass it behind the
thread guide.
1 Thread guide
7
Thread the needle from front to back and pull
out about 5 cm (2") of thread.
1 5cm (2inch)
Note
● If the thread take-up lever is lowered, the
upper thread cannot be wrapped around the
thread take-up lever. Make sure you raise
the presser foot lever and the thread take-up
before you feed the upper thread.
● If you incorrectly feed the thread you may
cause sewing problems.
Using the Needle Threader (models
equipped with a needle threader)
Set the main power switch to “O”.
1
Lower the presser foot lever.
2
Turn the balance wheel toward you
(counterclockwise) until the bottom of the
needle holder aligns with the bottom of the
needle-threading-hook holder.
1 Needle holder
2 Needle threader lever
3 Hook holder
4 Align
Note
● When you use the needle threader, make
sure to align the bottom of the needle
holder with the bottom of the holder for the
needle-threading hook before lowering the
needle threader lever, otherwise the hook
may be damaged.
3
While lowering the needle threader lever,
hook the thread onto the guide.
1 Needle holder
2 Needle threader lever
3 Guide
4
Pull down the needle threader lever as much
as possible, and then turn the lever toward the
back of the machine (away from you). Make
sure that the hook passes through the eye of
the needle and grabs the thread.
• Hold the thread in front of the needle to
make sure that the hook grabs it.
1
1
4
3
2
1
2
3
1
XL5000us.book Page 19 Tuesday, November 11, 2003 9:25 AM


