


GETTING READY ———————————————————————————————————————————————————————
—
30
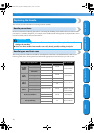
GETTING READYCONTENTS SEWING BASICS UTILITY STITCHES APPENDIX INDEX
5
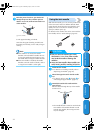
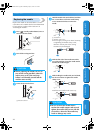
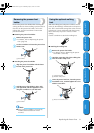
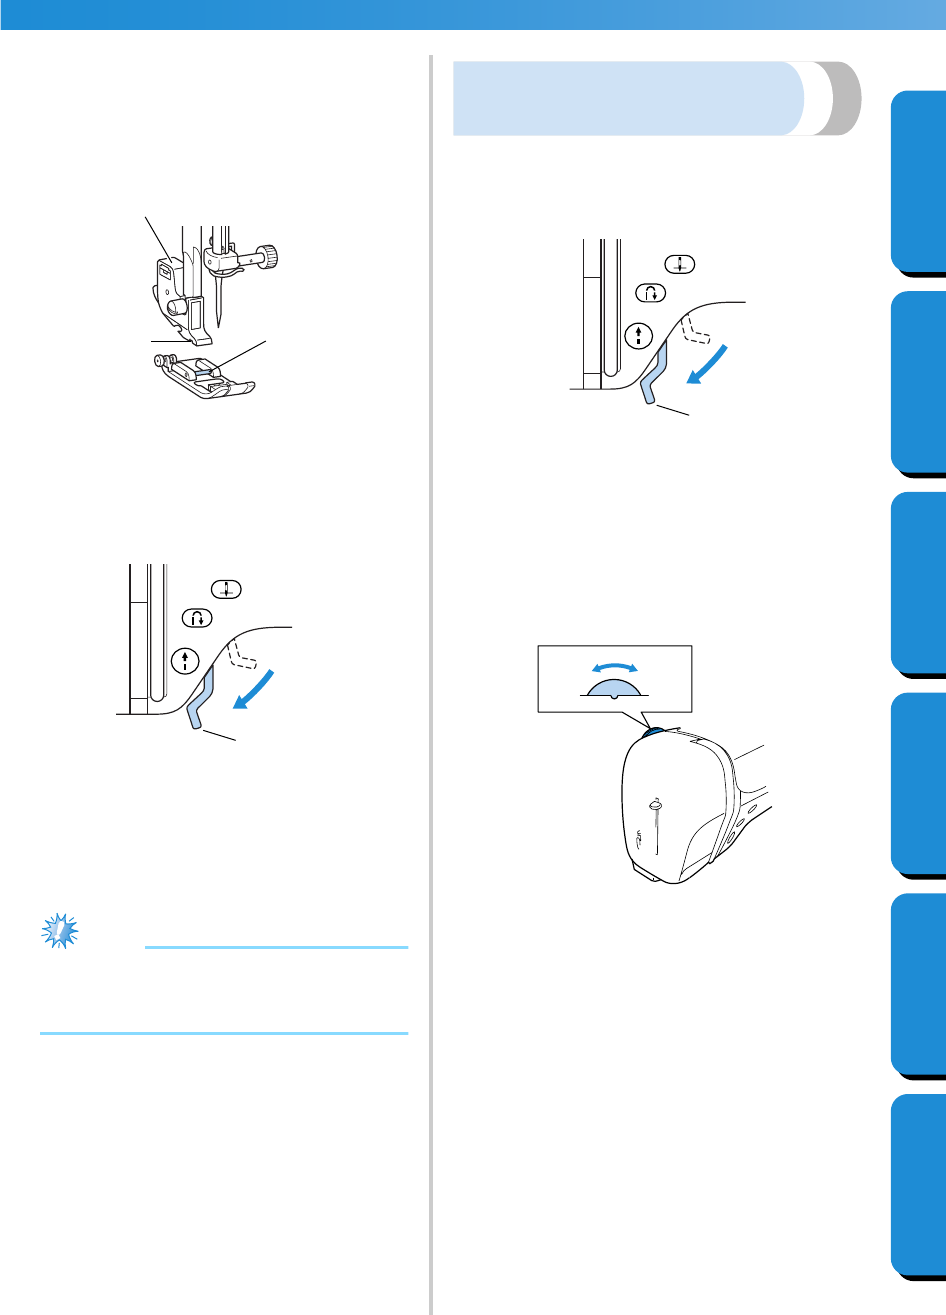
Place a different presser foot below the holder
so that the presser foot pin is aligned with the
notch in the holder.
Position the presser foot so the letter indicating
the presser foot type (A, G, I, J, M, N or R) is
positioned to be read.
1 Presser foot holder
2 Notch
3 Pin
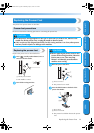
6
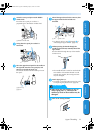
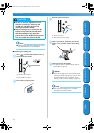
Slowly lower the presser foot lever so that the
presser foot pin snaps into the notch in the
presser foot holder.
1 Presser foot lever
X The presser foot is attached.
7
Raise the presser foot lever to check that the
presser foot is securely attached.
Note
● For details on the presser foot that should be
used with the selected stitch, refer to “Stitch
Settings” (page 92).
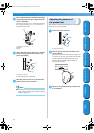
Adjusting the pressure of
the presser foot
The amount of pressure that the presser foot applies
to the fabric can be adjusted.
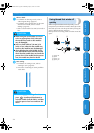
1
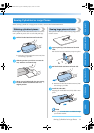
Lower the presser foot lever.
1 Presser foot lever
2
Turn the presser foot dial at the back of the
sewing machine.
The scale on the dial indicates the range from
1 (weak) to 4 (strong). Turn the dial to the right
(smaller number) to decrease the pressure.
Turn the dial to the left (large number) to
increase the pressure.
3
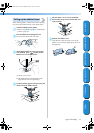
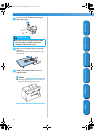
When you are finished sewing, reset the dial
to 3 (standard).
1
2
3
1
1
3
Weak
Strong
F0_brotherE.book Page 30 Wednesday, May 21, 2003 11:38 AM