


Eyelet Stitching 115
3
— — — — — — — — — — — — — — — — — — — — — — — — — — — — — — — — — — — — — — — — — — — — — — — — — — — —
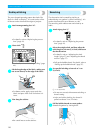
Eyelet Stitching
Eyelets, such as those on belts, can be sewn. Three sizes of eyelets are possible: 7 mm, 6 mm and 5 mm
(1/4, 15/64 and 3/16 inch).
a
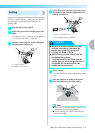
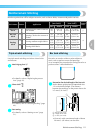
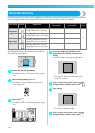
Attach monogramming foot “N”.
• For details, refer to “Replacing the presser
foot” (page 42).
b
Select stitch
62
.
• For details, refer to “Selecting stitching” (page
49).
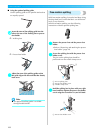
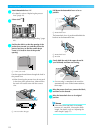
c
Adjust either the stitch width or the stitch
length to select the desired eyelet size.
a 7mm
b 6mm
c 5mm
• For details, refer to “Adjusting the stitch
width” (page 56) and “Adjusting the stitch
length” (page 57).
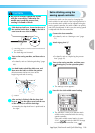
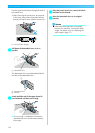
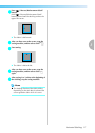
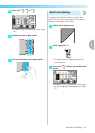
d
Lower the needle into the fabric at the
beginning of the stitching, and then lower the
presser foot lever.
e
Start sewing.
X Once sewing is completed, the machine
automatically sews reinforcement stitches,
then stops.
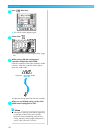
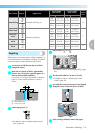
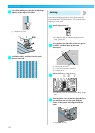
f
Use the eyelet punch to cut a hole in the
center of the eyelet.
• When using the eyelet punch, place thick
paper or some other protective sheet under
the fabric before punching the hole in the
fabric.
Memo
z If light weight thread is used, the stitching
may be sparse. If this occurs, sew the eyelet
twice before removing the fabric, one on top
of the other.
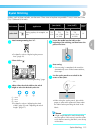
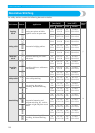
Stitch Name Pattern Application
Stitch Width
[mm (inch)]
Stitch Length
[mm (inch)]
Presser
Foot
Auto Manual Auto Manual
Eyelet stitch
62
Sewing eyelets, for example, on
belts
7.0
(1/4)
7.0, 6.0 or
5.0
(1/4, 15/64
or 3/16)
7.0
(1/4)
7.0, 6.0 or
5.0
(1/4, 15/64
or 3/16)
N
1
2
3