


2
Setting the Stitch 61
— — — — — — — — — — — — — — — — — — — — — — — — — — — — — — — — — — — — — — — — — — — — — — — — — — — —
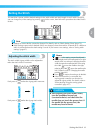
Setting the Stitch
This machine is preset with the default settings for the stitch width and stitch length for each stitch. However,
you can change any of the settings by pressing in the screen, then follow the procedure described in this
section.
Note
z Settings for some stitches cannot be changed. For details, refer to "Stitch Setting Chart" (page 72).
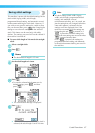
z Stitch settings return to their defaults if they are changed, when the machine is turned off or a different
stitch is selected before the stitch setting is saved. If you want to save settings, refer to "Saving stitch
settings" (page 67).
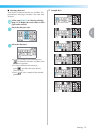
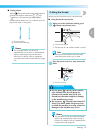
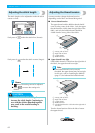
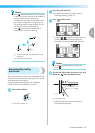
Adjusting the stitch width
The stitch width (zigzag width) can be adjusted to
make the stitch wider or narrower.
Each press of makes the zigzag stitch narrower.
Each press of makes the zigzag stitch wider.
Memo
z
means the setting cannot be adjusted.
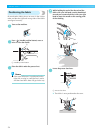
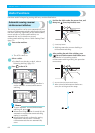
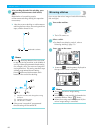
z
If the straight stitch (left needle position or triple
stretch stitch) was selected, changing the stitch
width changes the needle position. Increasing
the width moves the needle to the right;
reducing the width moves the needle to the
left. For details, refer to "Changing the needle
position" (
page 83
).
z Press to return the setting to its default.
z If the foot controller is connected, the
sewing speed controller can be used to
adjust the zigzag width. For details, refer to
"Satin stitching using the sewing speed
controller" (page 107).
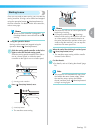
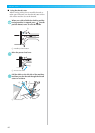
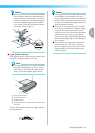
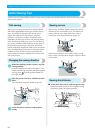
CAUTION
z After adjusting the stitch width, slowly
turn the handwheel toward you
(counterclockwise) and check that the
needle does not touch the presser foot. If
the needle hits the presser foot, the
needle may bend or break.