


2
Sewing 51
— — — — — — — — — — — — — — — — — — — — — — — — — — — — — — — — — — — — — — — — — — — — — — — — — — — —
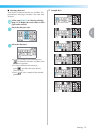
Stitch types
A stitch can be selected from the following types
available.
For details on the various stitches, refer to "Stitch
Setting Chart" (page 72).
a Utility stitches
You can select from 67 utility stitches, including
straight line stitching, overcasting, button holes
and basic decorative stitches. If this is selected,
the utility stitch selection appears right after the
power is turned on.
b My Custom Stitch
You can design original stitches. (For details, refer
to "Designing a Pattern (My Custom Stitch)" (page
131).)
c Character stitches-Gothic font
(Can be combined)
There are 55 characters, including letters,
symbols and numbers, in the Gothic font.
d Character stitches-Script font
(Can be combined)
There are 55 characters, including letters,
symbols and numbers, in the Script font.
e Character stitches-Outline style
(Can be combined)
There are 55 characters, including letters,
symbols and numbers, in the outline style.
f Decorative stitches
(Can be combined)
You can select from 30 decorative stitches,
including leaves, flowers and hearts. You can
sew combinations of multiple decorative stitches.
g Satin stitches
(Can be combined)
You can select from 16 satin stitches. You can
sew combinations of multiple decorative stitches.
h Combined utility stitches
(Can be combined)
You can sew with combinations from 39 utility
stitches.
i Decorative satin stitches
(Can be combined)
There are 9 decorative satin stitches.
j Cross stitches
(Can be combined)
You can select from 7 cross stitches. You can sew
combinations of multiple decorative stitches.
k Patterns saved in the machine's memory
You can retrieve a saved pattern. (For details,
refer to "Saving patterns" (page 129).)
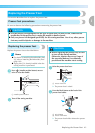
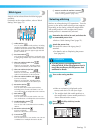
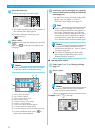
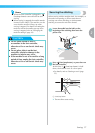
Selecting stitching
Stitches are selected using LCD operations. Turn the
power on, the utility stitch selecting screen appears.
Depending on the setting, either the straight stitch
(left needle position) or the straight stitch (center
needle position) is automatically selected.
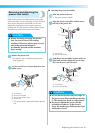
a
Determine the stitch to be used, and select the
recommended presser foot.
• Refer to "Stitch Setting Chart" (page 72).
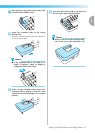
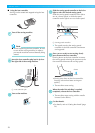
b
Attach the presser foot.
The machine comes with zigzag foot "J"
attached.
• For details, refer to "Replacing the presser
foot" (page 43).
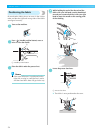
CAUTION
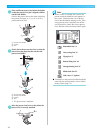
c
Turn on the sewing machine.
• When an animation is displayed on the
screen, touch the LCD with your finger.
X The straight stitch (left needle position) or
the straight stitch (center needle position) is
shown selected on the screen.
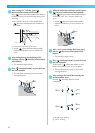
d
Press (Utility stitch key) on the
operation panel.
z Use the presser foot appropriate for
selected stitch. If the wrong presser foot is
used, the needle may hit the presser foot
and bend or break.