KNOWING YOUR SEWING MACHINE ————————————————————————————————————————————————————————————————————————————————————————————————————————————————————————————————
—
————————————————————————————————————————————————
—————
7
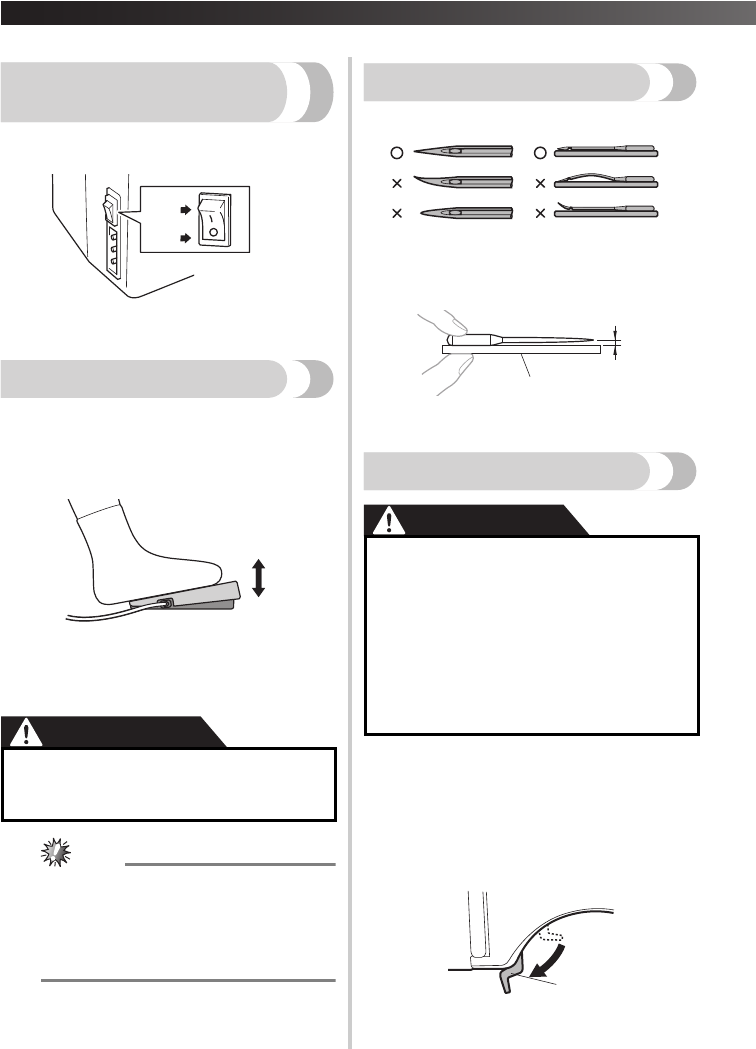
Main power and sewing
light switch
This switch turns the main power and sewing light on or
off.
1 Turn on (toward the ‘I’ mark)
2 Turn off (toward the ‘O’ mark)
Foot controller
When you press the foot controller down lightly, the
machine will run at a low speed. When you press
harder, the machine’s speed will increase. When you
take your foot off the foot controller, the machine will
stop.
1 Slower
2 Faster
You should make sure that nothing is placed on the foot
controller when the machine is not in use.
CAUTION
Note
(For U.S.A. only)
● Foot Controller: Model KD-1902
This foot controller can be used on the
machine with product code 885-X08.
The product code is mentioned on the
machine rating plate.
Checking the needle
The sewing needle must always be straight and sharp
for smooth sewing.
■ Checking the needle correctly
Put the flat side of the needle on a flat surface.
Check the needle from the top and the sides.
Dispose of any bent needles safely.
1 Parallel space
2 Level surface (bobbin cover, glass, etc.)
Replacing the needle
CAUTION
1
Turn off the machine.
2
Raise the needle by turning the
handwheel toward you
(counterclockwise) so that the mark on
the wheel points up.
3
Lower the presser foot lever.
1 Presser foot lever
● Do not allow pieces of cloth and dust to
build up on the foot controller. Doing so
could cause a fire or an electric shock.
2
1
1
2
● Always turn off the machine before you
change the needle. Otherwise, injuries
may occur if the foot controller is
accidentally pressed and the machine
starts sewing.
● Only use sewing machine needles for
home use. Other needles may bend or
break and cause injury.
● Never sew with a bent needle. A bent
needle will easily break and cause injury.
1
2
1


