KNOWING YOUR SEWING MACHINE ————————————————————————————————————————————————————————————————————————————————————————————————————————————————————————————————
—
————————————————————————————————————————————————
—————
19
8
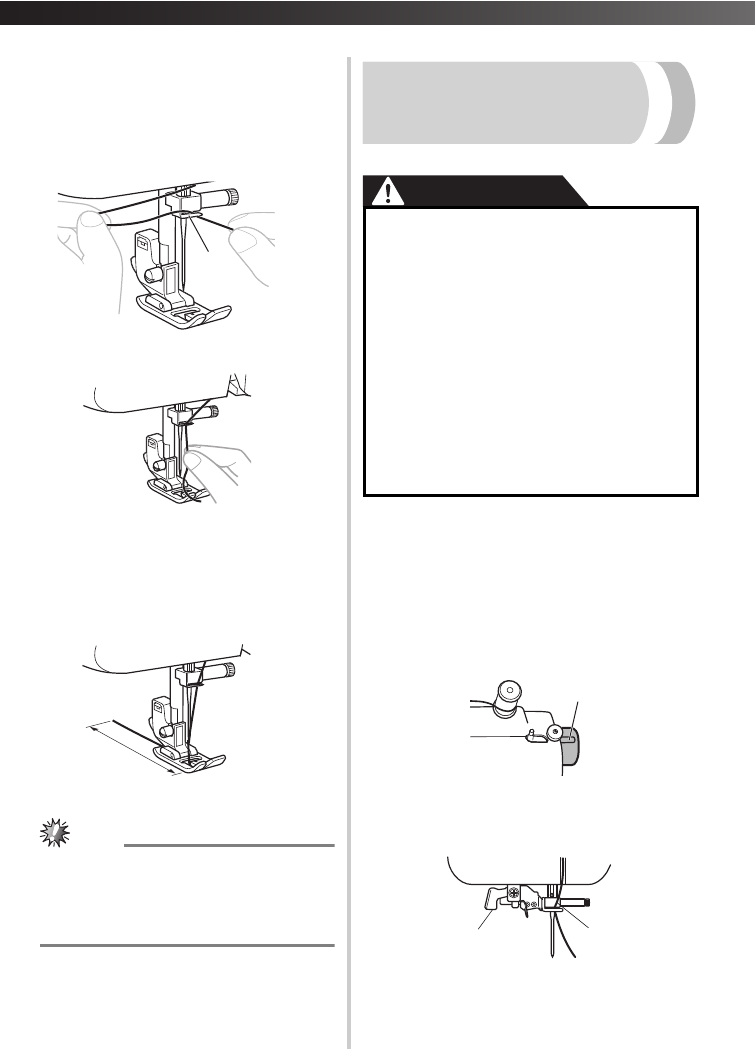
Put the thread behind the guide above the
needle.
• The thread can easily be passed behind the
needle bar thread guide by holding the
thread in your left hand, then feeding the
thread with your right hand.
1 Needle bar thread guide
9
Thread the needle from front to back
leaving a thread tail of about 5 cm
(2 inch).
• If your sewing machine is equipped with a
needle threader, use the needle threader to
thread the needle (see next section).
1 5 cm (2 inch)
Note
● Make sure you raise the presser foot lever
and the thread take-up lever before you feed
the upper thread.
● If you incorrectly feed the thread you may
cause sewing problems.
Using the needle threader
(for models equipped with
a needle threader)
This feature is only available on certain models.
CAUTION
1
Follow steps 1 to 8 from “Upper
threading” on page 17 before using the
needle threader.
2
Lower the presser foot lever.
3
Make sure that the mark on the wheel
points up as shown in the following
illustration.
1 Mark on the wheel
4
While lowering the needle threader lever,
hook the thread onto the guide.
1 Needle holder
2 Needle threader lever
1
1
● The needle threader can be used with a
75/11 through 100/16 home sewing
machine needle. However, the needle
threader cannot be used with a 65/9
home sewing machine needle. When
using special thread such as transparent
nylon thread or metallic thread, the
needle threader cannot be used.
● Thread with a thickness of 130/120 or
thicker cannot be used with the needle
threader.
● The needle threader cannot be used with
the wing needle or the twin needle.
● If the needle threader cannot be used,
refer to “Upper threading” on page 17.
1
1
2


