Upper Threading 29
1
— — — — — — — — — — — — — — — — — — — — — — — — — — — — — — — — — — — — — — — — — — — — — — — — — — — —
c
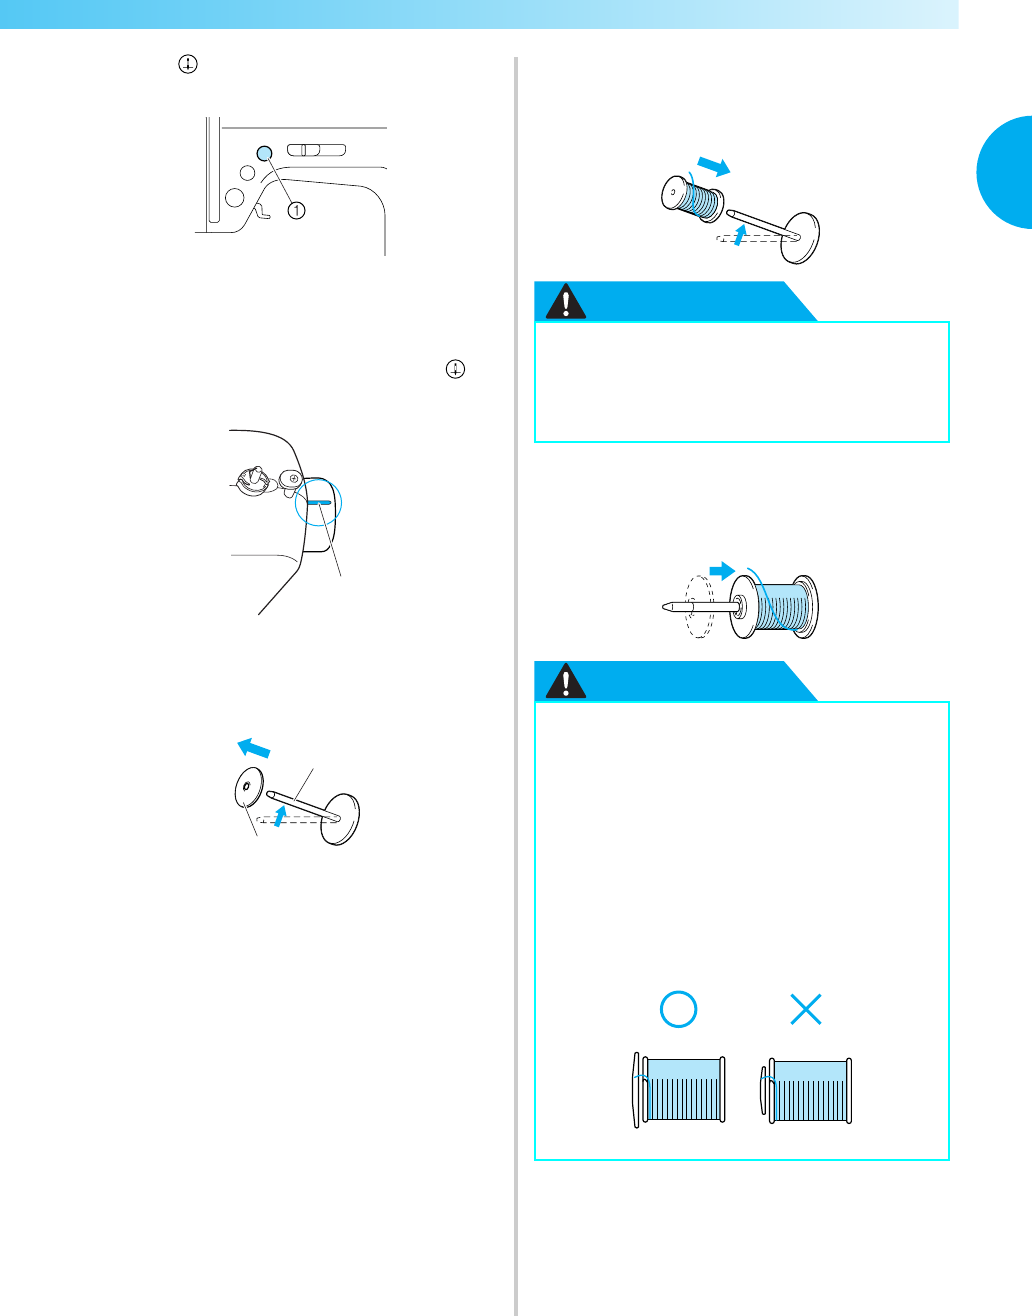
Press (needle position button) once or
twice to raise the needle.
a Needle position button
X The needle is at the correct height when the
mark on the handwheel is at the top, as
shown below. Check the handwheel and, if
this mark is not at this position, press
(needle position button) until it is.
a Mark on handwheel
d
Remove the spool cap that is inserted onto the
spool pin.
a Spool pin
b Spool cap
e
Place the spool of thread onto the spool pin.
Slide the spool onto the pin so that the spool is
horizontal and the thread unwinds to the front
at the bottom.
CAUTION
f
Slide the spool cap onto the spool pin.
Slide the spool cap as far as possible to the
right, as shown, with the rounded side on the
left.
CAUTION
a
a
b
● If the spool or the spool cap is not
positioned correctly, the thread may
become tangled around the spool pin and
the needle may break.
● If the spool or the spool cap is not
positioned correctly, the thread may
become tangled around the spool pin and
the needle may break.
● Three spool cap sizes are available (large,
medium and small), allowing you to
choose a spool cap that best fits the size
of spool being used. If the spool cap is too
small for the spool being used, the thread
may catch on the slit in the spool and the
needle may break.


