


12
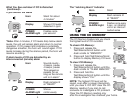
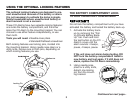
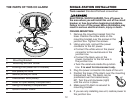
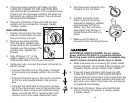
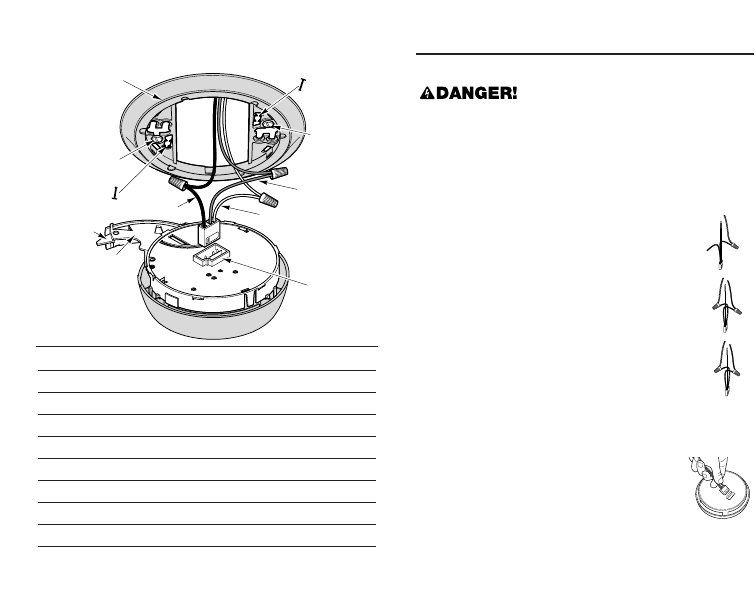
THE PARTS OF THIS CO ALARM
1 Mounting Bracket
2 Mounting Slot and Screw
3 Locking Pins (break out of bracket)
4 Hot (Black) AC Wire
5 Neutral (White) AC Wire
6 Interconnect Wire (Violet)
7 Lever to Open Battery Compartment
8 Swing-Out Battery Compartment
9 Quick-Connect Power
1
2
3
2
9
8
7
3
5
6
4
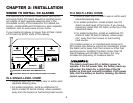
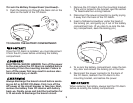
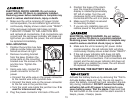
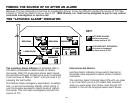
SINGLE-STATION INSTALLATION
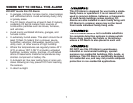
Tools needed: Standard/Flathead screwdriver.
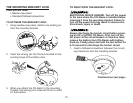
ELECTRICAL SHOCK HAZARD. Turn off power to
the area where you will install this unit at the circuit
breaker or fuse box before beginning installation.
Failure to turn off the power before installation may
result in serious electrical shock, injury or death.
CEILING MOUNTING:
1. Remove the mounting bracket from the
base. Position the screw slots on the
mounting bracket over the screws in the
junction box. Tighten the screws.
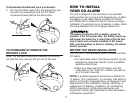
2. Using wire nuts, connect the power
connector to the AC power.
• Connect the white wire on the power
connector to the neutral wire in the
junction box.
• Connect the black wire on the
power connector to the hot wire in
the junction box.
• Tuck the violet wire inside the junction
box.
It is used for interconnect only.
3. Plug the power connector into back of the unit.
4. Position the base of the Alarm over the mounting
bracket and turn. The Alarm can be
positioned over the bracket every
60°. Turn the unit clockwise (right)
until the unit is in place.
5. Make sure CO Alarm is secured to
mounting bracket.
6. If you are only installing one unit, restore power to
the junction box.