6 720 608 782
Installation instructions
17
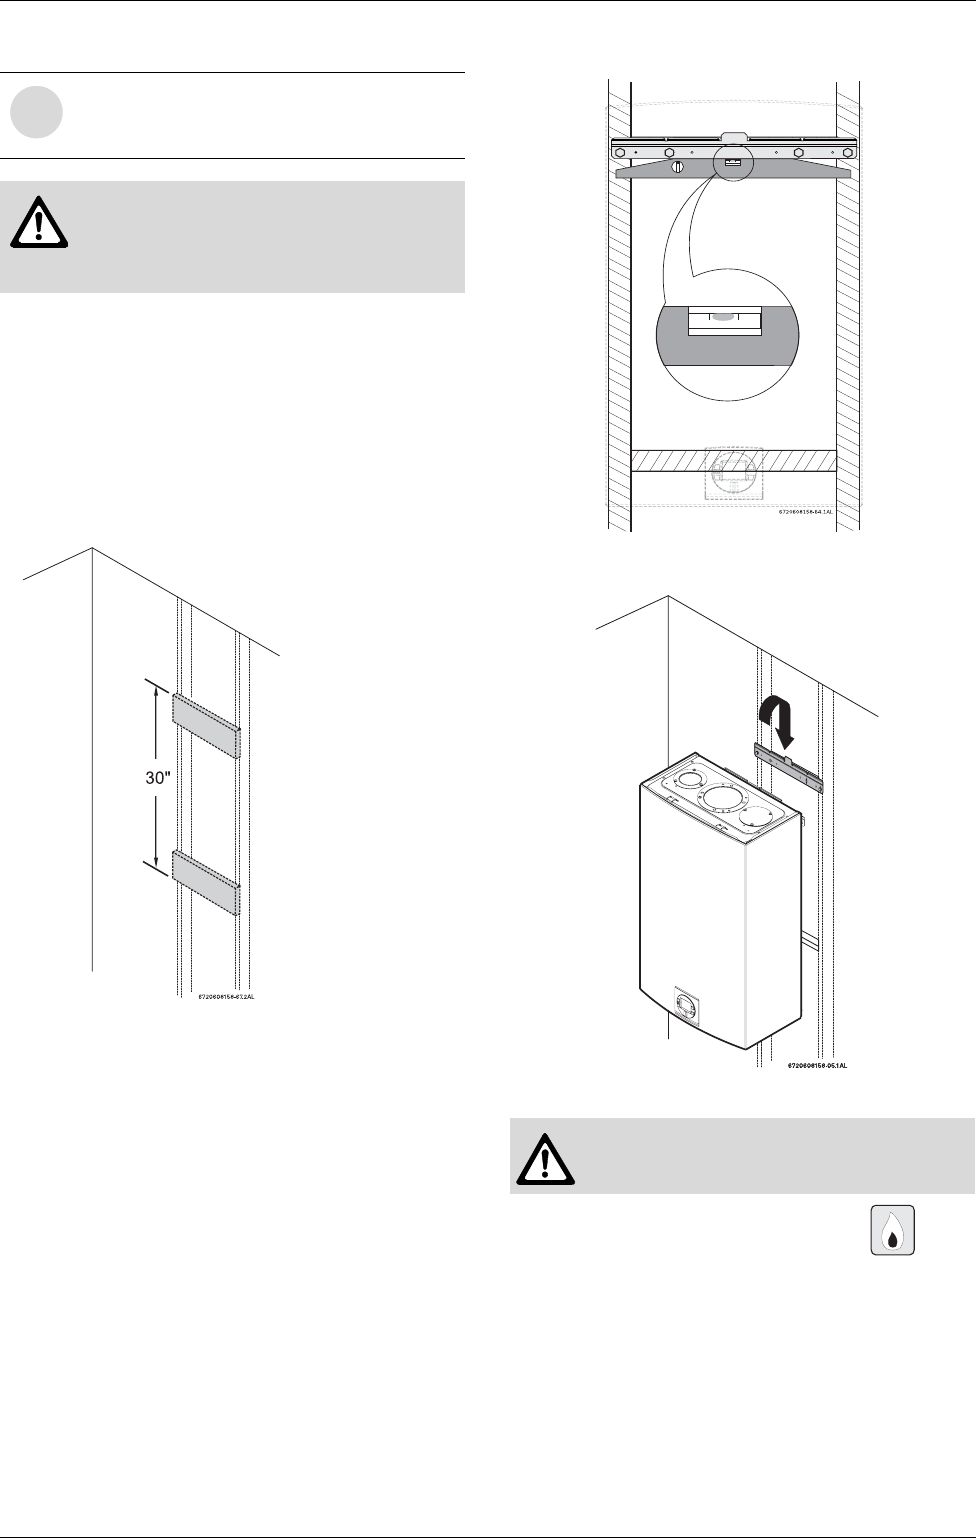
If wall is sheathed with plaster or drywall, it is
recommended that two support boards, either 1”x4” or
1/2" (minimum) plywood first be attached across a pair
of studs, see Fig. 22.
B Secure the wall mounting bracket provided with the
heater to the wall surface. The heater must be kept
level on the wall surface (see Fig. 23).
B Hang the appliance on the bracket, see Fig. 24.
Fig. 22 Distance between support boards
Fig. 23 Leveling the mounting bracket on the studs
Fig. 24 Mounting the heater
3.8 Gas piping & connections
Before connecting the gas supply, check the rating
plate on the right side of the heater to be sure that the
heater is rated for the same gas to which it will be
connected.
In the United States: The installation must conform with
local codes or, in the absence of local codes, the
National Fuel Gas Code ANSI Z223.1/NFPA 54.
In Canada: The Installation must conform to CSA B149
i
Front cover should be removed (see
instructions on page 6) in order to inspect
components visually.
Warning: Do not install this appliance
on a carpeted wall. The heater must be
mounted on a wall using appropriate
anchoring materials.
Studs 16"
(406mm) on
center
Warning: Appliance must be installed
vertically.


