www.bissell.com 800.237.7691
Assembly
5
Operations
WARNING:
Do not use this product while on
any type of ladder. Do not place
the product in a place where it will
be stepped on or kicked while in
use. Do not place the product on an
elevated surface where it may be
pulled off the surface while in use.
Assembling your Little Green PROheat
is a simple process. The only thing you
will need to assemble your cleaner is a
Phillips head screwdriver.
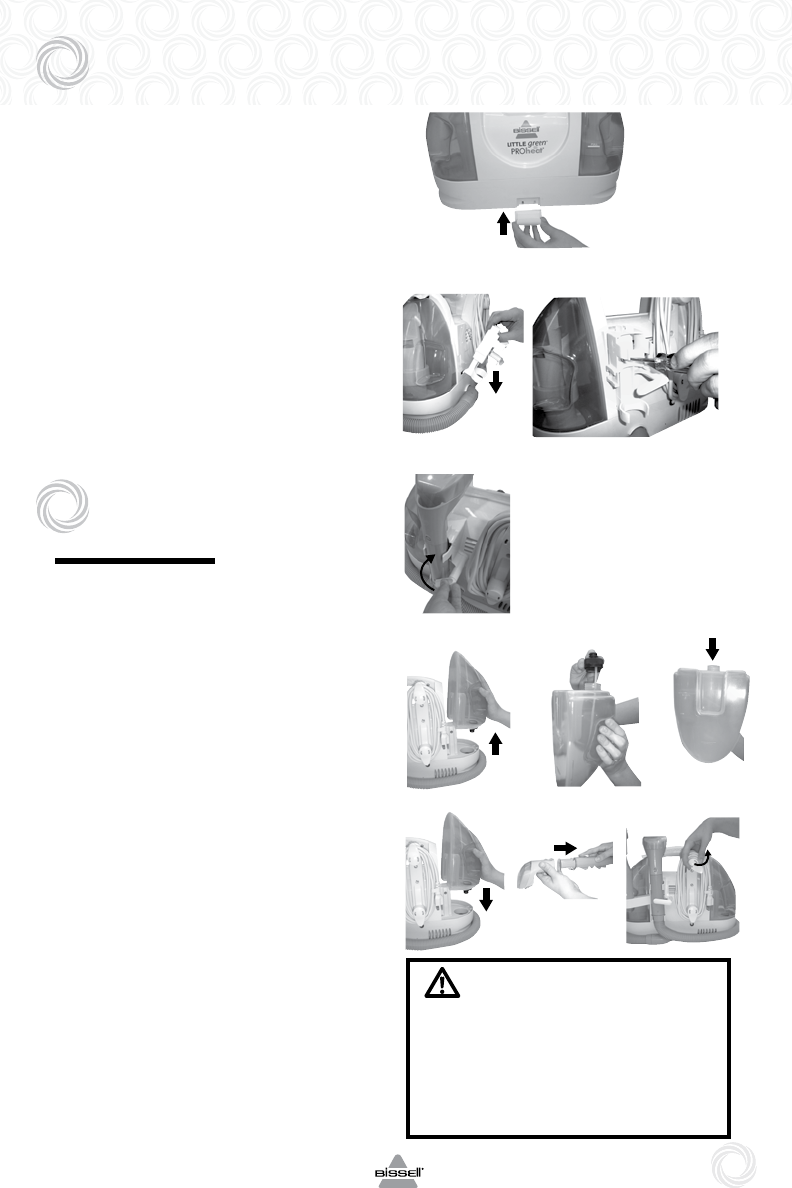
1. Slide the back plate of the flex hose
clip into the opening on the front of
the unit. You will hear a “snap” when
it is locked in place.
2. Take the flex hose storage bracket and
slide the lower plate into the opening
on the back of unit. Make sure the
screw holes line up.
3. Insert screw and tighten with a screwdriver.
4. Wrap the flex hose around unit and
place hose grip into bracket. Turn brack-
et latch clockwise to lock in place.
Getting ready
1. To fill the clean water/solution tank.
A. Remove the tank by lifting it straight
up and then away from the unit.
B. Unscrew the black cap at the bottom
of the clean/solution tank.
C. Using a standard liquid measuring
cup (or cap on BISSELL 2X Compact
cleaning formula), measure 4oz. of
formula (2 caps full) and pour into
tank. Then fill with hot tap water to
the WATER fill line. Replace and tight-
en the black cap. DO NOT BOIL
OR MICROWAVE WATER.
D Replace the clean/solution tank by
lining up the vertical guides on the left
side of the unit with the indentations
on the clean/solution tank and gently
slide it down into position.
2. Unwrap vacuum flex hose completely
from onboard hose storage.
3. Attach your selected cleaning tool to the
hose unit by pressing tool firmly until
the button lock snaps into hole. Make
certain the tool is securely attached.
4. Twist the quick release cord wrap
clockwise to unwrap the power cord.
5. Plug into proper outet.
1.
3.
2.
4.
1A.
1C.
1B.
1D.
3.
4.


