


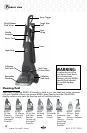
www.bissell.com 800.237.7691
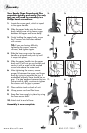
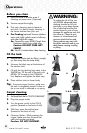
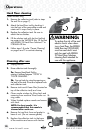
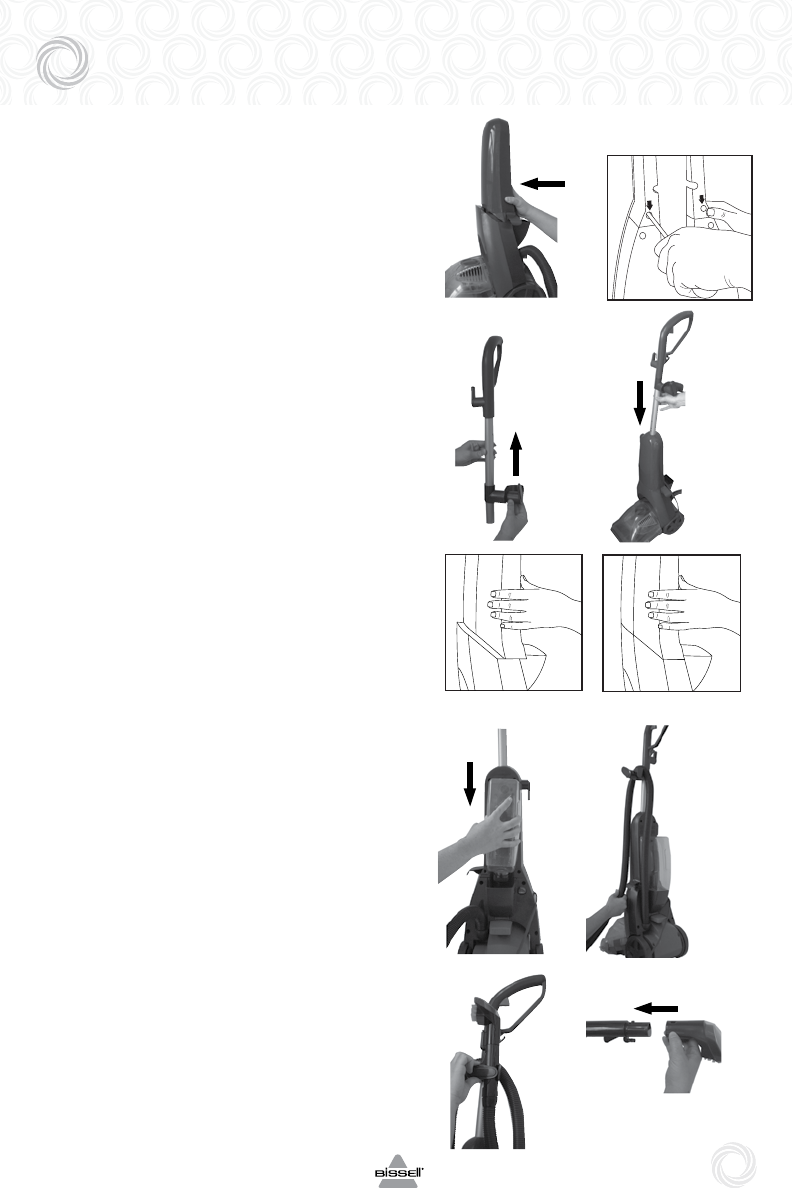
Assembly
5
Your Ready Clean Powerbrush Plus
assembles quickly and easily. The only
tool you will need for assembly is a
Phillips head screwdriver.
1. Locate the screw pack, which is taped
to the upper handle.
2. Slide the upper body onto the lower
body, taking care not to leave a gap
between the upper and lower body.
3. Firmly holding the upper body, screw
the 2 screws into the holes marked
with arrows.
TIP: If you are having difficulty
tightening the screws, remove,
re-insert, and tighten again.
4. Slide the hose wrap onto the upper
handle as pictured and push up until
it snaps into place.
5. Slide the upper handle into the upper
body until it will not go any farther and
secure it with a screw at the marked
screw hole above the water tank.
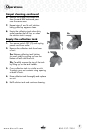
6. After tightening the screws, ensure
proper fit between the upper and lower
body by trying to separate the two. If
assembled properly, there should be no
gap. If a gap appears between the two
(see picture at right), continue to tighten
the screws until no gap is present.
7. Place solution tank on back of unit.
8. Wrap power cord and flex hose.
9. Keep flex hose snugly in place by using
the hose secure latch.
10. Attach tool to end of hose.
Assembly is now complete.
2.
4.
6.
7.
9.
3.
5.
8.
10.
CORRECT
INCORRECT