


2. When in "Auto" mode, press the (-) button on the
remote to decrease the "Set" temperature. The
unit scrolls one digit at a time in a continuous loop.
UNIT OPERATION WITHOUT REMOTE
A. Remote and Unit are OFF:
1. Press the Mode button on the unit the first time. The
"Low" light illuminates and the unit runs in "Low" mode.
The power light turns on.
2. Press the Mode button a second time to run in "High"
mode (1500 Watts).
3. Press the Mode button a third time and the unit shuts
off.
Note: The "auto" light only illuminates when the unit is set
to "auto" mode by the remote.
B. Remote is ON and Unit is ON:
1. Press the Mode button on the unit. The unit will then
switch "Modes"; either from "Low" to "High", "High" to
"Off" or "Auto" to "Off" . The unit’s lights will reflect the
change. The Remote will display a different mode – the
mode in which it was left. If a button is pressed on the
Remote, the Remote’s signal will override the "Mode"
on the unit and the two will be back in sync.
TIMER FUNCTION:
Using Timer to turn unit off
1) Hold mode button for 2 seconds to unlock remote.
2) Push + and - together.
2.1) "timer" turns on. 1 Hr appears on the
screen.
3) Push + or - to adjust the number of hours the unit will
run before it automatically shuts itself off.
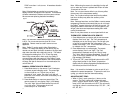
7
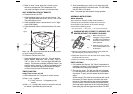
low
high
auto
LOW
(1000 Watts)
HIGH
(1500 Watts)
AUTO
MODE
mode
Figure 3
3. Avoid overloading your circuit by not using other high
wattage appliances in the same outlet. At 1500 Watts,
this unit draws 12.5 Amps.
Note: The power light will remain lit during operation
ASSEMBLY INSTRUCTIONS
Wheel Assembly
Tools required for assembly: Phillips head screwdriver
Carefully unpack your Bionaire
®
heater from the box (it is
recommended to save the box for off-season storage).
You will find the following pieces:
1. Four casters (wheels) 2. Four screws 3. Two caster (wheel platforms)
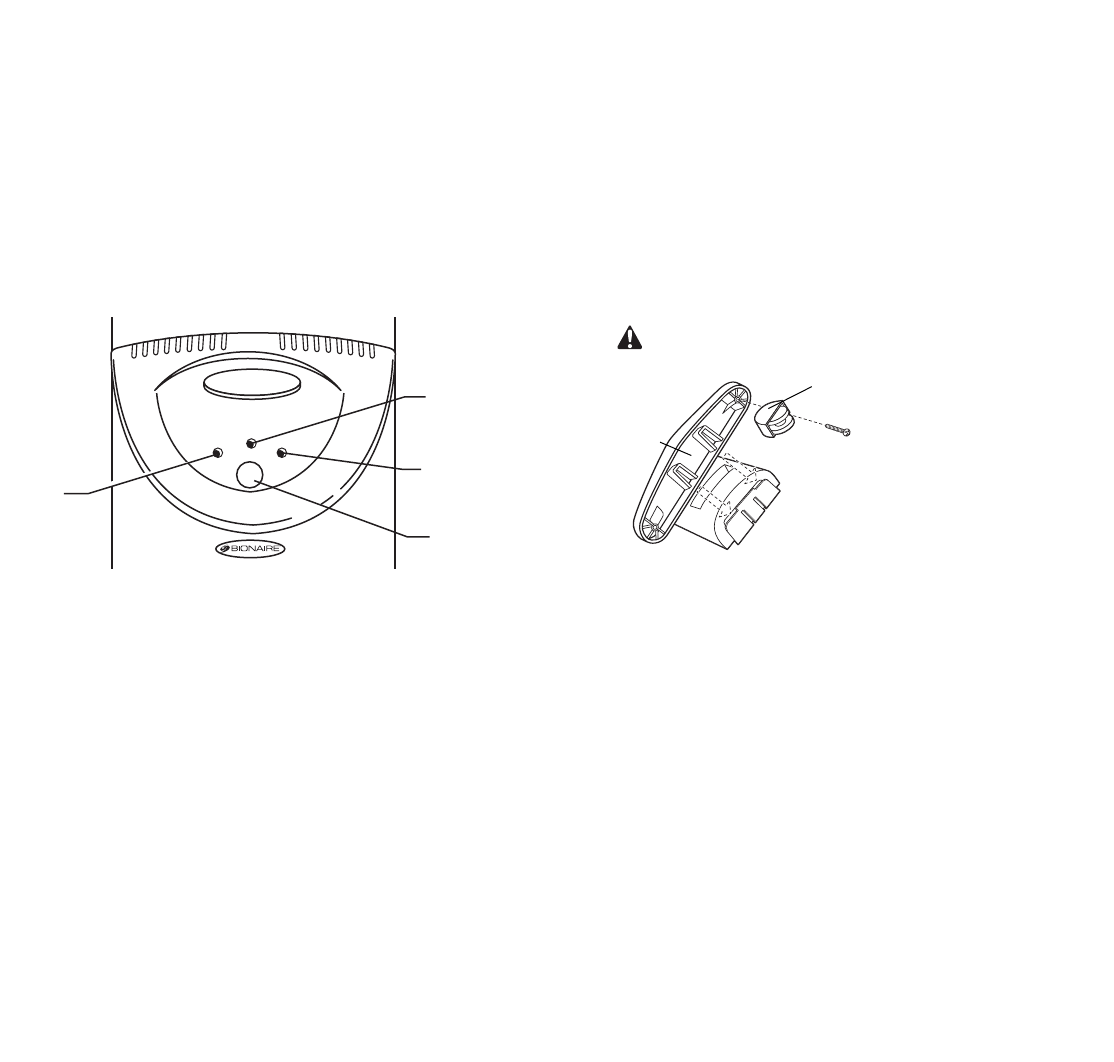
WARNING DO NOT ATTEMPT TO OPERATE THE
HEATER WITHOUT THE WHEELS IN PLACE
1. Make sure the unit is
unplugged. Using a slotted
or Phillips head screwdriver,
attach two casters to each
caster platform.
2. Carefully turn the unit over
so the caster platforms can
be attached.
3. Slide the caster platform into the bottom of the plastic end
cap, following the grooves (shown in Fig. 1).
4. Repeat this sequence on the other side of the heater, making
sure both sides are secure.
5. Return the console to its upright position.
FIRST USE ONLY:
1. Put batteries into Remote. The "Room" temperature is
displayed at all times. (Use 3 AAA batteries only, do not
mix alkaline and heavy duty batteries)
2. Plug unit into outlet. The first time the unit is plugged
in, it will beep every two seconds until it is synced with
the remote. To sync unit with remote follow the below
steps:
Unlock remote. (This must be done before each use of
the remote) To Unlock remote, hold down the mode
button for 2 seconds until the lock symbol disappears
from the screen. Once the remote is unlocked, press
the mode button again and the unit will quickly beep 5
times telling the user the signal was received. DO NOT
4
Caster
Platform
Casters
(Wheels)
X 4
Fig. 1