


AQUATIC INDUSTRIES, INC. 7
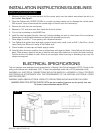
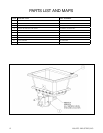
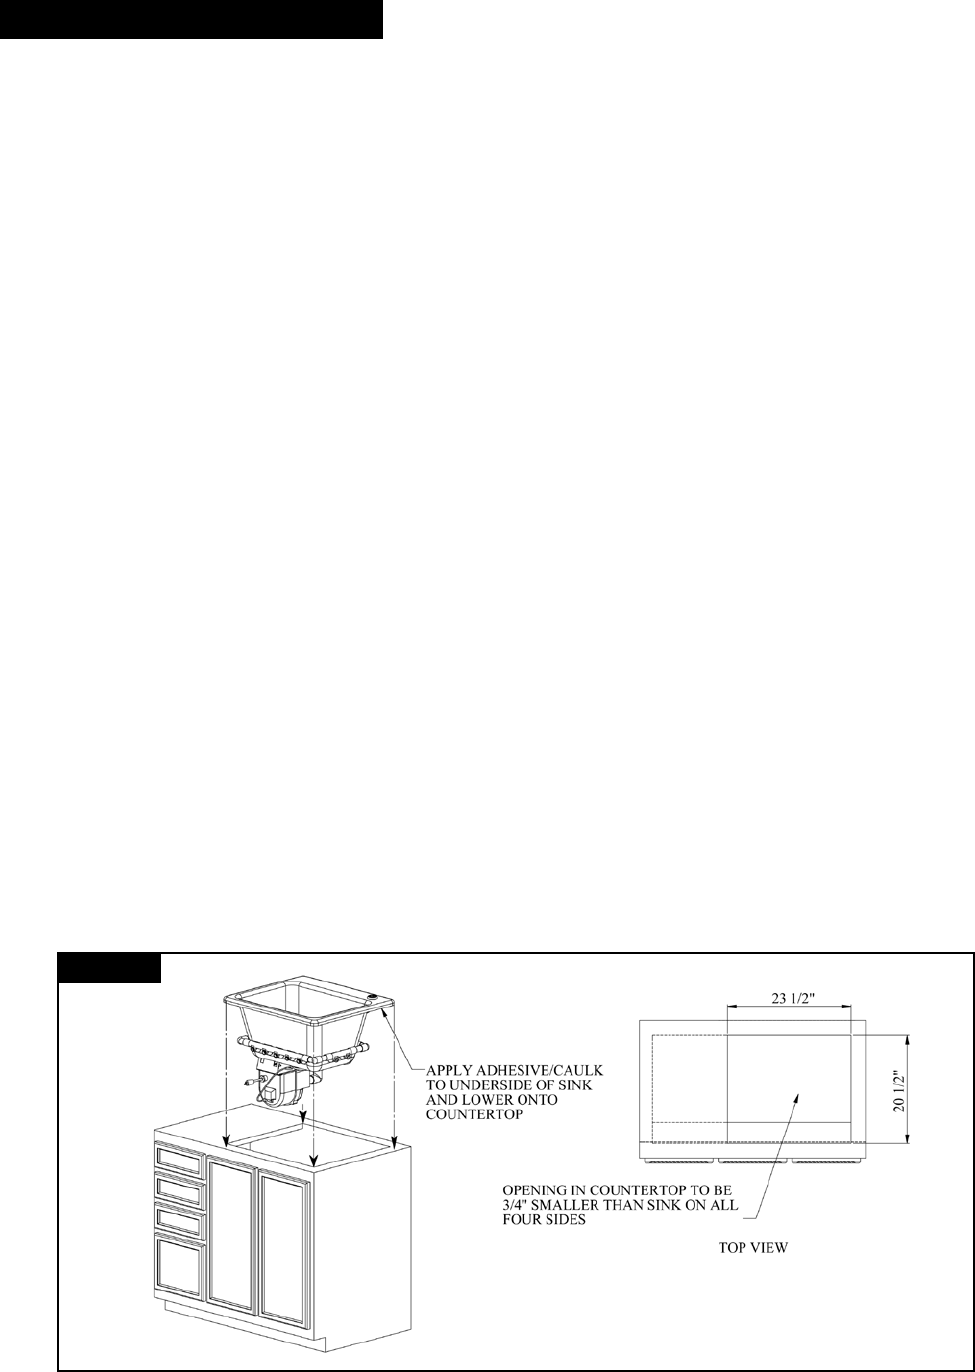
1. Measure the sink. Using measurement, find the center point over the cabinet area where the sink is to
be installed. See Figure 1.
2. Place the Delicair sink UPSIDE DOWN on counter top being careful not to damage the control panel.
With a pencil, trace a line around the outside edge of the sink onto the countertop.
3. Remove the sink from the countertop.
4. Measure in 3/4” and draw new lines inside the first sink outline.
5. Cut out the countertop on this INNER line.
6. Install the sink hardware (faucets, drain etc.) before installing the sink in cutout area of the countertop.
Remember to install basket strainers and drains with plumber’s putty only.
7. Clean edge of counter 1” from opening with denatured alcohol.
8. Turn Delicair sink upside down and apply a bead of acrylic latex caulk, such as DAP
™
Alex Plus
™
Acrylic
Latex Caulk plus Silicone to the lip of the Delicair sink.
9. Check location of drain trap and water supply outlets.
10. Carefully place the sink in position, line up all hardware with taps and drain. Press Delicair sink firmly into
place. Place a heavy object in the sink to hold the sink down (Be careful not to scratch the sink’s surface).
Smooth and trim the bead of caulk. Allow to set overnight, without moving or disturbing in any way. No
clamps are required.
ELECTRICAL SPECIFICATIONS
This unit requires one dedicated circuit protected by a Ground Fault Circuit Interrupter (GFCI). Rough-in the
wiring to the blower on a dedicated 120V, 15 amp, and standard outlet with a GFCI protected circuit.
WARNING: ALL ELECTRICAL CONNECTIONS SHOULD BE MADE BY A LICENSED, LOCALLY CERTIFIED
ELECTRICIAN, IN ACCORDANCE WITH THE REQUIREMENTS OF THE NATIONAL ELECTRICAL CODES
AND PROCEDURES.
WARNING: WHEN USING ELECTRICAL PRODUCTS, PRECAUTIONS SHOULD ALWAYS BE FOLLOWED.
DANGER: RISK OF ELECTRIC SHOCK! GFCIs are not supplied; however we do specify their use.
All known code authorities require GFCIs.
Figure 1
INSTALLATION PROCEDURES
INSTALLATION INSTRUCTIONS/GUIDELINES