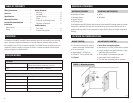
INSTALLATION
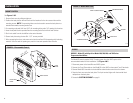
MOUNT CONTROL
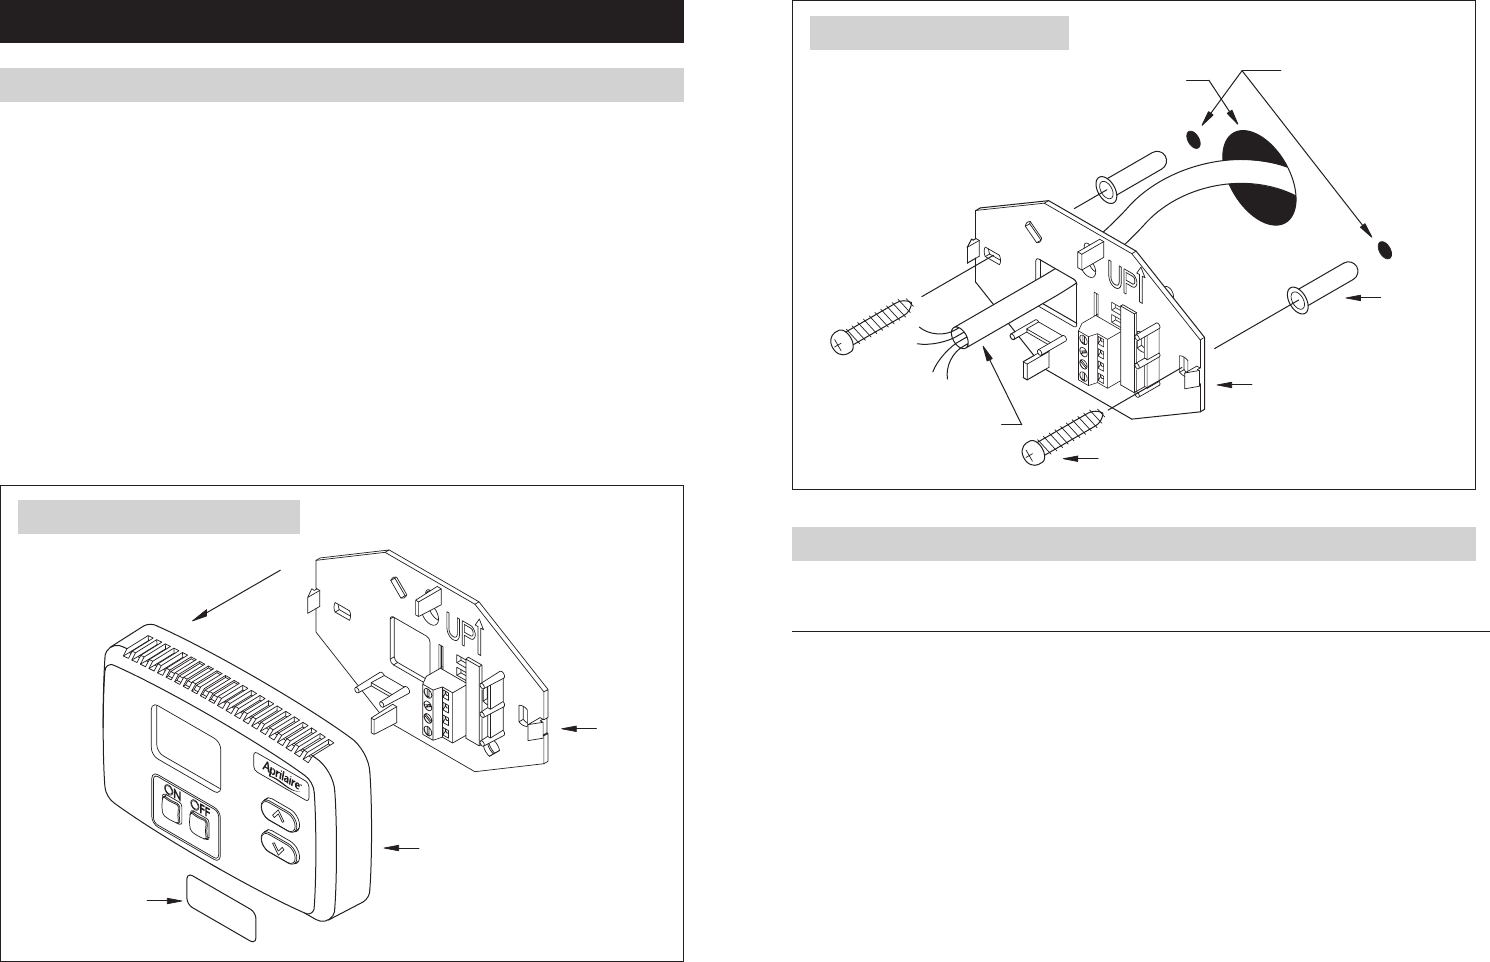
PULL APART
FRONT COVER
BACK
PLATE
RH SETTING
LABEL
H
H
R
C
FIGURE 2 – Disassemble Control
90-1667
H
H
R
C
BACK PLATE
ANCHOR
SCREW
MOUNTING HOLES
WIRE ACCESS OPENING
4-CONDUCTOR WIRE
FIGURE 3 – Mount Back Plate
90-1668
See Figures 2 & 3.
1. Remove front cover by pulling straight out.
2.Positionthebackplateonthewallandmarkthelocationsforthewireaccessholeandthe
mounting screws. NOTE:Themountingholescanalsobeusedtosecurethebackplatetoa
standard horizontally mounted junction box.
3.Formountingondrywall,drilltwo3/16”dia.mountingholesanda3/4”openingforthewires.
4. Insert the drywall anchors provided into the mounting holes flush with the wall surface.
5. Run 4-wire cable from the humidifier to the control location.
6.Securebackplateusingthetwo#8x1-1/2”screwsprovided.
7.Afterconnectingthewires,tuckexcesswireintothewallandfilltheopeningwithinsulating
material. Failure to seal the opening may result in inaccurate operation due to drafts.
WIRING
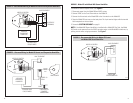
WIRING – Model 65 with Aprilaire Model 400, 500, 600, and 700 Series
Evaporative Humidifiers
The Model 65 control requires 24VAC. Drawing power from the HVAC system is the
recommended method for this installation. See Figures 4 & 5.
1. Disconnect power to the humidifier and HVAC system.
2. Connect the C and R terminals on the Model 65 to the HVAC or thermostat C and R terminals.
3. Connect Model 65 H terminals to the humidifier solenoid valve control circuit as shown.
4.Snapthefrontcoverontothebackplate.The4-pinterminalalignswiththeterminalblock
receptacleonthebackplate.
5. Proceed to SYSTEM CHECKOUT on page 9.
4
5


