10
english
ATTIX 360-2M
ATTIX 550-2M / ATTIX 560-2MXC
ATTIX 751-2M / ATTIX 761-2MXC
1)
Option depending on model
7.2 Maintenance work
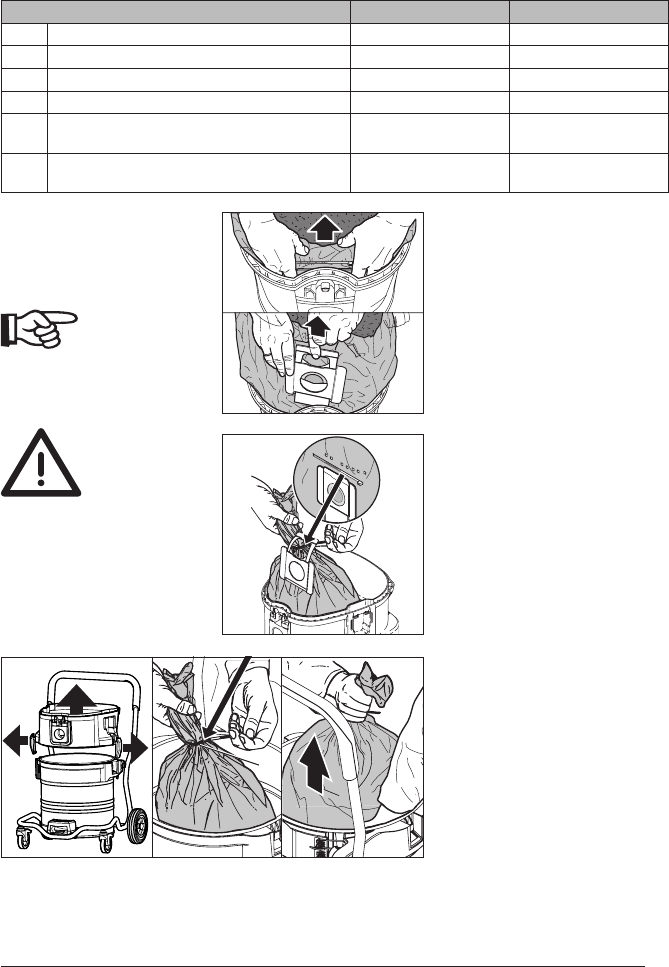
7.2.1 Replacing the waste
bag
ATTIX 360-2M/550-2M/
560-2MXC:
1. Open the retaining clamps and
remove the upper section of the
cleaner from the dirt tank.
2. Carefully remove the waste bag
connection (1) from the inlet fit-
ting.
3. Close the waste bag connection
with the slide (2).
4. Close the waste bag using the
cable binder (3).
5. Dispose of the dirt in accordance
with legal regulations.
6. Insert a new filter bag into the
cleaned tank as described in the
instructions enclosed.
IMPORTANT: Press the filter bag
connection firmly on to the inlet
fitting.
ATTIX 751-2M/761-2MXC:
1. Remove the upper section of
cleaner from the dirt tank.
2. Open the retaining clamps (1)
and remove the intermediate ring
(2) from the tank.
3. Carefully remove the waste bag
connection from the inlet fitting.
4. Close the waste bag using the
cable binder (3).
5. Dispose of the dirt in accordance
with legal regulations.
6. Insert a new filter bag into the
cleaned tank as described in the
instructions enclosed.
IMPORTANT: Press the filter bag
connection firmly on to the inlet
fitting.
7 Maintenance
7.1 Maintenance plan
After finishing work As required
7.2.1 Replacing the waste bag
7.2.2 Replacing the filter bag
7.2.3 Emptying dirt tank (ATTIX 3+5)
7.2.4 Emptying the dirt tank (ATTIX 7)
7.2.5 Replacing filter element
(ATTIX 360-2M/550-2M/751-2M)
7.2.6 Replacing filter element
(ATTIX 560-2MXC/761-2MXC)
When using ATTIX 360-2M/560-
2MXC/761-2MXC clean them tho-
roughly before replacing the waste
bag - see sections 4.5 bzw.4.6.
During the following work, ensu-
re that dust is not unnecessarily
spread around. Wear a P2 brea-
thing mask.
3
1
1
1
1
2
2
1
2
3


