


A-16 - FORM NO. 56041580 - Captor
™
4300, 4800, 5400 / CR 1100, 1200, 1400
A-16 / ENGLISH
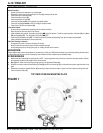
DETERGENT SYSTEM PREPARATION AND USE (AXP/EDS MODELS ONLY)
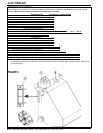
Fill the detergent cartridge with a maximum of 2.2 gallons (8.32 Liters) of detergent. SERVICE NOTE: Remove the detergent cartridge from the detergent box prior to lling to
avoid spilling detergent on the machine.
It is recommended that a separate cartridge be used for each detergent you plan to use. The detergent cartridges have a white decal on them so you can write the detergent
name on each cartridge to avoid mixing them up. The detergent cartridge has a Magnetic Slider (A) on one end that should be set to the proper dilution ratio according to the
dilution instructions on the manufacturer’s bottle. Slide the Magnet Slider (A) to the appropriate location on Detergent Dilution Ratio Decal (B). When installing a new cartridge,
remove the Cap (C) and place the cartridge in the detergent box. Install the Dry Break Cap (D) as shown.
The system should be purged of previous detergent when switching to a different detergent. SERVICE NOTE: Move machine over oor drain before purging because a small
amount of detergent will be dispensed in the process.
To Purge When Changing Chemicals:
1 Disconnect and remove the detergent cartridge.
2 Turn the Key Switch (MM) ON and press the Detergent ON/OFF Switch (RR) for at least 2 seconds. NOTE: Once activated the purge process takes about 10 seconds.
See illustration on next page for Detergent System indicators. Normally one purge cycle is adequate to purge the system.
To Purge Weekly:
1 Disconnect and remove the detergent cartridge. Install and connect a Cartridge lled with clean water
2 Turn the Key Switch (MM) ON and press the Detergent ON/OFF Switch (RR) for at least 2 seconds. NOTE: Once activated the purge process takes about 10 seconds.
See illustration on next page for Detergent System indicators. Normally one purge cycle is adequate to purge the system.
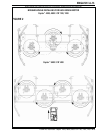
The Detergent Box (E) has a Detergent Level Viewing Slot (F) for keeping track of how much detergent is remaining in the cartridge. When the detergent level is nearing the
bottom of this slot it is time to re ll or replace the cartridge.
General Use:
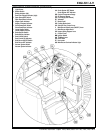
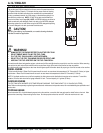
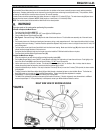
The detergent (AXP/EDS) system is enabled when the Key Switch (MM) is turned on and reverts to the last state (Chem On or Chem Off) it was in prior to the last power down.
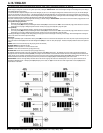
The current Solution Flow Rate (VV) and the last used Detergent Ratio (WW) (if in “Chem On” state) are displayed. The Status LED (YY) indicates the status of the system as
follows:
GREEN: Solution not low and chemical pump ON (pumping solution and chemical)
BLINKING GREEN: Purge has been activated
LED OFF: Solution ow position = 0 or solution solenoid is OFF
ORANGE: Solution ON and Chemical OFF (pumping solution only)
BLINKING RED: Solution low and chemical pump ON (pumping solution only)
No detergent is dispensed until the scrub system is activated and the Drive Pedal (OO) pushed forward. The detergent ratio can be varied by subsequently pressing the
Detergent Increment and Decrement Switches (SS & TT). The detergent ow rate increases or decreases with the solution ow rate but the detergent ratio remains the same
unless changed. During scrubbing, the detergent system can be turned off at any time by pressing the Detergent ON/OFF Switch (RR) to allow scrubbing with water only. On
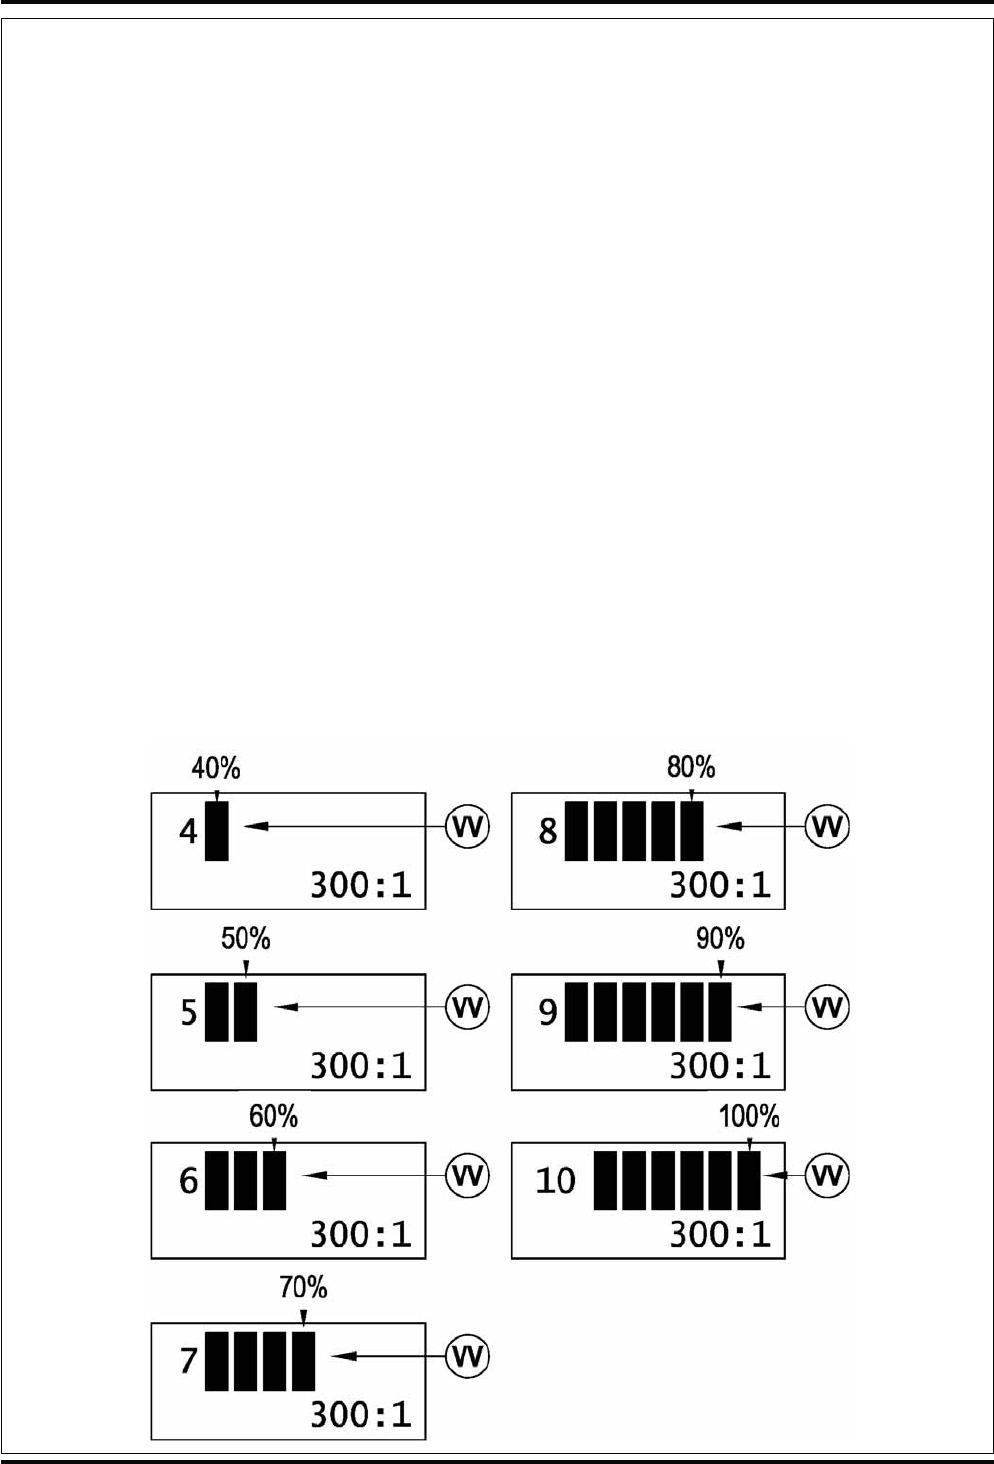
AXP/EDS models the solution ow rate (40%-100%) is electronically controlled and is displayed (VV) on the AXP/EDS display panel as shown below.
SERVICE NOTE: Follow the “To Purge Weekly” instructions above if the machine is going to be stored for an extended period of time or if you plan to discontinue use of
the detergent (AXP/EDS) system. The Display Panel (UU) will display an Error Code “E1” (XX) in the lower left corner if the magnetic slider circuit board (ZZ) becomes
disconnected or malfunctions.
revised 3/08