Page -4- CLARKE TECHNOLOGY 530 Upright Vacuum Operator's Manual
REPLACEMENT PROCEDURES (cont.)
11.
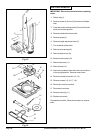
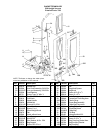
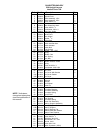
To Replace Handle Socket (24-I).
a. Remove hood as in step 7.
b. Remove handle release pedal as in step 10.
c. Remove "C" washers (17-I) from socket bolt
(18-I) pull out bolt and remove socket.
12. To Replace Handle Position Cam (27-I).
a. Remove handle socket as in step 11.
b. Pull out "c" washer (30-I) and bolt (29-I) remove
cam and cam spring (28-I).
c. When reassembling be sure spring (28-I) is
located as before.
13. To Replace the Line Cord (2A-I).
a. Disengage line cord from retainer in handle as
in step 2a.
b. Remove handle tube as in step 2.
c. Remove hood as in step 7.
d. Disconnect switch and ground leads.
e. Remove the insulating cover from switch lead
forcing a sharp 1/16 needle to rise the rib inside
the insulator and pull it out. (Or cut wire to
insulated terminal leaving enough wire to
reconnect.)
f. Remove Heyco strain relief (20-I) from chassis
with Heyco pliers and slide it out of the line
cord.
g. Slide strain reliefs and hook on the new line
cord, and reassemble with the Heyco pliers
making sure to locate the strain relief as it was
before.
14. To Replace the On-Off Switch (12-M).
a. Remove hood as in step 7.
b. Disconnect the electrical terminal from switch.
c. Press the side tabs on the switch and pull it
out.
d. Press the new switch on the opening until the
tabs snap, and reconnect the terminal.
15. To Replace the Switch Actuator (22-I).
a. Remove hood as in step 7.
b. Remove "C" washer (25-I) from bolt (23) and
slide out the bolt and the actuator assembly.
c. Replace the new actuator and assemble.
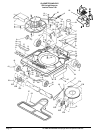
16. To Replace the Fan.
a. Remove the belt as in point 3 a , b and c.
b. Hold the fan (14-M) while turning loose the nut
(15-M).
c. Remove nut and fan.
d. Remove the new fan and reassemble.
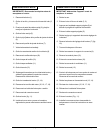
17. Motor Servicing.
The only possible motor repairs are :
a. Replace carbon brushes.
b. Replace armature.
c. Replace field.
NOTE: Never try to repair the field or armature, if
defective replace with a new one.
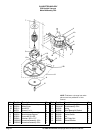
TO DISASSEMBLE THE MOTOR
1. Remove motor as in point 8.
2. Hold the fan (14-M) while turning loose nut (15-M)
and remove nut and fan.
3. Remove the electrical connection to carbon
brushes pulling them out of the terminals.
4. Remove the brush holders support screws (5-M)
and take out the brush holder assembly (3-M). If
the carbon brush is worn out replace the complete
assembly (3-M).
5. Remove the four motor cover screws (2-M) and lift
the motor cover (1).
6. Remove field and armature and replace as
required.
7. Reassemble in reverse order making sure the field
springs (10-M), the ground washer (16-M) and the
ground lead are in correct position.


