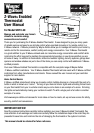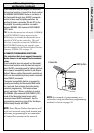
11
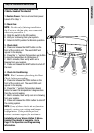
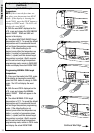
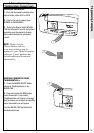
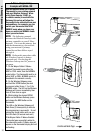
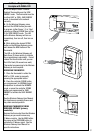
Step 4: Wiring Information (continued)
IMPORTANT!
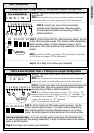
Additional Wiring Notes:
• For heat pumps with O and B both present, connect O wire to O terminal and B wire to C terminal (NOTE:
This is typically for Trane Heat Pump products only.) Do not connect B wire to B terminal as it may
damage the 24VAC power system.
• For LENNOX Pulse systems, please contact customer support or contact your HVAC professional for specific
information regarding installing the Z-Wave
® Enabled Thermostat with your system.
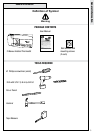
• Use 18- to 22-gauge thermostat wire.
• Your Z-Wave® enabled thermostat must have a C wire (electrical power) and cannot operate from batteries
alone. Batteries are for back up only.
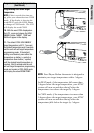
• If you are unsure of how to connect your system, please call customer support for additional information or
contact an HVAC professional.
• If you have 2 large wires (12 or 14 gauge or if it is bigger than paper clip wire) or know that your system
operates on line voltage, immediately stop, re-install your existing thermostat and contact customer support.
The Wayne-Dalton Z-Wave
® Enabled thermostat operates on 24 Volts AC power only.
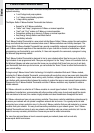
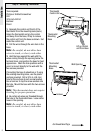
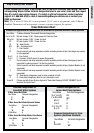
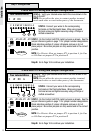
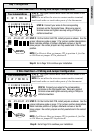
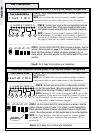
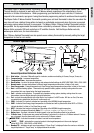
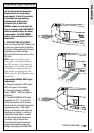
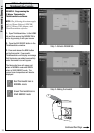
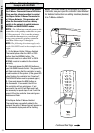
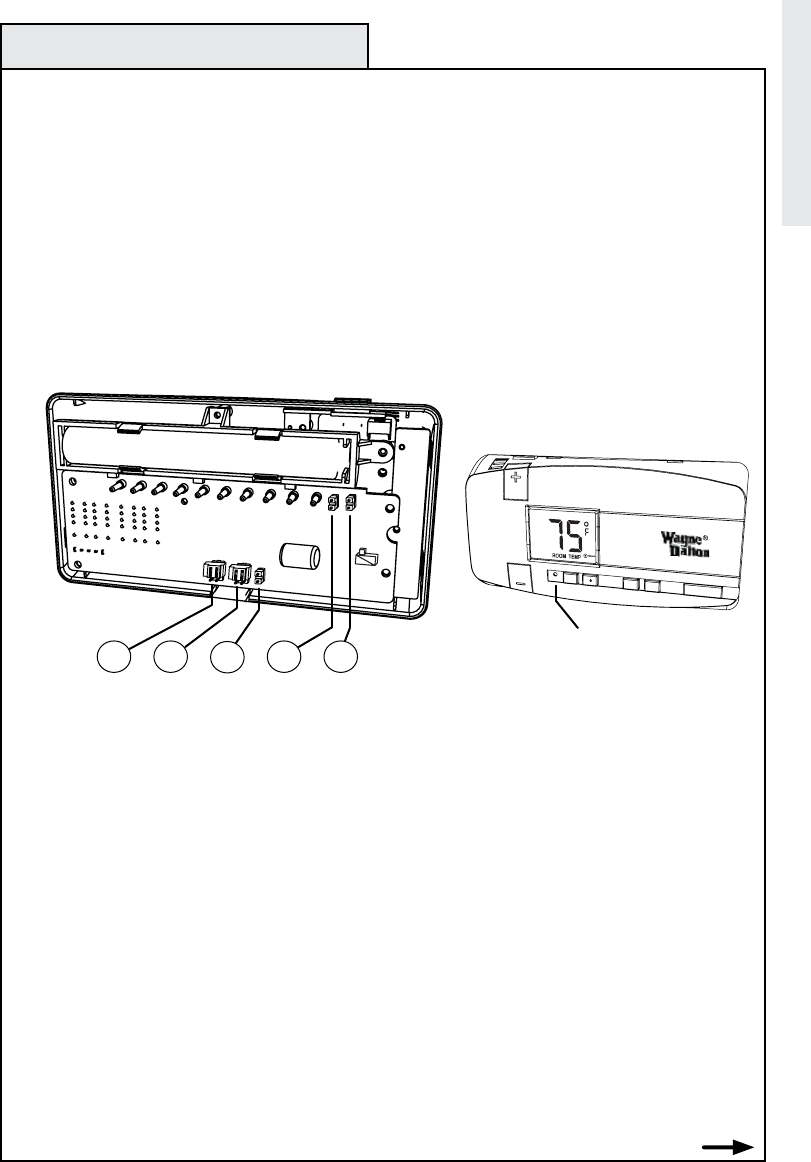
Jumper Reference Guide
The number below corresponds to the bubble number above.
JP5 -- Fan Control: a) NO FAN -No fan control even with switch on front of thermostat (RARE.)
(No jumper)
b) ELECT - Fan is controlled from thermostat.
(Jumper on top 4 pins)
c) GAS - Fan is controlled by furnace.
(Jumper on bottom 4 pins)
JP3 -- Heat Pump Type: a) OFF - No heat pump system present (Conventional HVAC System)
( No Jumper)
b) ON - Bypasses heat pump 1st stage and immediately triggers auxiliary heating.
(Eliminates time delay for effectively heating homes located in colder climates.)
(Jumper on top 4 pins)
c) Heat Pump - Normal heat pump setting to activate both stages.
(Jumper on bottom 4 pins)
JP4 -- Power: a) RC-RH Connected - For single transformer systems.
(Jumper on both pins)
b) RC-RH Separate - For systems with a separate transformer for A/C and heat.
(No Jumper)
JP1 -- Celsius/Fahrenheit: a) °C - Thermostat will display in degrees Celsius.
(Jumper on both pins)
b) °F - Thermostat will display in degrees Fahrenheit.
(No Jumper )
JP2 -- Heat Pump Auxiliary Type: a) Fossil fuels - Natural gas, propane, or oil auxiliary system.
(Jumper on both pins)
b) Elect - Electric auxiliary system.
(No Jumper)
Reset -- Reset Button - Always press the reset button after changing jumper settings.
NOTE: Unused jumpers may be stored by attaching them to a single pin.
Reset
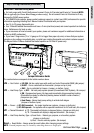
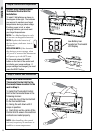
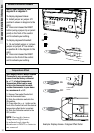
Installation
JP2JP1
Continued Next Page
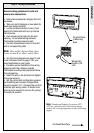
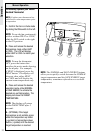
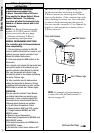
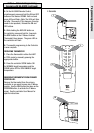
AUTO
ON
FAN
HEAT
COOL
SAVE
ENERGY
NORMAL
RESET
COOL
JP4JP3JP5