NOTE: If kettle burner does not immediately light, the
ignition control module continues sparking for 6
seconds, then locks out power to the gas valve (main
valve remains closed). The ignition fail light comes
ON. The module remains locked out until the on/off
switch is cycled to reset the system and re-start the
ignition trial cycle.
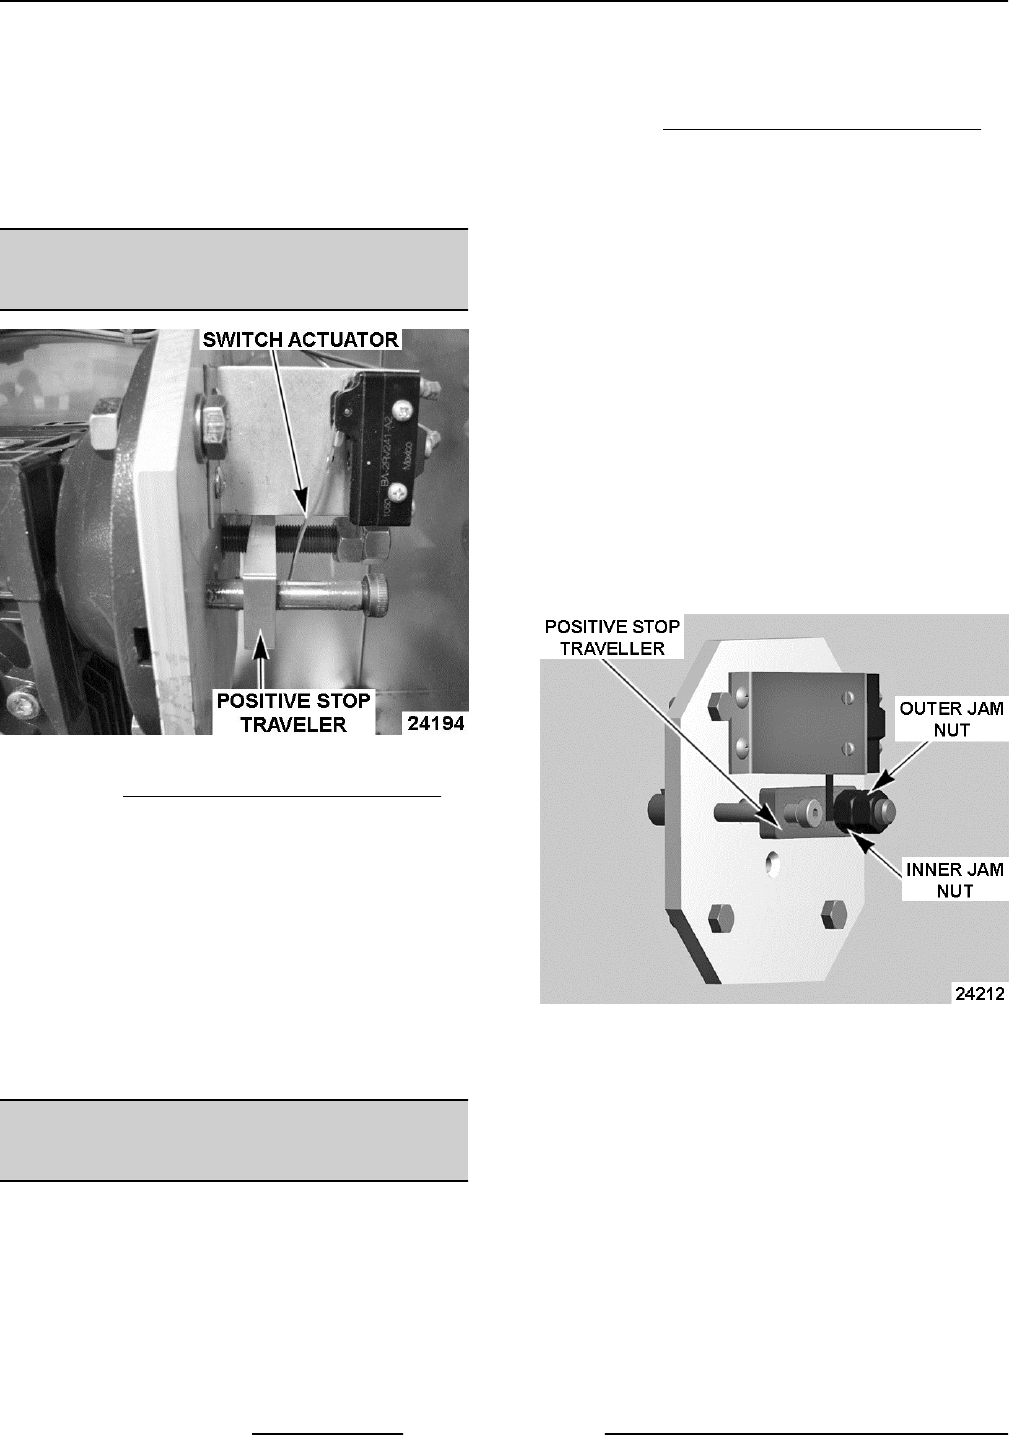
TILT SWITCH (2S) ADJUSTMENT -
MANUAL TILTING MODELS
Fig. 46
1. Remove CONTROL BOX COVER (TILTING) to
access Tilt Switch (2S).
2. Kettle tilt operation - The switch actuator should
be operated by the positive stop traveler when
the kettle is fully upright.
3. If adjustment is necessary, bend the switch
actuator to obtain the proper tilt switch operation.
A. Kettle fully upright - Tilt switch should be
operated (N.O. held closed).
B. Kettle tilted approximately 10 degrees - Tilt
switch should be un- operated (open).
KETTLE TILT ADJUSTMENT -
MANUAL TILTING MODELS
NOTE: Perform this procedure whenever the kettle is
not returning to a horizontal position when upright, or
when kettle is not tilting past 90° to empty contents.
1. With kettle fully upright, the top of kettle should
be horizontal when viewed from either side.
2. Turn crank handle clockwise to tilt the kettle until
it stops. Kettle should be tilted past 90° to allow
contents to drain.
3. If adjustment is necessary, continue with
procedure.
4. Remove CONTROL BOX COVER (TILTING).
5. Return kettle to fully upright position.
A. The inner jam nut should be in solid contact
with positive stop traveller.
B. To adjust upright position (horizontal):
1) Loosen outer jam nut 2 to 3 turns
counterclockwise and turn the inner
jam nut in the same direction and
amount.
2) Turn crank handle to position the top of
kettle horizontally.
3) Turn inner jam nut clockwise until it
stops against the positive stop
traveller. Tighten outer jam nut to
secure the stop position.
C. Turn crank handle to verify operation.
Repeat adjustment as necessary.
Kettle Fully Upright - Traveller Contacts Inner Jam
Nut
6. Fully tilt the kettle until crank handle stops.
A. Verify positive stop traveller is in solid
contact with stop plate.
B. To adjust fully tilted position:
1) Remove shoulder screw from stop
plate.
2) Remove tilt switch bracket from stop
plate.
K Series Gas Kettles 2/3 Jacketed Stationary and Tilting - SERVICE PROCEDURES AND ADJUSTMENTS
F45461 Rev. A (0713) Page 26 of 44
