User’s Manual
68
⑥ Click the camera button (1 to 16) to select the camera to be viewed.
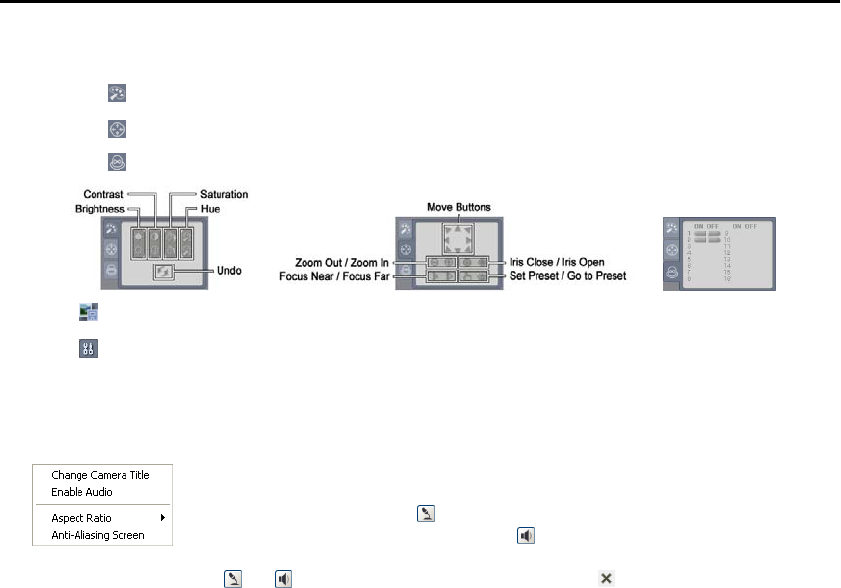
⑦ Click the to adjust the brightness, contrast, saturation and hue of monitoring image.
⑧ Click the
to control pan, tilt and zoom of the camera from a remote site.
⑨ Click the to control alarm out devices at the remote site.
⑩ Click to save the current image as a bitmap or JPEG file format.
⑪ Click to set up the image drawing mode and OSD display. You can adjust the display speed by
changing the image drawing mode, and select OSD information to be displayed on the screen.
⑫ The event status window at the bottom displays a list of events that were detected from the remote site.
⑬ Selecting a camera on the screen and clicking the right mouse button displays the text menu screen.
Change Camera Title: Changes the camera name.
Enable Audio: Enables audio communication with the remote site. When the audio
control panel displays, click
to send audio to the connected remote site and click the
button again to stop sending audio. Click
to monitor live audio from the connected
remote site through the attached speaker and click the button again stop monitoring
live audio. Clicking both
and allows two-way communication. Clicking disables audio communication.
Aspect Ratio: Changes the image aspect ratio.
Anti-Aliasing Screen: Enhances image display quality by eliminating stair stepping (aliasing) effects in
the enlarged image.
NOTE: A camera name change in the Web Watch mode does not affect the camera name set up on
the remote site. Leaving the Camera Title blank causes the camera name set up on the remote site
to display.
Web Search Mode
WebSearch is a remote web search program that allows you to search recorded video on the remote DVR.
NOTE: The remote site connection in the Web Search mode will automatically be disconnected if
there is no activity for 30 minutes.
