56
Connecting the Power/Basic Operations
—Continued
Switching the Display
While listening to or watching an input source, you can
display information regarding the type of source and sig-
nal being input.
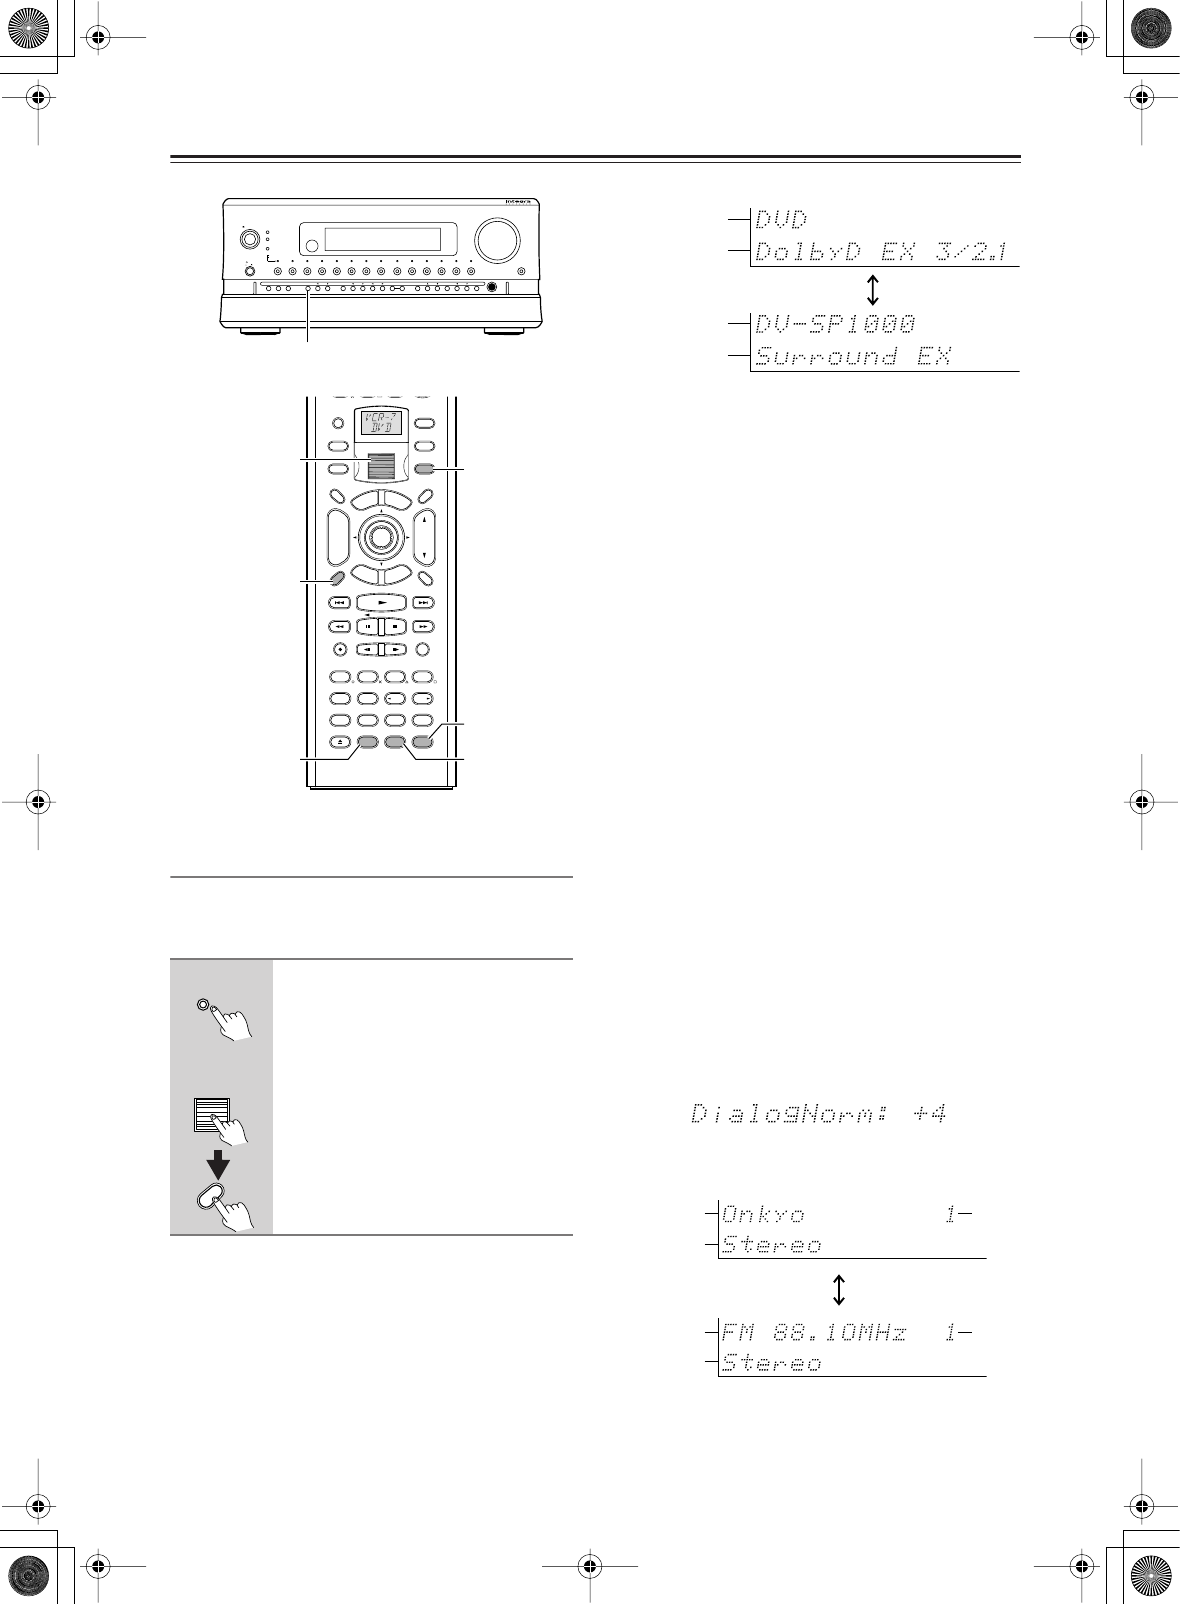
When an input source other than FM or AM is selected:
*When the input signal is digital audio other than PCM
The program format is displayed. For example, the dis-
play “Dolby D: 3/2.1” shows that the format is Dolby
Digital with 5.1 discrete channels consisting of three
front channels (front left, front right, and center), two
surround channels (surround left and surround right),
and the low frequency effect (LFE) channel.
When the front channel number is 2, they are the front left
and front right; when it is 1, it is monaural. When the sur-
round channel number is 1, it is monaural; when it is 0,
there is no surround channel. When no LFE number is
given, there is no LFE channel. Also, if there is no program
format for the input signal, nothing will be displayed.
When the input signal is linear PCM
The sampling frequency is displayed. For example, the
display “PCM fs: 44.1k” shows that the signal is PCM
and that the sampling frequency is 44.1 kHz.
Dialog norm
Dialogue Normalization (Dialog Norm) is a feature of
Dolby Digital. When playing back software that has
been encoded in Dolby Digital, sometimes you may see
a brief message in the front panel display that reads Dia-
log Norm xdB (“x” being a numeric value). Dialogue
Normalization serves to let you know if the source
material has been recorded at a higher or lower level
than usual. For example, if you see the message “Dialog
Norm: +4” in the front panel display, to keep the overall
output level constant the output volume has been auto-
matically decreased by 4 dB. In other words, the source
material that you are listening to has been recorded 4 dB
louder than usual.
When FM or AM is selected as the input source:
Press the [Display] button on the
RDC-7.1.
On the remote controller, press the
scroll wheel, and then press the
[Display] button.
ABC DEF
PQRS TUV WXYZ
GHI JKL MNO
Caps Delete
Language Loca
t
ion
Album Ar
tist GenrePlaylist
Repeat Video Music Photo
@.-'/
--
/
---
Direct Tuning
#
Custom
Display
Dimmer
T
V
Input
Sleep
Random
Main A Main B
Muting
AngleSubtitleAudio
MemorySearchA
-
BRepeat
On Standby
T
V
T
V CH
T
V VOL
E
x
i
t
G
u
i
d
e
Rec
Last Memory
Prev
CH
Enter
S
e
t
u
p
R
e
t
u
r
n
Test
Tone
CH SEL
Pure A
Surround
Direct
Stereo
Re
-
EQ
THX
A
ll
CH
ST
Level
+
Level
-
L Night
Audio
SEL
DSP DSP
+
10 0
Clear
123
456
789
Input
T
o
p
M
e
n
u
M
e
n
u
VOL
CH
Disc
I
+
-
+
-
Zone
3
Zone
2
InputMode
Macro
S
e
r
v
e
r
A
u
d
i
o
A
D
J
Re-EQ
L Night
Input
Audio SEL
Display
On
Standby/On
Standby
Pure Audio
On
Master Volume
Power
DVD Video 1 Video 2
Video 3 Video 4
Video 5 Video 6 Video 7
Tape 1
Tape 2
Tuner
Phono Net Audio
C D
Open/Close
Zone 2
()
GRN
Rec
/
Zone
3
()
RED
O f f
Phones
Clear
Rec
/
Zone 3Zone 2 Off DSPDisplay Tuning Tuning ModePreset Memory Setup ExitEnter
Dimmer
AV Controller RDC
-
7.1
Display
Scroll wheel
RC-554M
RC-555M
Display
RDC-7.1
Remote
controller
Display
Input
Program format*
Custom name
Listening mode
FM/AM +
Frequency
Listening
mode
Custom
name
Listening
mode
Preset
no.
Preset
no.