Chapter 9 Remove/Replace Procedures
86
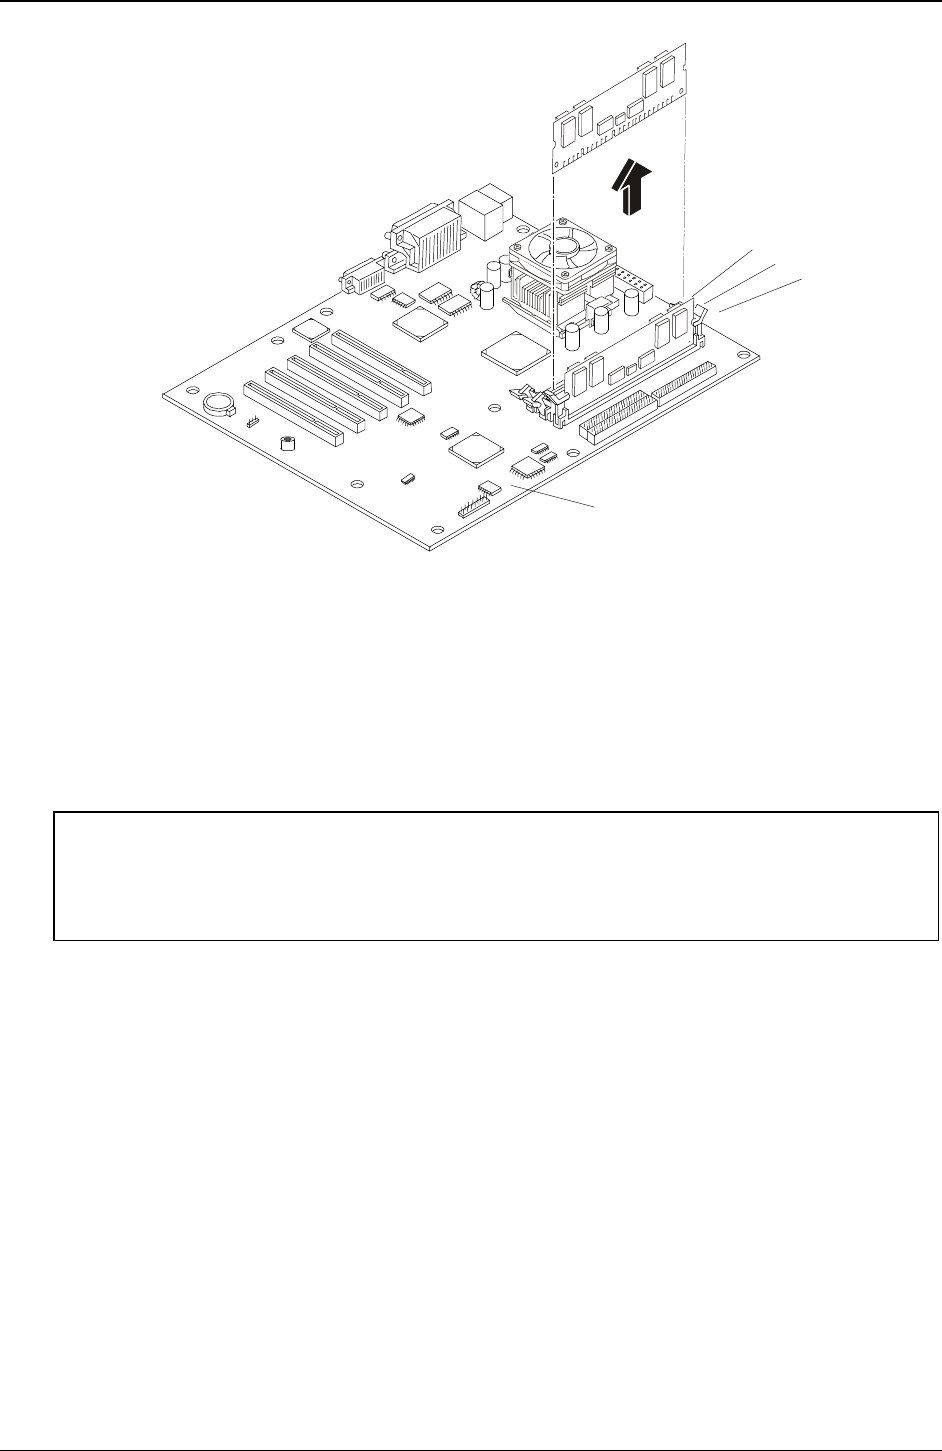
System Board
DIMM Slots
1
2
3
Removing DIMMs from System Board
Replacing DIMMs
1. Choose a DIMM slot for the desired DIMM.
DIMM sizes may be mixed on the system board and may be loaded in any order (1 through 3).
However, HP recommends starting at slot 1 and filling the slots in order: 1, 2, and 3. Empty slots
between DIMMs are permitted.
2. Spread the two retaining latches on the slot outward.
CAUTION Use only HP DIMMs, which are 168-pin, 3.3V, PC133 (133 MHz), and buffered (or
registered) ECC SDRAM DIMMs. The EDO DIMMs and PC 100 SDRAM DIMMs
from earlier HP Server models will fit into the DIMM slots in the HP Server tc2100, but
the EDO DIMMs and PC 100 SDRAM will not function properly. HP's warranty does
not apply to non-HP parts.
3. Remove a DIMM from its protective container, handling the module by its edges.
If necessary, lay it on an anti-static surface until you are ready to install it.
4. Align the notches on the DIMM with the keys on the slot.


