English
Setup
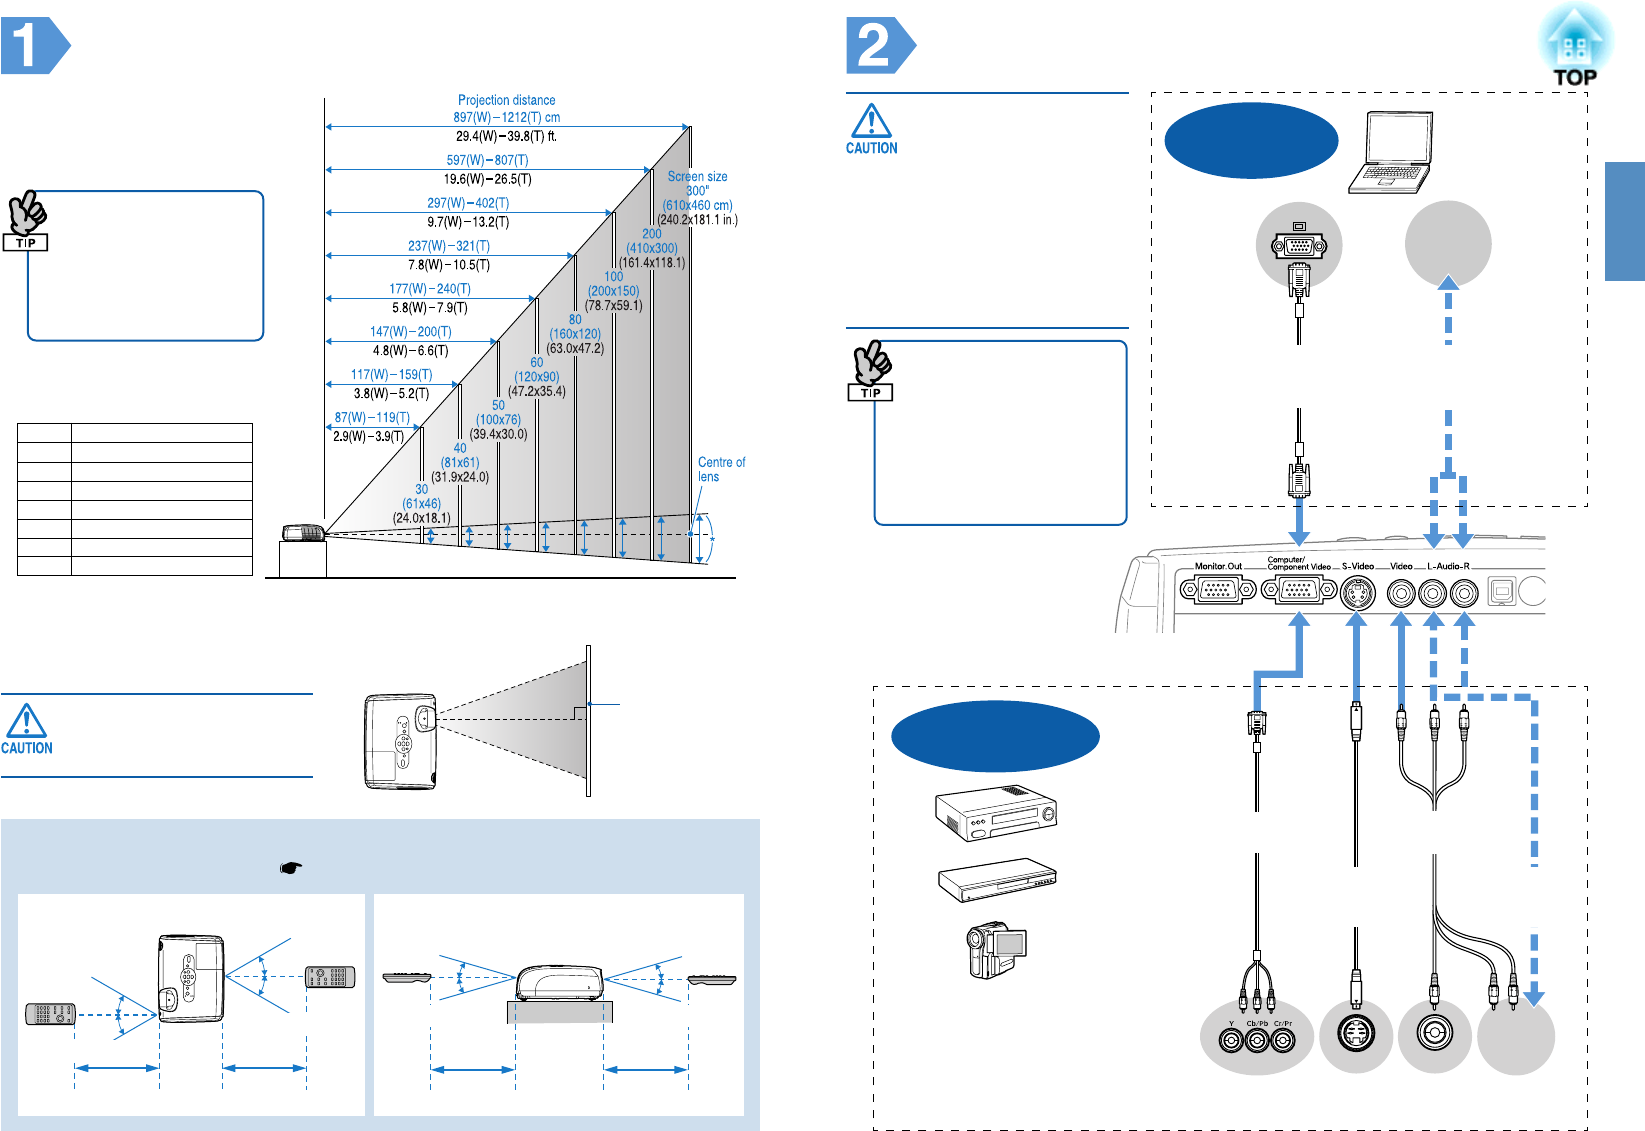
* Distance from the center of the
lens to the base of the screen.
Operating Range (Left and Right) Operating Range (Up and Down)
See the illustration on the right
to choose the best position for
your projected image. The
values are only a guide.
• After making keystone
correction, the projected
image will be smaller.
• You can project a better
quality of image when
zoom is set to the
maximum.
Setup this projector parallel to the
screen.
Do not stand this projector
upright. This may damage
your projector.
Using the remote control
Insert the batteries provided. User’s Guide "Replacing the batteries"
Connecting to Visual Equipment
•Turn off connected
equipment. Damage
may result if you try to
connect when the
power is on.
•Do not try to force a
cable connector to fit a
port with a different
shape. This may
damage your projector.
• When the source has an
unusual connection, use the
cable provided with the
source or commercially
available cables.
• If you use a 2RCA (L/R)
stereo min-jack audio cable,
make sure it is labelled "No
resistance".
Connecting to
a Computer
View from above
Component video
cable (optional)
Computer cable
(Accessory /
Optional)
To audio
output port
To audio
output
port
Video
out
S-Video
out
Screen
W: Maximum Zoom T: Minimum Zoom
Approx.
6 m
S-Video cable
(Commercially
available)
A/V Cable
(Commercially available)
DVD players, VHS
players, satellite
tuners, RGB
converters, video
distribution
machines, and so on.
* The port names may vary depending on the equipment.
Approx. 15°
Component
out
Connecting to a
Video Source
Approx. 30°
4 to -2 (1.7 to -0.9)
6 to -3 (2.3 to -1.1)
7 to -4 (2.8 to -1.4)
9 to -4 (3.4 to -1.7)
12 to -6 (4.5 to -2.3)
14 to -7 (5.7 to -2.9)
29 to -15 (11.3 to -5.7)
43 to -22 (17.0 to -8.6)
30”
40”
50”
60”
80”
100”
200”
300”
Units: cm (in.)
Approx.
6 m
Approx.
6 m
Approx.
6 m
Approx. 15°
Approx. 15°
Approx. 15°
Approx. 30°
Approx. 30°
Approx. 30°
Audio Cable
(Commercially
available)
Audio Cable
(Commercially
available)


