93
Example of advanced use
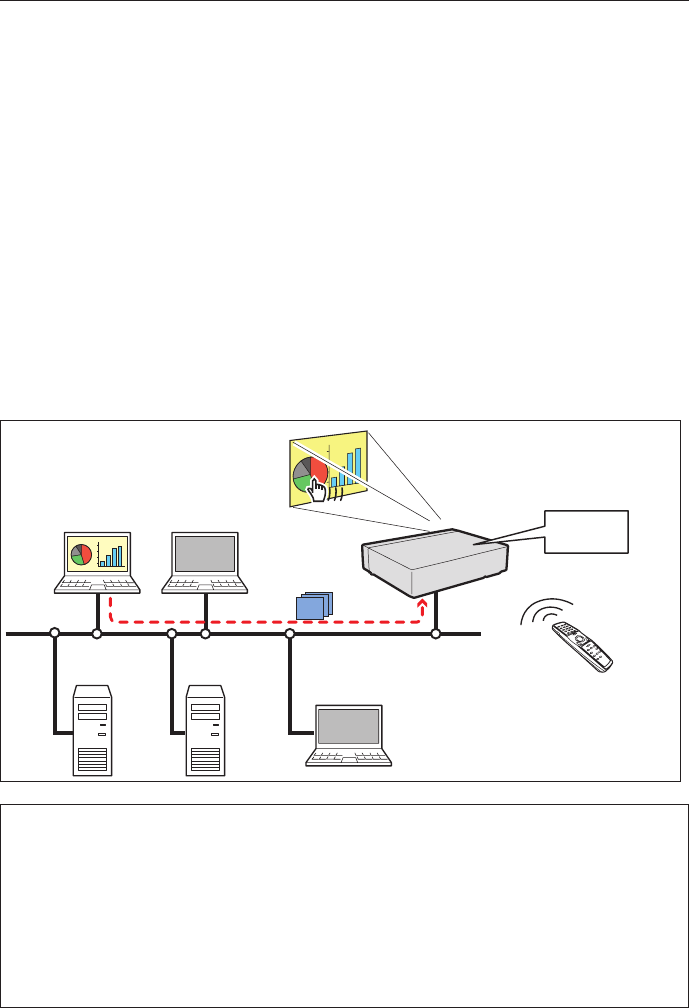
Displays the presentation data stored in the computer by using the wireless mouse function
from the projector.
1 Start capturing of the computer PC1 by using the projector.
Select “Network Capture” icon from the menu and select "PC1" and then select "Connect" (+ p.92).
=> The Network Capture software installed in the selected computer will start capturing.
2 On the image of the PC1 projected on the screen, search a presentation file data stored in the PC1 by
using the wireless mouse function of the remote control supplied with the projector.
3 Select a desired file and double click with the remote control .
=> The application by which the document was created starts and the projector projects the presenta-
tion picture on the screen.
4 Start the presentation.
=> By using wireless mouse function, control the page browsing and some other operations for the PC1.
✐ For further instructions of the wireless mouse, please refer to the projector’s owners manual.
✐ On the projected screen using with the network capture, the shape of the mouse pointer differs from the
one on the computer’s screen.
Setting condition
Projector
Input mode: Network
Registering the connection: The IP address of the computer and proper parameter must be set
to the PC1 (+ p.89-90).
Mouse Display: "On" (
+ p.91)
Computer PC1
Software: The Network Capture 4 is activated.
PC4 PC3
Capture
PC5
PC2
PJ2
PC1
* PC provides the Network Capture.
* Controls PC1 with wireless mouse.
Project a screen
image of PC1
with PJ2.
Using the real time capture


