


5.4 Clean, and re-paint, the rear of the door if required. Clean
the screws with light oil and coat with high temperature
anti-seize grease, this will aid future removal.
5.5 Fit a new sealing rope between the new glass and the door,
and place the glass into position in the door. Place the glass
fixing clips into position and re-fix with the clean fixing
screws, tighten the screws evenly until the clips hold the
glass. Do not over tighten the clips as this could break the
glass.
5.6 Fit only Yeoman ceramic glass, which is suitable to use in
high temperature applications.
5.7 Using the stove with a damaged door glass could cause
dangerous fumes to enter the room, or the stove to over-
fire, resulting in damage.
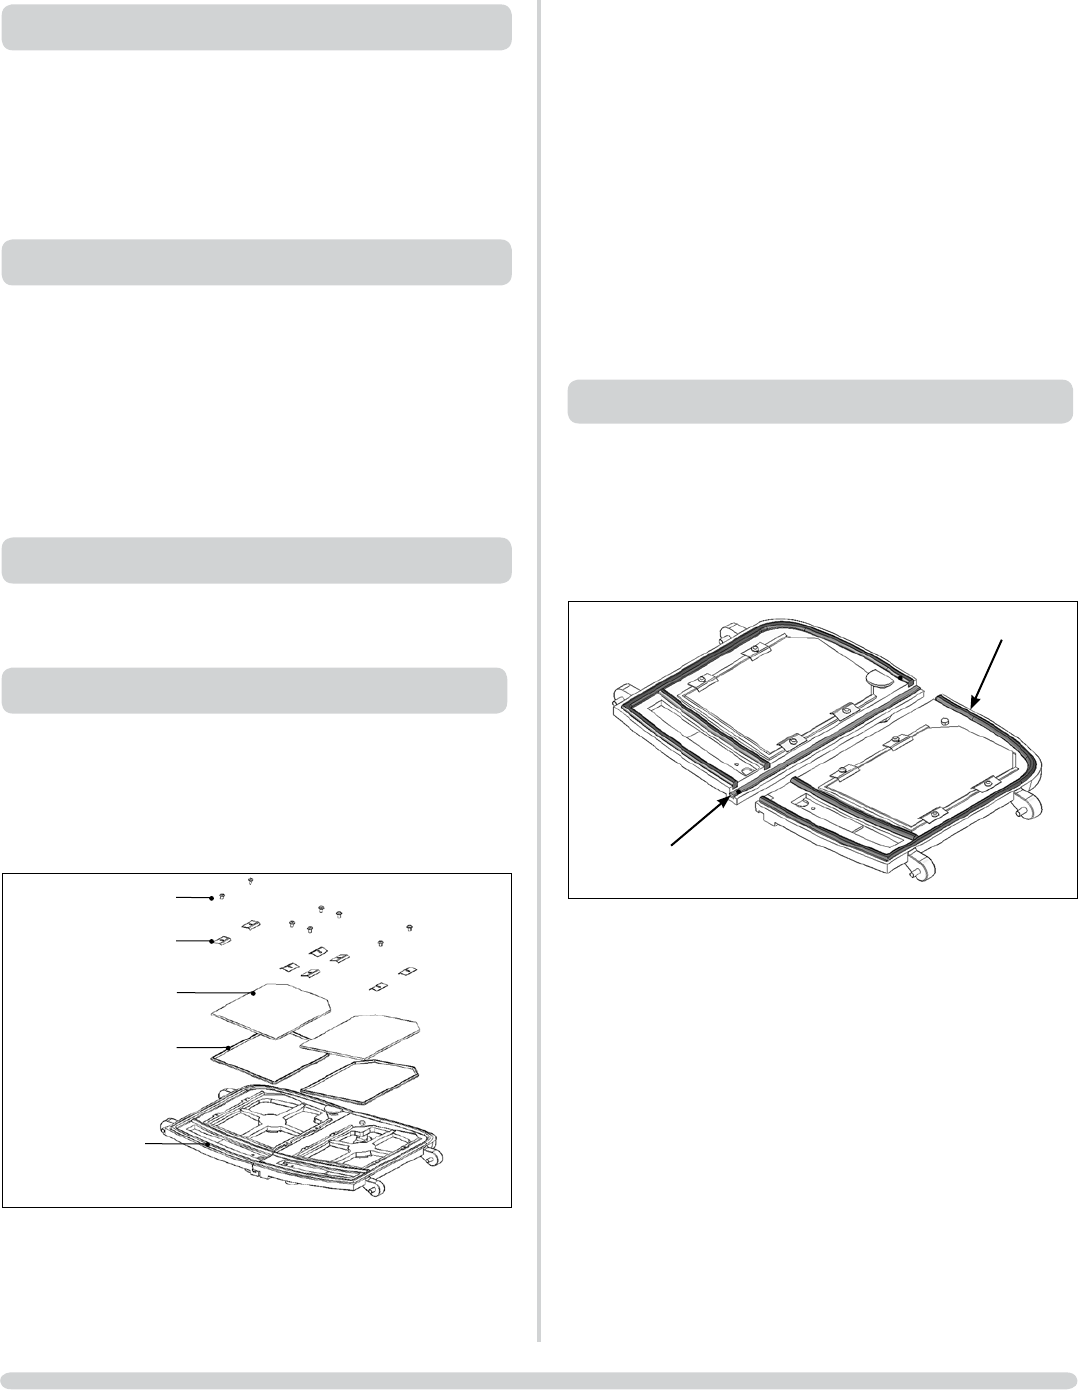
6. FITTING A NEW DOOR SEAL
6.1 To maintain the safe use of your stove you may need to
replace a damaged or worn door sealing rope. To complete
this operation, use this method.
6.2 Remove the door from the stove, by opening and lifting the
door free of the hinge blocks. Then lie the door face down
on a soft flat surface, to protect the paintwork and glass.
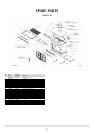
PR7531
Rope seal 12x3mm
Rope seal 14mm
6.3 Remove the old rope and scrape old glue from the locating
grooves. Clean the locating groove with a clean dry cloth to
remove all old dust and debris.
6.4 Squeeze a generous bead of fresh Stovax Thermic Seal glue
into the rope locating grooves (part no. 5037). Press the
new 14mm Stovax rope into the locating groove around
the edge of the door with the ends of the rope reaching the
straight edge of the door. Press the 12x3mm rope along the
groove on the straight edge of the door ensuring it reaches
both top and bottom of the door (this seal is only found on
one door).
6.5 Refit the door and close the door to apply pressure to
new rope. Leave the stove closed for at least 12 hours
before lighting the stove and using at a low output for
approximately one day.
MAINTENANCE and SERVICING
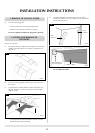
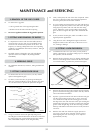
2. REMOVAL OF THE LOG GUARD
2.1 To remove the Log guard:
— Lift Log Guard clear of the supporting brackets.
— Rotate to clear the sides of the door opening.
2.2 Do not use appliance without the log guard in position.
3. FITTING AND REMOVAL OF BAFFLE
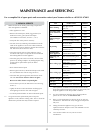
3.1 It is important to remove and clean the baffle system to
ensure the flue ways are clear of soot and debris and to
ensure the safe and efficient operation of the stove. The
frequency of cleaning will depend on the stove operating
conditions. See Installation Instructions, Section 4, Fitting &
Removal of Baffle.
3.2 The baffle system is designed to give safe and efficient
operation of the stove. Replace any damaged baffle
immediately.
4. RIDDLING GRATE
4.1 See Installation Instructions, Section 4, Fitting and Removal
of Grate.
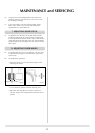
5. FITTING A NEW DOOR GLASS
5.1 To maintain the safe use of your stove you may need to
replace a damaged door glass.
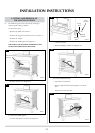
5.2 To do this, r emove the door, by opening and lifting the
door free of the hinge blocks. Then lie the door face down
on a soft flat surface, to protect the paintwork and glass.
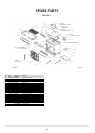
PR7529
Fixing Screws (x8)
Fixing Clips (x8)
Glass (x2)
Glass Seal (3mm)
Door (x2)
5.3 Using a screwdriver remove the glass clip fixing screws.
The old glass can then be lifted clear of the door. (Note how
the 3mm sealing rope is placed between the glass and the
door.) Remember to dispose of the old glass safely.
32