


5
Controllers
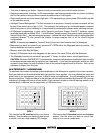
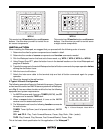
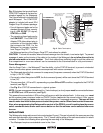
8. The Waterpad is now wired into the final system (refer to Figs. 3 & 5) and all commands tested again
--
before
applying the button icons.
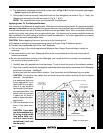
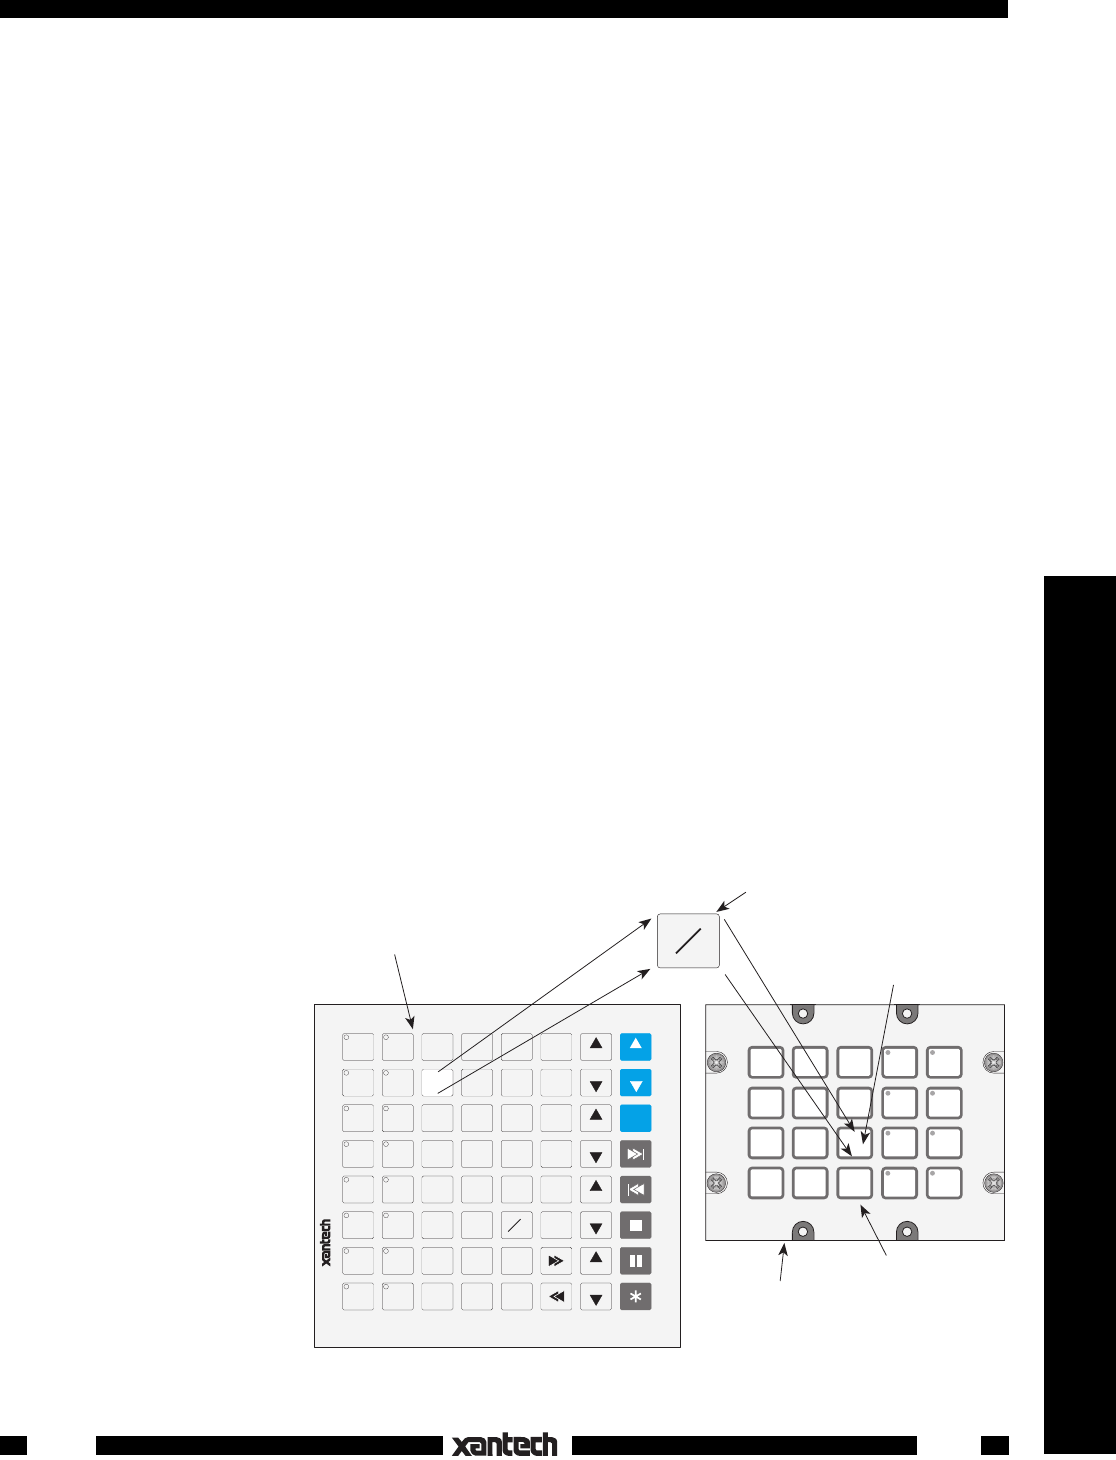
9. If the system functions correctly, the button icons can then be applied, as shown in Fig. 4. Finally, the
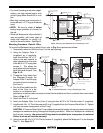
Waterpad is mounted to the wall as shown in Fig. 6, 7, 8 & 9.
NOTE: The needed button icons are included with the Waterpad.
Applying Icons To The Waterpad Buttons
Each version of the Waterpad is supplied with 128 button icons on two mylar sheets. An assortment of both
source and function icons are provided and were chosen to cover practically any conceivable installation.
You will note that an extra set of Volume and Mute icons are provided in blue. Also, an extra set of function
symbol icons (play, stop, pause, etc.) are provided in grey. Use these icons to enhance visibility under low
light conditions or for color coding of functions or taste considerations. For indoor applications, you would
normally use the more sedate white icons.
CAUTION: Before applying the icons, be sure to do the following first:
a) Complete all configuring and programming using the Dragon Drop IR software system.
b) Transfer the programmed data to the "real" Waterpad.
c) Print out a copy of the virtual programmed Waterpad from Dragon Drop and keep it nearby for
reference.
d) Test each button on the "real" Waterpad (without the icons attached) and be sure it executes all
desired commands.
e) Be sure the membrane surfaces of the Waterpad, your hands and the icon sheets, are completely
dry and free of any grease or dirt.
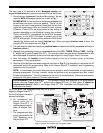
1. Carefully peel off a desired icon from the sheets. Try not to touch too much of the adhesive surface.
2. Align it very carefully within the rectangular embossed button area on the membrane of the Waterpad
and press it into place. See Fig. 4.
Be sure you have the correct button location. Use the printed virtual Waterpad as your guide.
CAUTION: You must be very certain that you have the correct location and that the icon is aligned
correctly. The adhesive
is a waterproof type and
is very aggressive. If you
have to pull it up to repo-
sition it, it may not bond
well enough to hold prop-
erly the second time. You
would have to purchase
a spare set of icons in
order to replace the dam-
aged one(s).
3. Affix the remainder of the
icons in the same man-
ner.
CAUTION:
If you dam-
age the membrane (e.g.
by trying to dig out an
icon with a knife, etc.)
so that it loses its wa-
tertight seal, it will void
the warranty!
Fig. 4 Icon Application
AUX
AUX l
CAM
CATV
CD
CD 1
CD 2
DAT
SAT
SAT 1
SAT 2
TAPE
TAPE 1
TAPE 2
TUNER
TV
AM
AMP
ANT
CLEAR
DISC
DISC
+
DISC
---
INPUT
LINE
MENU
MUTE
MUTE
ON
MUTE
OFF
OFF
ON
SHFL
SHUT
SPKR
TIME
TRACK
UP
VIDEO
5
6
7
8
9
0
TV
SCRN
SCRN
TNR
TNR
TV
VOL
VOL
TV
VCR
MUTE
VOL
#1
Custom labels for WPK
VOL
AM
FM
ICONS on Paper
Backed Sheet
(2 sheets included)
ICON (has adhesive backing)
ICON fits within
embossed button
area on membrane
WATERPAD™
(without decorator style cover plate)
Membrane
WPK1