


10
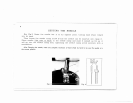
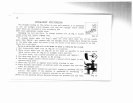
STRAIGHT
STITCHING
For
straight
sewing
on
fine
fabric
or
very
soft
material,
it
is
advisable
to
use
the
straight
stitch
presser
foot
and
the
straight
stitch
needle
plate
which
are
included
in
your
accessory
box.
Both
have
appropriate
needle
slots.
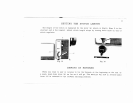
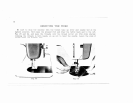
Changing
the
foot
and
plate.
To
change
presser
foot
(8,
Fig.1),
loosen
thumb
screw
and
remove
zigzag
foot.
Fig.
13
Replace
with
straight
stitch
foot
(Fig.13)
and
tighten
screw
securely.
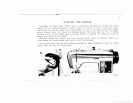
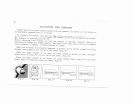
To
change
needle
plate
(10,
Fig.1),
slide
the
cover
plate
open,
lift
off
the
needle
plate
(See
Fig.14),
and
replace
with
the
straight
stitch
needle
plate
fitting
the
recess
on
the
plate
edge
under
the
screw
(1)
and
two
holes
of
the
plate
on
screws
(2
on
bed.
Close
the
cover
plate.
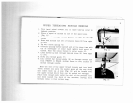
Be
sure
to
set
the
stitch
width
at
0,
or
the
needle
will
break
on
striking
the
foot
or
plate.
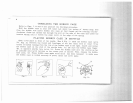
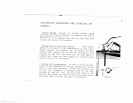
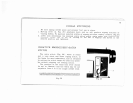
1.
Set
lower
stitch
width
lock
(D,
Fig.15)
at
0
position.
2.
Move
stitch
width
lock
(E,
Fig.15)
as
far
down
as
possible
to
lock
zigzag
stitch
width
control
lever
(F,
Fig.15)
in
straight
stitch
position.
(To
move
locks,
turn
counter-clockwise
set
position
and
tighten.)
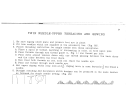
3.
Put
drop
feed
knob
(A,
Fig.16)
at
HI
setting.
4.
Set
stitch
length
control
beyond
number
1
(adjust
stitch
length
to
suit
material
being
sewn.)
5.
Have
take
up
lever
at
highest
point
before
starting
to
sew.
6.
Place
material
and
threads
in
position
under
the
presser
foot
and
then
lower
the
presser
foot.
7.
Turn
the
hand
wheel
toward
you
and
start
sewing
by
pressing
the
foot
control.
The
speed
of
the
machine
is
regulated
by
increasing
or
decreasing
the
amount
of
pressure
exerted
on
the
control.
Never
run
the
maching
without
material
between
the
presser
foot
and
feed.
Fig.
14
V
—