


5
INSTALLATION INSTRUCTIONS
Unpack the Air Conditioner
Remove packaging materials
■ Remove and properly dispose of packaging materials.
Remove tape and glue residue from surfaces before turning
on the air conditioner. Rub a small amount of liquid dish soap
over the adhesive with your fingers. Wipe with warm water
and dry.
■ Do not use sharp instruments, rubbing alcohol, flammable
fluids, or abrasive cleaners to remove tape or glue. These
products can damage the surface of your air conditioner.
■ Handle air conditioner gently.
Prepare Air Conditioner for Installation
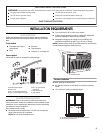
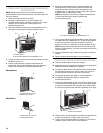
NOTE: Attach top channel and side curtains to air conditioner
before placing air conditioner in window.
1. Locate supplied bag of screws.
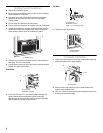
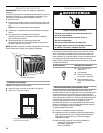
2. Place top channel on top of air conditioner, lining up the holes
in top channel with the holes on top of air conditioner.
3. Using #10 x ³⁄₈" pan-head screws, attach top channel to air
conditioner.
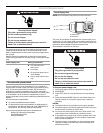
4. Locate supplied bag of 6 - #8 x ³⁄₈" pan-head screws.
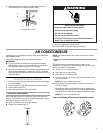
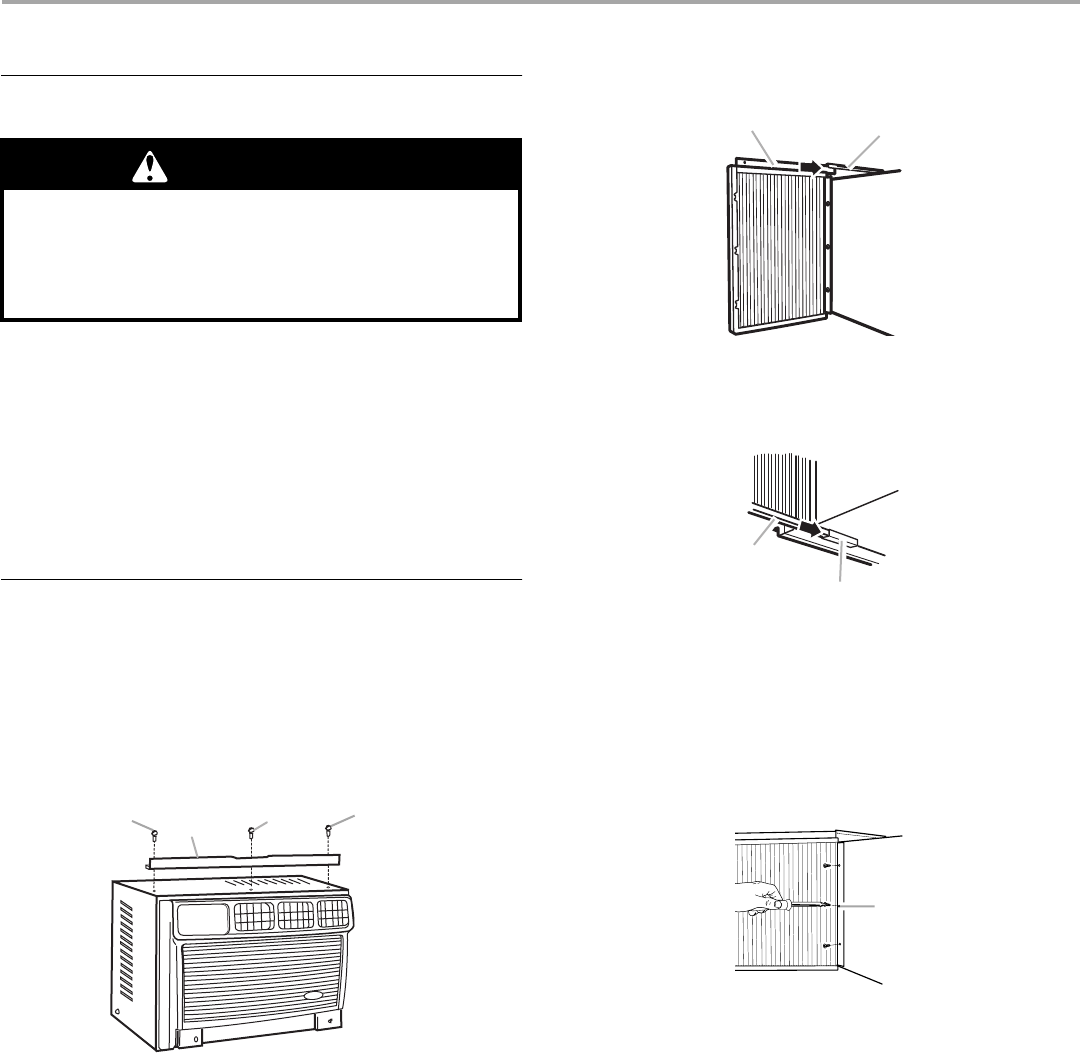
5. Insert top and then bottom of right-hand curtain housing in
top and bottom curtain guides on air conditioner.
Back View
Bottom View
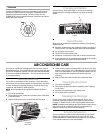
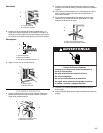
6. Extend right-hand curtain outward so you may insert the first
screw through the middle hole of the curtain. Using #8 x ³⁄₈"
pan-head screw, screw curtain to middle hole in air
conditioner cabinet.
NOTE: This screw is required to correctly attach curtain (top
to bottom) to the air conditioner cabinet.
7. While the right-hand curtain is still extended, insert #8 x ³⁄₈"
pan-head screws into the top and bottom slots of curtain.
Screw curtain to top and bottom holes in air conditioner
cabinet.
NOTE: Some curtains may have 2 slots at each end. You will
be able to see a mounting hole through the correct slot.
8. Slide curtain housing into guides as far as it will go.
9. Repeat above steps for left-hand curtain.
A.Top channel
B.#10 x
³⁄₈
" pan-head screw
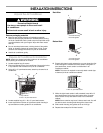
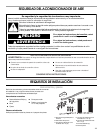
Excessive Weight Hazard
Use two or more people to move and install
air conditioner.
WARNING
Failure to do so can result in back or other injury.
A
B
B
B
A.Curtain housing
B.Curtain guides
A.Curtain housing
B.Curtain guides
A.#8 x
³⁄₈
" pan-head screw
A
B
A
B
A