


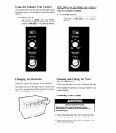
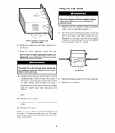

3. Loft up and away from the bottom sprrng cltps
2. Clean filter, using a vacuum cleaner.
-OR-
3. If very drrty, wash filter with warm water and mild
detergent. Air dry thoroughly before replacing.
4. Replace elastic band.
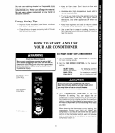
Annual Maintenance for Your
Air Conditioner
Your air conditioner needs annual maintenance to help
insure steady, top performance throughout the year.
Call the service company recommended by your
dealer to:
4. Remove and clean filter. (Follow instructions under
“Cleaning Air Conditioner Filter.“)
5. Clean front panel using a soft cloth with warm water
and mild soap or detergent. Rinse and dry.
l
Inspect and clean the coils and condensate water
passages.
l
Check fan and oil the fan motor.
6. Wipe control panel clean with a soft dry cloth
7. Replace front panel.
(The compressor IS sealed and needs no oiling.)
Expense of annual inspection IS customer’s
responsibility.
I
Do not use cleaning fluids, solvents, abrasive
cleaners, or strong detergents. They may
damage the parts.
I
Cleaning Air Conditioner Filter
The filter
IS
cleanable. A clean filter helps remove dust,
lint and other particles from the air. Check every two
weeks to see if filter needs cleanrng.
1.
Remove front panel from unit. (Follow instructions
under “Cleaning of Front Panel”.) Remove filter
from plastic front frame. by removing elastrc band
which holds It tn place.
Do-It-Yourself Maintenance
If you are familiar with electrical appliances you can
do the cleaning and maintenance yourself. If you decide
to go ahead, follow these steps.
Electrical Shock Hazard
Disconnect power cord from receptacle before
performing any maintenance. Be sure no liquid
gets into the motor, electrical control box or com-
pressor electrical terminals. Failure to follow the
above precautions could result in personal injury.
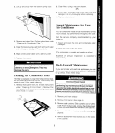
1.
Remove unit from window
2. Remove front panel. (See page 4)
3. Remove side curtains. Slide curtains out to fullest
width. From the back side, remove the phillips head
screws (A) which attach the curtains to the cabinet.
4. Remove slotted/hex head screws (B) holdrng top
channel.
5. Remove slotted/hex head screws (C) on the sides
of the cabinet.