


13
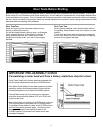
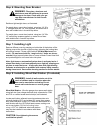
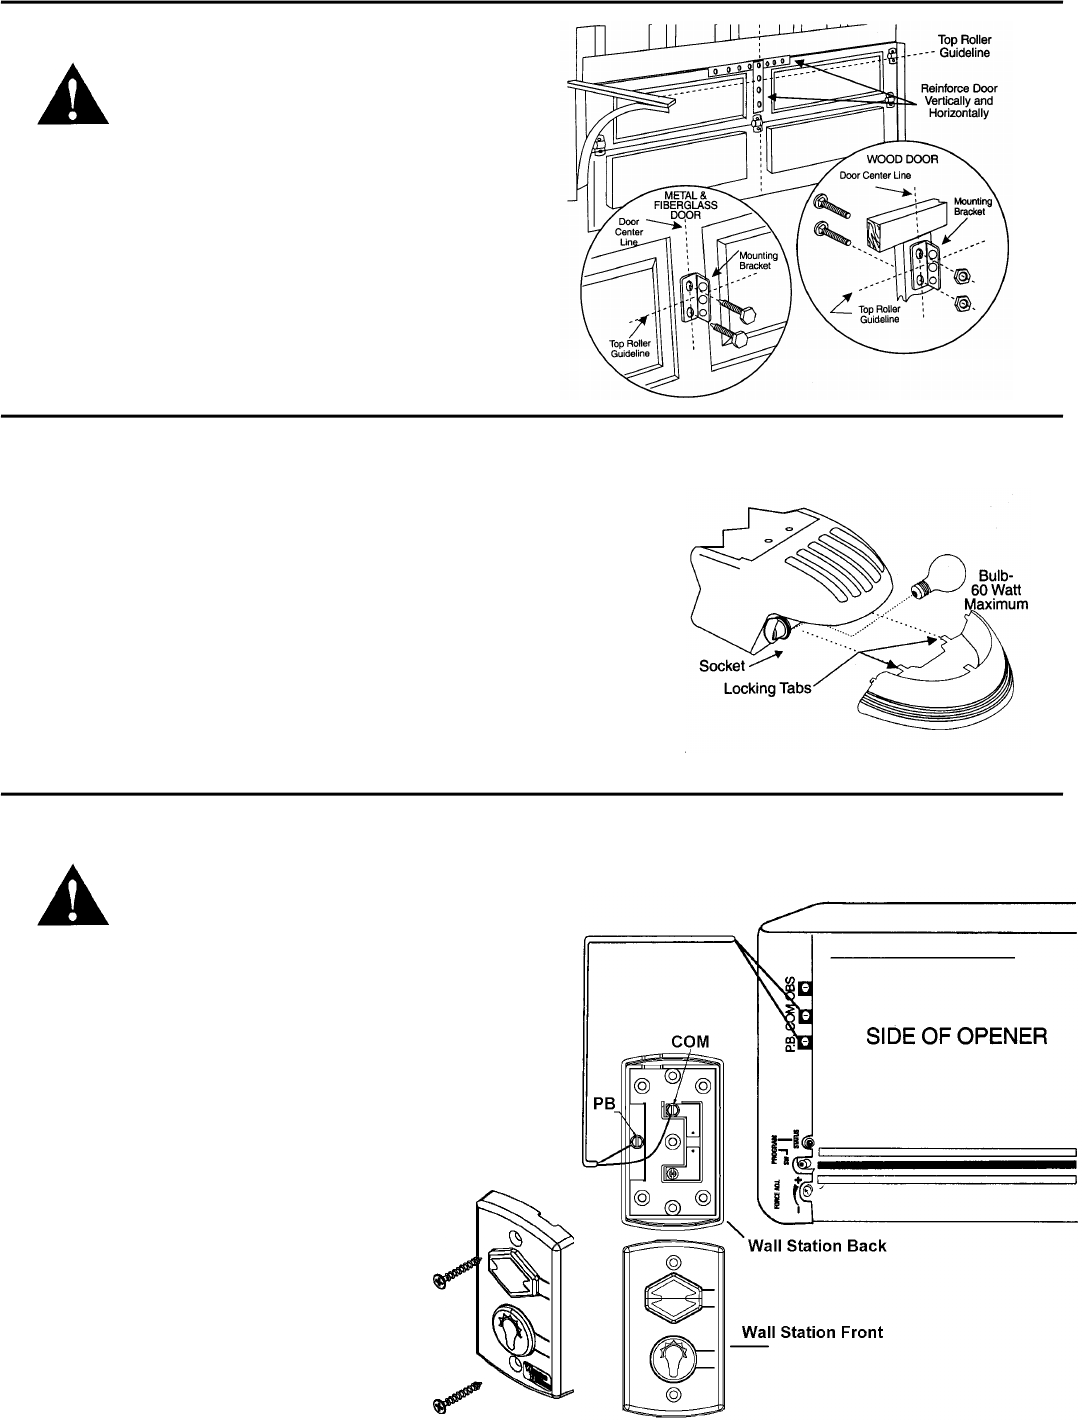
Step 6: Mounting Door Bracket
WARNING: Fiberglass, aluminum and
steel doors must be reinforced to prevent
damage to the door. Check with your ga-
rage door manufacturer for their recom-
mendations.
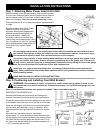
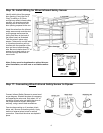
Reinforce light weight doors, as illustrated.
For wood doors, mount door bracket, using two 1/4”-20 x
2” carriage bolts and 1/4” nuts supplied, on center line of
door with middle hole in line with top rollers.
For metal doors, mount door bracket, using two 1/4”-20 x
1/2” self drilling screws supplied, on center line of door
with middle hole in line with top rollers.
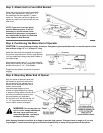
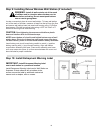
Step 7: Installing Light
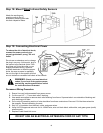
Remove diffuser cover by pressing on both sides of the bottom of the
lighting cover at the junction of the housing, releasing the locking tabs,
and pulling forward. Screw a 60 Watt bulb (60 Watt Maximum) into
socket. For maximum bulb life, “rough service” bulbs are recom-
mended. Align top and bottom tabs on cover to Motor Power Head Unit
and push straight on until cover locks into place.
Note: light turns on automatically when door is activated and a 4
minute time delay circuit automatically turns light off, allowing am-
ple time to enter the house. A fully open door with light blinking
indicates an obstruction or problems with external safety sensors
during close travel. See trouble shooting section for further details.
Step 8: Installing Wired Wall Station (if included)
WARNING: Install all wall controls out of the
reach of children and in a location where the
door can be seen before activating. Do not
mount wall controls near or next to garage
door.
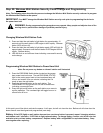
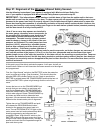
Wired Wall Station: Wire the garage door opener wall station
using bell wire (low voltage electrical wire) connected to COM
and P.B. on vertical screw terminal strips, as illustrated.
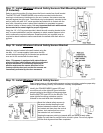
Locate push button adjacent to service entrance door at a
minimum height of 5 ft., and at least 5 ft. away from garage
door (see illustration in Step 10). Fasten the wall station in a
safe location with the (2) Phillips head screws, making sure
not to over tighten. Pilot drill mounting holes
using a 3/32" bit. Additional wired wall stations
may also be installed in accordance with these
instructions.
CAUTION: Over tightening the screws
could deform plastic.