


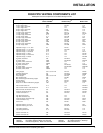
Waterford TARA T25 Direct Vent Freestanding Gas Stove
25
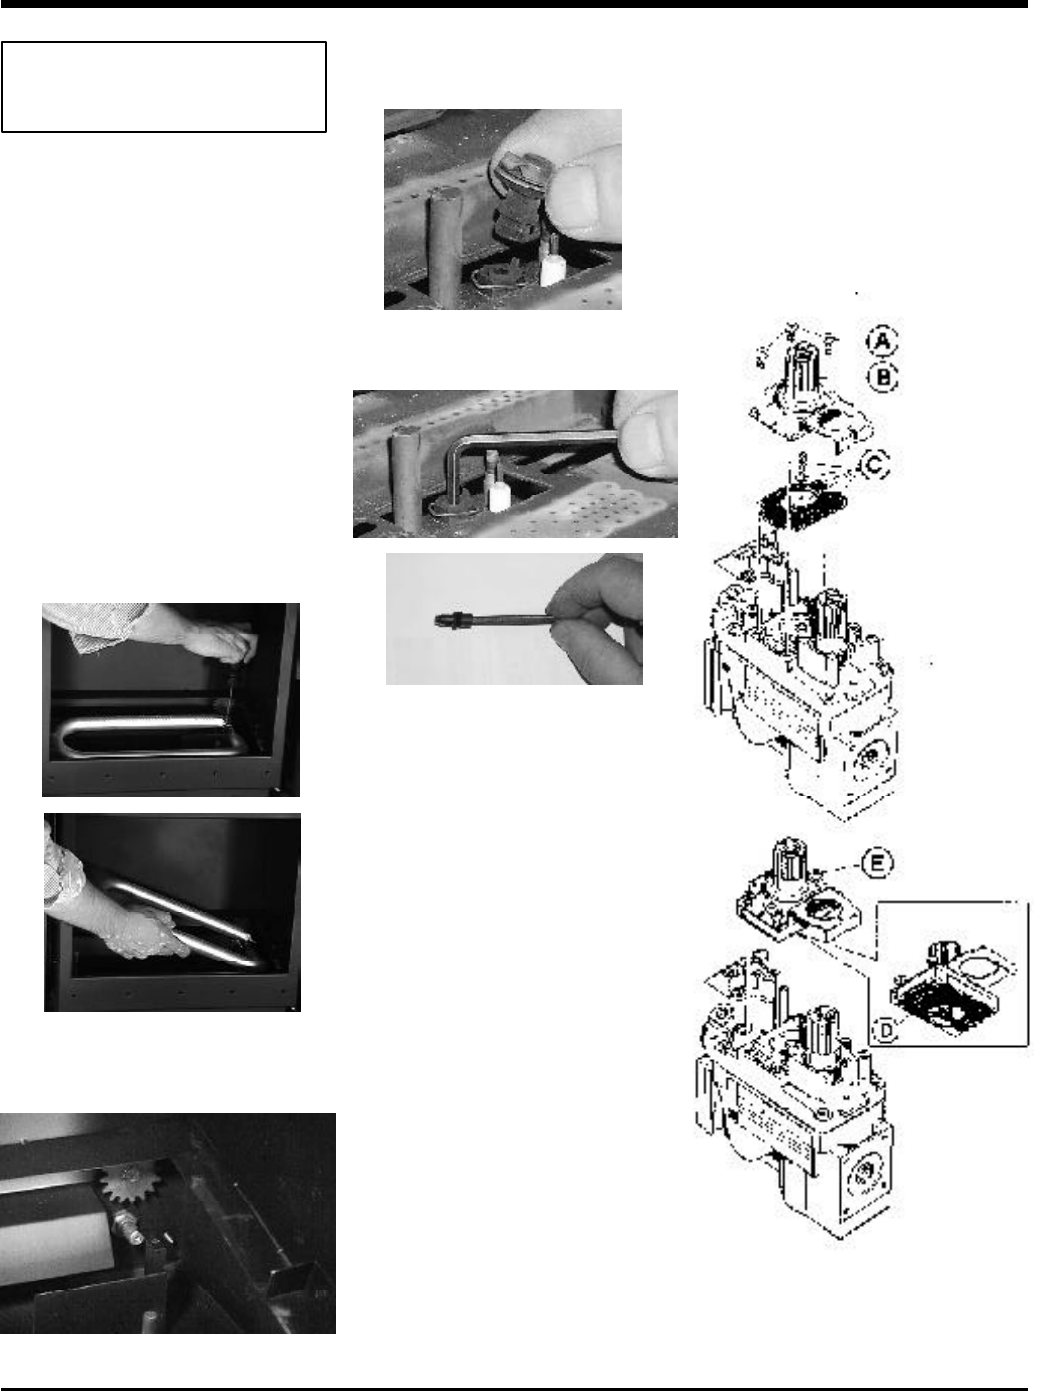
8) Unscrew the pilot orifice with the allen key
and replace with the LP pilot orifice in the
kit.
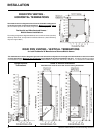
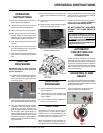
INSTALLATION
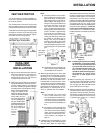
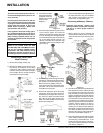
1) Shut off the gas supply.
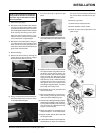
2) Remove the Cast Iron Front Panel. Hold the
cast iron front panel at the bottom and lift
upwards and out from the stove. Once free
of the locating tabs, the panel can be dropped
down; freeing it from the top of the stove.
Place the cast iron front panel on a non-
abrasive surface, away from any traffic to
ensure that it does not get damaged.
3) Remove the Front Glass Panel. Using a 7/
16" socket wrench, remove the 6hex head
bolts used to secure the glass panel and
frame to the stove. Remove the frame and
glass panel and set it aside.
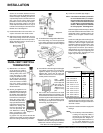
4) Remove the logs.
5) Remove the burner tube by removing the
locking screw on the rear burner support
bracket and then lift the burner out.
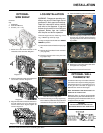
6) Using a 1/2" deep socket remove the burner
orifice and install new front burner orifice
LP stamped #53 and tighten.
7) Pull off the pilot cap to expose the pilot
orifice.
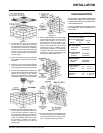
9) Replace the burner. Place the burner onto
the support bracket and guide the front of
the burner onto the burner injector. The
burner air shutter gears must be aligned.
Check to make sure that the two gears
engage each other by at least two-thirds of
their thickness. If not, it will be necessary
to disengage the burner and screw the
drive gear in and out as required. Once
everything is aligned properly, secure the
burner with the locking screw.
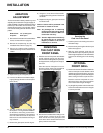
10)Re-install the logs, front glass panel and
cast iron door front.
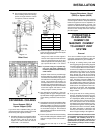
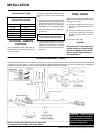
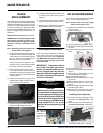
11)Remove and discard the 3 pressure regu-
lator mounting screws (A), pressure reg-
ulator tower (B) and diaphragm (C).
12)Insure that the rubber gasket (D) is properly
positioned and install the new HI/LO pres-
sure regulator assembly to the valve using
the new screws (E) supplied with the kit.
Tighten screws securely.
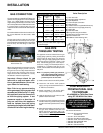
13)Attach clear label "This unit has been con-
verted to Propane" on the serial # decal.
14)Replace yellow "Natural Gas" label with
red "Propane" label.
15)Take the Decal with the Propane Orifice #,
Manifold Pressure, Input, etc. and attach to
the stove's rear heat shield to indicate that
the unit has been converted to burn pro-
pane.
16)Check for gas leaks.
17)Check inlet and outlet pressures.
18)Check operation of flame control.
19)Check for proper flame appearance and
glow on logs.
NOTE: If the conversion to Propane is
being made at the time of installation,
the valve may be removed to make it
more accessible.