


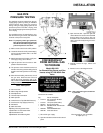
Waterford E65-1 Emerald Direct Vent Freestanding Gas Stove 29
OPERATING
INSTRUCTIONS
1) Read and understand these instructions
before operating this appliance.
2) Check to see that all wiring is correct and
enclosed to prevent possible shock.
3) Check to ensure there are no gas leaks.
4) Make sure the glass in the door frame is
properly positioned. Never operate the
appliance with the glass removed. Never
strike the glass or slam the door shut.
5) Verify that the venting and cap are unob-
structed.
6) Verify log placement. If the pilot cannot be
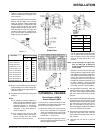
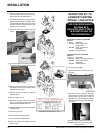
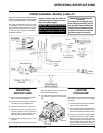
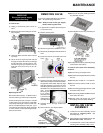
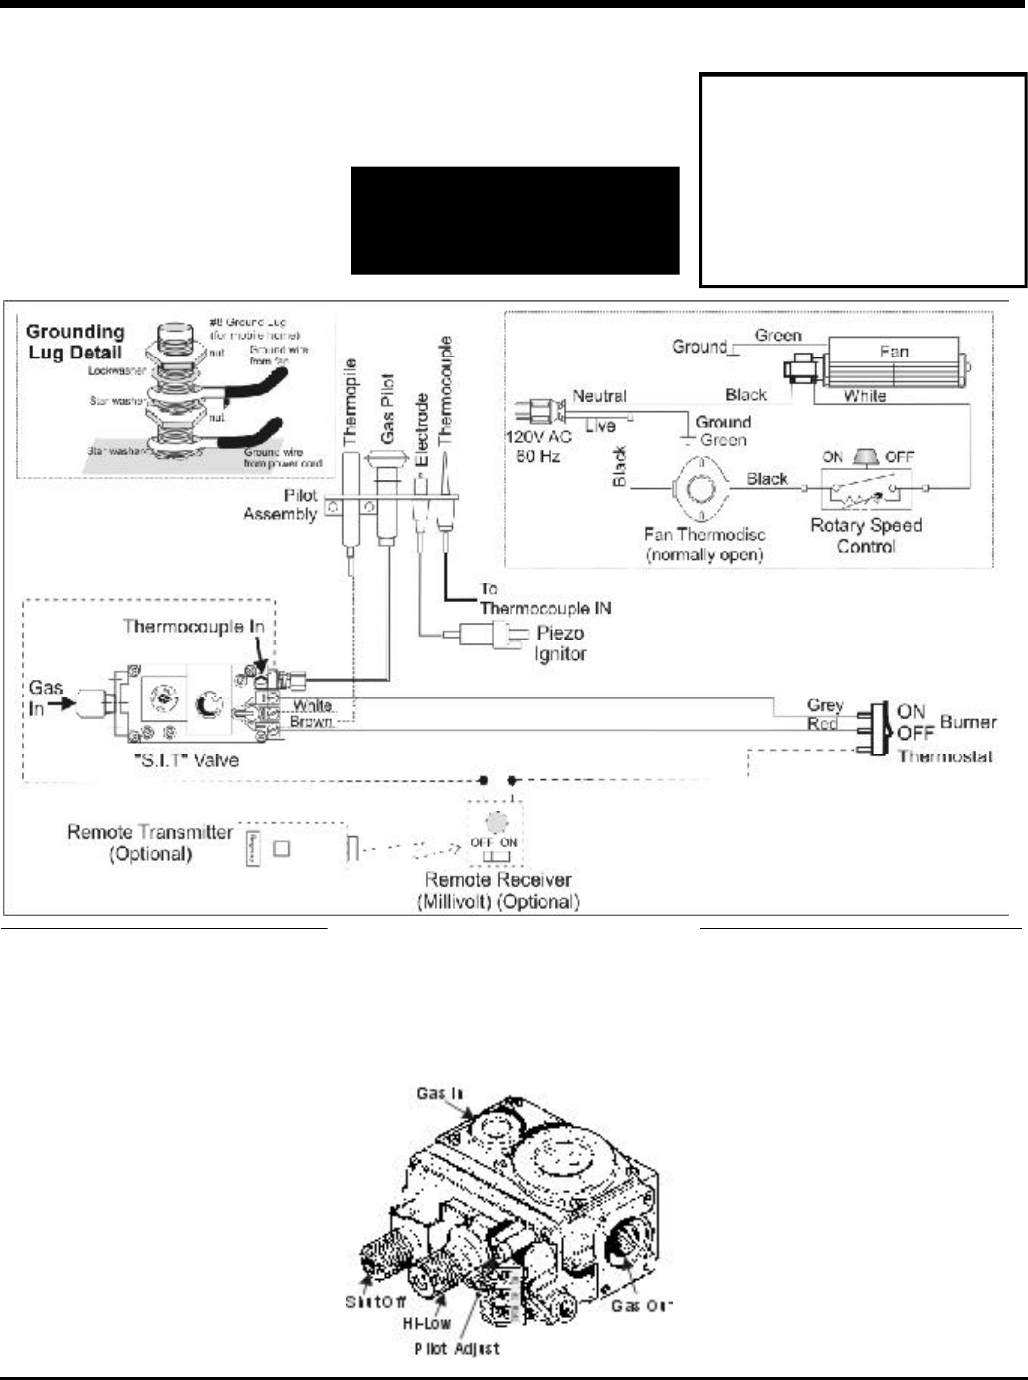
WIRING DIAGRAM - E65-NG1 & E65-LP1
If any of the original wires as supplied with the
appliance must be replaced, it must be replaced
with CSA type SEW (200
o
C) or its equivalent.
This heater does not require a 120V A.C. supply
for operation. In case of a power failure, the
burner switch and the optional remote control/
thermostat will continue to operate. However,
a 120V A.C. power supply is needed for the
fan/blower operation.
Caution: Ensure that the wires do
not touch any hot surfaces and are
away from sharp edges.
seen when lighting the unit - the logs have
been incorrectly positioned.
7) The unit should never be turned off, and on
again without a minimum of a 60 second
wait.
LIGHTING
PROCEDURE
IMPORTANT: Gas cock knob cannot be turned
from "PILOT" to "OFF" unless it is partially
depressed.
1) Turn stove OFF using the Burner "ON/OFF"
switch remote or thermostat.
2) Turn gas control knob so indicator points to
"OFF" position and allow 5 minutes for any
gas in the combustion chamber to escape.
3) Turn gas control knob counterclockwise
so indicator points to the "PILOT" position.
Depress the gas control knob fully. De-
press the igniter button several times until
the pilot lights. After approximately one
minute, release the gas control knob. The
pilot flame should continue to burn. If the
OPERATING INSTRUCTIONS
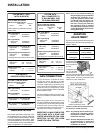
WARNING: Electrical Grounding
Instructions
This appliance is equipped with a
three pronged (grounding) plug for
your protection against shock haz-
ard and should be plugged directly
into a properly grounded three-prong
receptacle. Do not cut or remove the
grounding prong from this plug.
CAUTION: Label all wires prior to
disconnection when servicing con-
trols. Wiring errors can cause im-
proper and dangerous operation.