9
Assembly Instructions — continued
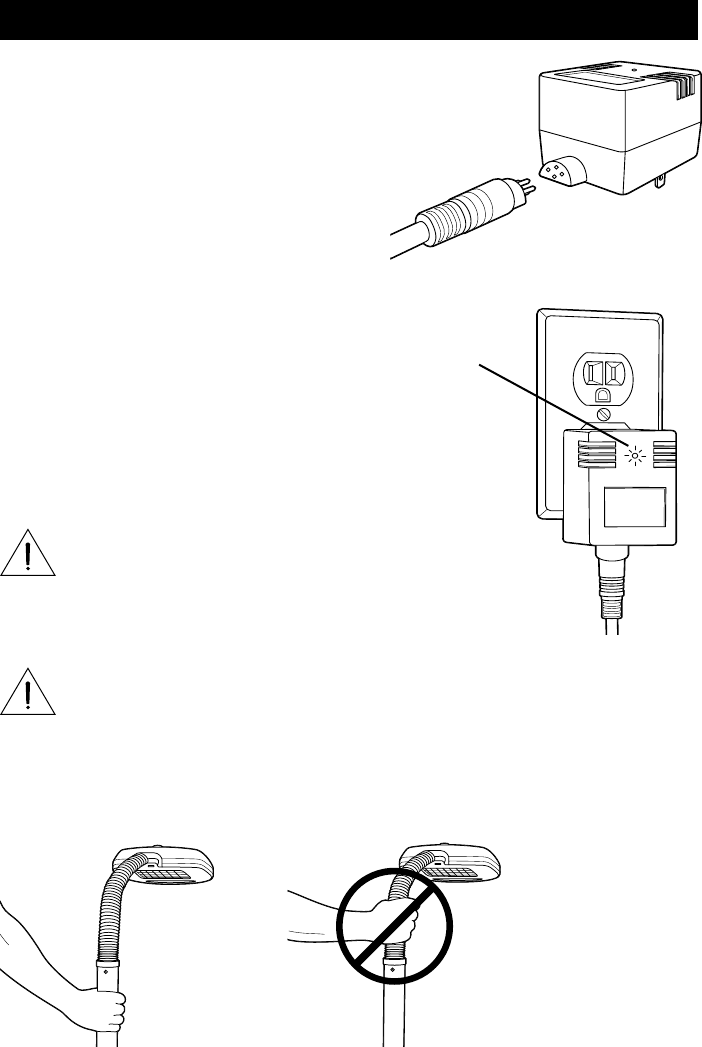
5. Attach the ballast to the power
cord. Use care to align the 4-pin
plug properly. DO NOT FORCE.
The power cord is designed to
connect only one way (Fig. 5).
6. Plug the ballast into a standard 120V
50/60Hz outlet and turn the lamp on. The
green LED indicator (J) on center of the
ballast will illuminate (Fig. 6). If not, please
refer to the troubleshooting section of this
manual (see page 11).
Note: Green LED indicator will not illuminate if
lamp is turned off or bulb is removed.
J
ATTENTION!
Fig. 5
Fig. 6
ALWAYS lift your
lamp by the shaft
DO NOT lift the lamp
by the gooseneck
WARNING: Do not block vents on the
ballast. Vents are necessary for proper
function of the ballast; blocking them
may cause overheating of the ballast and
increase the risk of fire.
AVERTISSEMENT : Ne pas bloquer les ouvertures sur le
ballast. Vents sont nécessaires pour le bon fonctionnement
du ballast, le blocage entre eux peuvent provoquer une
surchauffe du ballast et d’accroître le risque d'incendie.


