14
ASHES - REMOASHES - REMO
ASHES - REMOASHES - REMO
ASHES - REMO
VV
VV
V
AL AND DISPOSALAL AND DISPOSAL
AL AND DISPOSALAL AND DISPOSAL
AL AND DISPOSAL
Ashes should not be allowed to accumulate inside the heater to the point that they obstruct airflow through the burning wood.
If ashes obstruct the airflow, poor burning of the wood is likely.
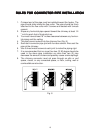
When removing ashes from the heater, wear noncombustible gloves to protect your hands from hot surfaces. Remove the ash dump cover
exposing the hole in the bottom of the firebox. Rake ashes through the hole into the ash pan in the pedestal using an ash shovel. Put the ash dump
cover back in place before removing the ash pan. Remove ash pan and dump ashes into a safe, noncombustible container. Replace the ash pan
after dumping the ashes.
ASHES SHOULD BE PLACED IN A METAL CONTAINER WITH A TIGHT FITTING LID. THE CLOSED CONTAINER OF ASHES SHOULD BE
PLACED ON A NONCOMBUSTIBLE FLOOR OR ON THE GROUND, WELL AWAY FROM ALL COMBUSTIBLE MATERIALS, PENDING FINAL
DISPOSAL. IF THE ASHES ARE DISPOSED OF BY BURIAL IN SOIL OR OTHERWISE LOCALLY DISPERSED, THEY SHOULD BE RETAINED
IN THE CLOSED CONTAINER UNTIL ALL CINDERS HAVE THOROUGHLY COOLED.
Ashes should never be placed in a wooden, cardboard, or plastic container, nor in a paper or plastic bag, no matter how long the fire has been out.
Coals have been known to stay hot for several days when embedded in ashes.
NEVER OPERATE THIS HEATER WITH THE BRICK CRADLE OR THE ASH PAN REMOVED OR DAMAGED.
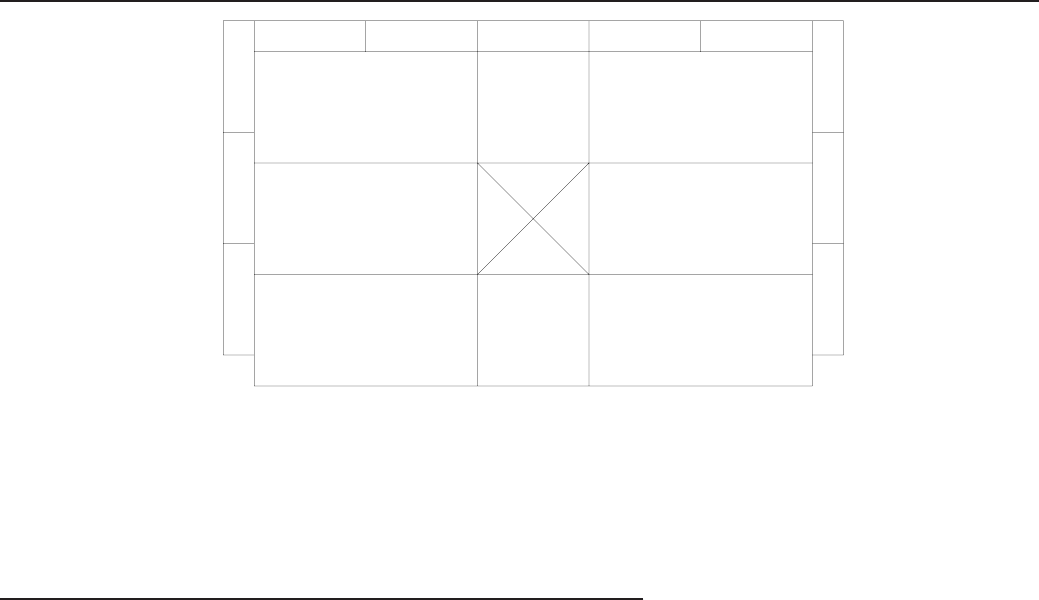
BRICK PLABRICK PLA
BRICK PLABRICK PLA
BRICK PLA
CEMENT - (TCEMENT - (T
CEMENT - (TCEMENT - (T
CEMENT - (T
OP INSIDE OP INSIDE
OP INSIDE OP INSIDE
OP INSIDE
VIEW OF FIREBOVIEW OF FIREBO
VIEW OF FIREBOVIEW OF FIREBO
VIEW OF FIREBO
X)X)
X)X)
X)
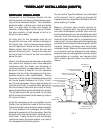
1. INSERT RIGHT & LEFT SIDE FIREBRICK AS SHOWN.
2. INSERT REAR FIREBRICK AS SHOWN.
3. INSERT BOTTOM 1/2 FIREBRICK AND ASH DUMP COVER
AS SHOWN.
1/2
BRICK
1/2
BRICK
GLASS REPLACEMENT INSTRUCTIONS FOR MODEL 2007GLASS REPLACEMENT INSTRUCTIONS FOR MODEL 2007
GLASS REPLACEMENT INSTRUCTIONS FOR MODEL 2007GLASS REPLACEMENT INSTRUCTIONS FOR MODEL 2007
GLASS REPLACEMENT INSTRUCTIONS FOR MODEL 2007
7.
8.
9.
10.
11.
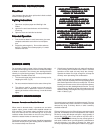
Use part no. 2722 only, to replace broken
glass. Glass dimensions(8-7/8 x 20-1/4 x
5mm) high temp resistance glass
Warning: Do not slam door or strike glass.
Slamming door or striking glass may cause
glass to break.
Caution: Do not build fire directly on glass.
Warning: Do not use abrasive cleaners.
Abrasive cleaners may damage the glass.
Warning: Do not use substitute Materials.
Be sure heater has cooled before begin-
ning.
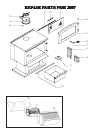
Remove 12, 10-24 x 1/4 screws and glass
retainers (10, 11) with screw driver.
Remove damaged glass (2).
To reinstall glass, follow steps 1-2 in re-
verse order. Be sure to replace the gasket
on the glass.
Caution: Do not operate with broken glass.
When removing broken glass, wear thick
gloves, and safety glasses. Keep children
away. Discard broken glass.
1.
2.
3.
4.
5.
6.


