– 157 –
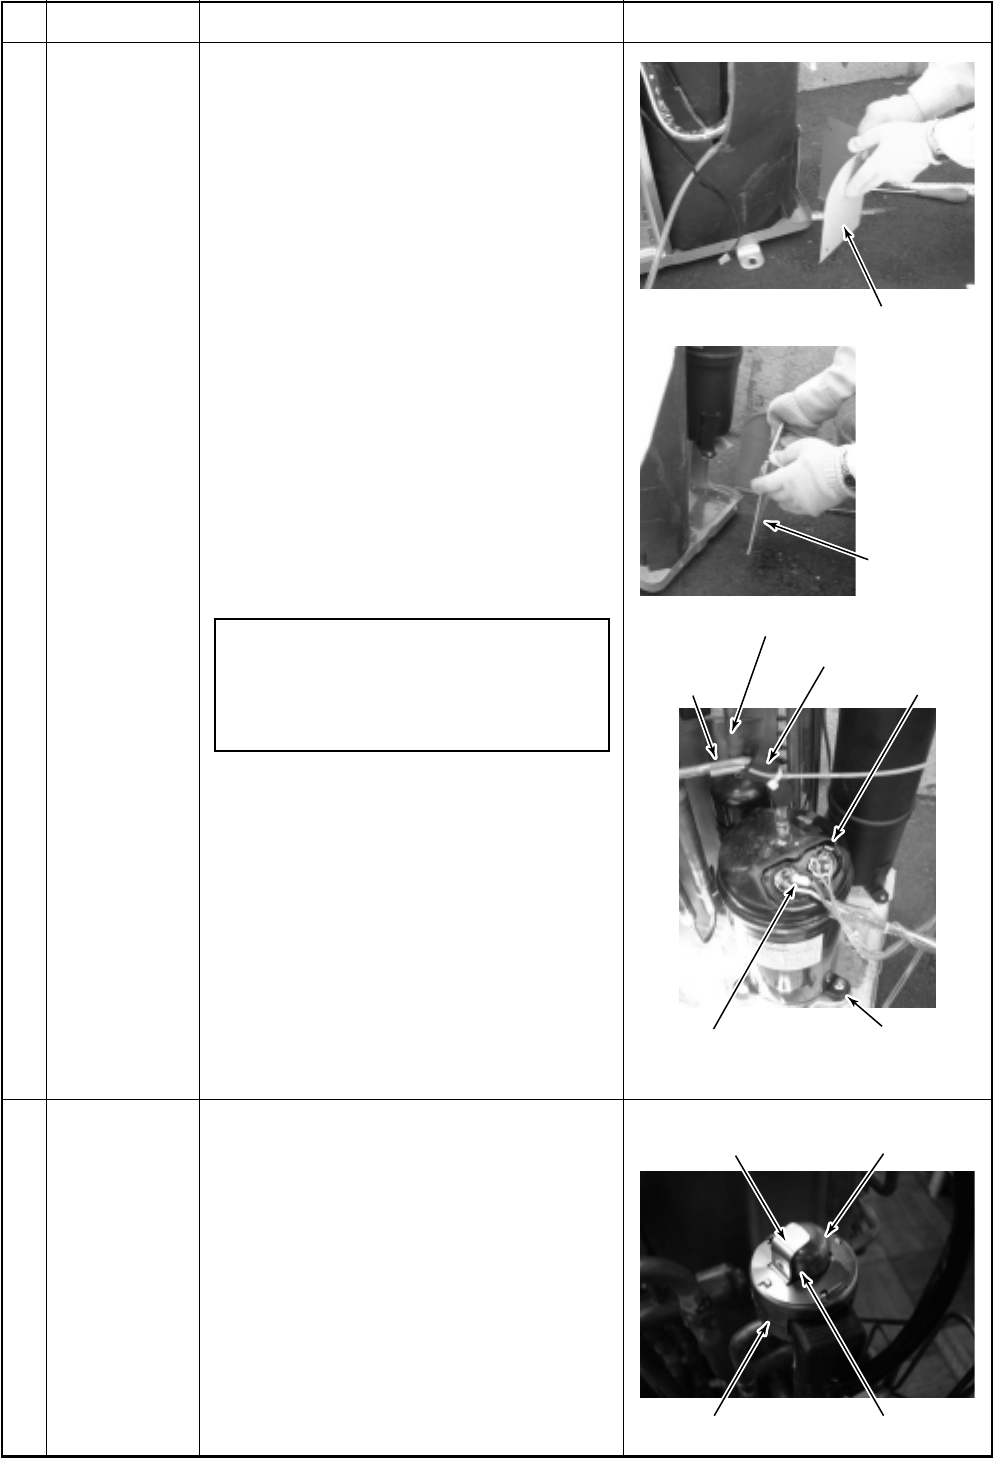
Piping panel (Front)
Remove (Suction pipe)
Remove (Discharge pipe)
Case thermo.
PMV coil
PMV bodyPositioning extrusion
Concave part
TD sensor
Compressor nuts
(3 pcs)
Compressor lead
Piping panel
(Rear)
No.
Part name
Compressor
PMV coil
Procedure
1) Recover refrigerant gas.
2) Perform the works in 1 of and in .
3) Remove the piping panel (Front).
Take off screws of the piping panel (Front)
and the base plate.
(ST1T Ø4 × 10, 2 pcs)
Take off screws of the piping panel (Front)
and the piping panel (Rear).
(ST1T Ø4 × 10, 2 pcs)
4) Remove the piping panel (Rear).
Take off screws of the piping panel (Rear)
and the base plate.
(ST1T Ø4 × 10, 2 pcs)
5) Remove the sound-insulation plate.
6) Remove terminal cover of the compressor,
and then remove compressor lead and
case thermo. of the compressor.
(ST1T Ø4 × 10, 2 pcs)
7) Remove TD sensor fixed to the discharge
pipe.
8) Using a burner, remove pipe connected to
the compressor.
NOTE)
Pay attention that 4-way valve or PMV is
not exposed to a flame.
(Otherwise, a malfunction may be
caused.)
9) Pull out discharge pipe and suction pipe
of the refrigerating cycle upward.
10) Take off the compressor nuts (3 pcs)
fixing the compressor to the base plate.
11) Draw out the compressor toward you.
1. Detachment
1) Perform the works in 1 of and in .
2) Hold outside of the coil by hands and turn
it while lifting upward. The fixing hooks
come off the fixing concavities and then
the coil can be removed from PMV body.
2. Attachment
1) Match the positioning extrusion of the coil
surely to the concave part of PMV body,
and then fix it.
Remarks


