– 156 –
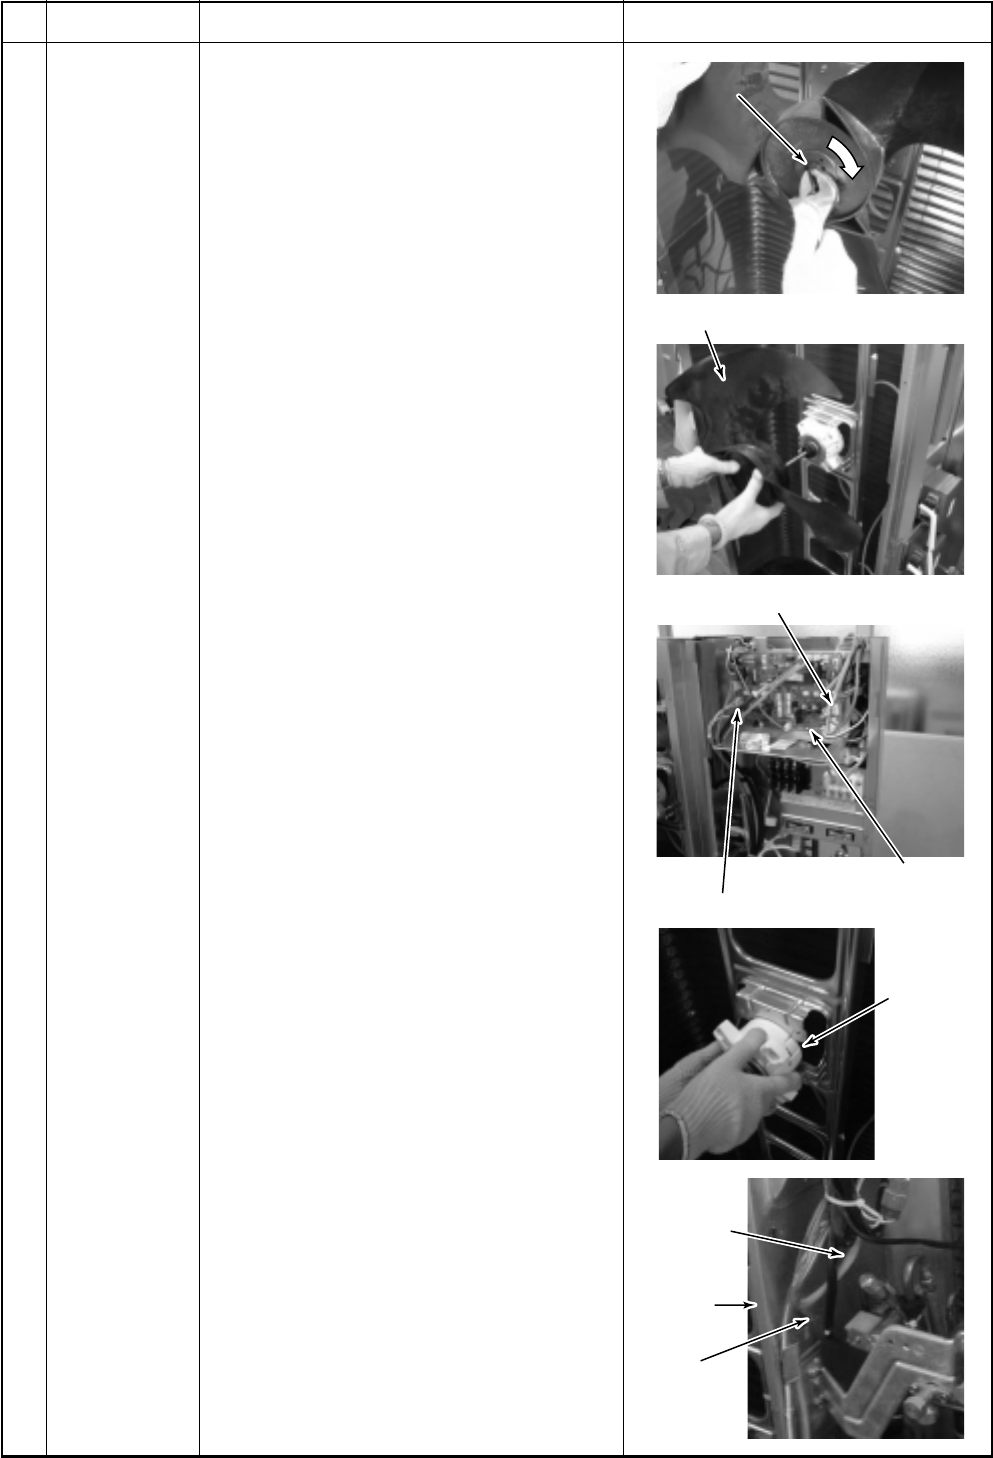
Flange nut
Propeller fan
Fan motor connector at upper side
Cycle P.C. board
Fan motor
Fan motor
lead
Partition
plate
Motor lead
fixed plate
Fan motor connector at lower side
Loosen by
turning clockwise
kwise
.
Flange nut
Loosen by
turning clockwise.
No.
Part name
Fan motor
Procedure
1) Perform the works in 1 of and 1 of .
2) Take off flange nut fixing the fan motor
with the propeller fan.
• Loosen the flange nut by turning clock-
wise. (When tightening, turn it counter-
clockwise.)
3) Remove the propeller fan.
4) Remove connector for the fan motor from
the inverter.
5) Take off fixing screws (4 pcs) with sup-
porting the fan motor so that it does not
fall down.
6) When replacing the fan motor at lower
side, remove the motor lead fixed plate
which is fixed to the partition plate with
screw (ST1T Ø4 × 10, 1 pc), pull the fan
motor lead out of the partition plate, and
then remove the fan motor.
* Cautions in assembling fan motor
<In case of RAV-SP1102AT-E>
• Be sure to mount the propeller fan and the
fan motor at upper and lower sides be-
cause they are different.
• Tighten the flange nut with the following
torque.
Upper side: 9.8N·m (100kgf·cm)
Lower side: 4.9N·m (50kgf·cm)
<In case of RAV-SP1402AT-E>
• The same propeller fan and the fan motor
are used at upper and lower sides.
• Tighten the flange nut with the following
torque.
Upper side: 9.8N·m (100kgf·cm)
Lower side: 9.8N·m (100kgf·cm)
• Be sure to mount the motor lead fixed plate
so that the fan motor lead is not caught in.
• Be sure that the propeller fan does not
come to contact with the fan motor lead.
Remarks


