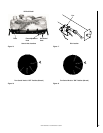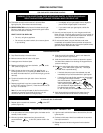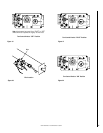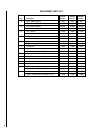
NOTE: DIAGRAMS & ILLUSTRATION NOT TO SCALE.
4
The space in the previous example is a confined
space because the actual BTU/Hr used is more
than the maximum BTU/Hr the space can sup-
port. You must provide additional fresh air.
Your options are:
a.Rework equations adding the space of ad-
joining room(s). If the extra volume provides
an unconfined space, then remove door or
add ventilation grills between rooms. Refer
to National Fuel Gas Code, ANSI Z223.1,
Section 5.3.
b.Vent room directly to the outdoors. Refer to
National Fuel Gas Code, ANSI Z223.1, Sec-
tion 5.3.
c. Install a lower BTU/Hr heater, such as a
24,000 BTU/Hr, to make the area an uncon-
fined space.
If the actual BTU/Hr used is less than the
maximum BTU/Hr the space can support, then
the space is an unconfined space. You will need
no additional fresh air ventilation for an uncon-
fined space.
2.Divide the volume of space by 50 ft
3
to
determine the maximum BTU/Hr the space
can support.
______ (volume of space – ft
3
)/ 50 ft
3
=
(Maximum BTU/Hr the space can support)
Example: 3072 ft
3
/ 50 ft
3
= 61.44
or 61,440 BTU/Hr the space can support.
3.Add the BTU/Hr of all the fuel burning appli-
ances in the space.
Vent-Free heater _______ BTU/Hr
Gas appliance #1* _______ BTU/Hr
Gas appliance #2 + _______ BTU/Hr
Total = _______ BTU/Hr
Example:
Vent-free heater 32,000 BTU/Hr
Gas appliance #1 35,000 BTU/Hr
(water heater)
Total = 67,000 BTU/Hr
* Do not include direct-vent gas appliances.
Direct-vent is sealed combustion and draws
combustion air from the outdoors.
4. Compare the maximum BTU/Hr the space
can support with the actual amount of BTU/
Hr used.
_________ BTU/Hr
(max. the space can support)
_________ BTU/Hr
(actual amount of BTU/Hr used)
Example:
61,440 BTU/Hr
(max. the space can support)
67,000 BTU/Hr
(actual amount of BTU/Hr used)
WARNING: IF THE AREA IN WHICH THE
HEATER MAY BE OPERATED IS SMALLER
THAN THAT DEFINED AS AN UNCON-
FINED SPACE, PROVIDE ADEQUATE
COMBUSTION AND VENTILATION AIR BY
ONE OF THE METHODS DESCRIBED IN
THE NATIONAL FUEL GAS CODE, ANSI
Z223.1, SECTION 5.3 OR APPLICABLE
LOCAL CODES.
PREINSTALLATION
WARNING: BEFORE INSTALLING IN A
SOLID FUEL BURNING FIREPLACE, THE
CHIMNEY FLUE AND FIREBOX MUST BE
CLEANED OF SOOT, CREOSOTE, ASHES
AND LOOSE PAINT BY A QUALIFIED CHIM-
NEY CLEANER.
Note: Illustrations shown in this manual reflect
“typical” installations with nominal dimensions
and are for reference only. Actual installations
may vary due to individual design preferences.
However, always maintain minimum clearances
to combustible materials and do not violate any
specific installation requirements. Refer to Fig-
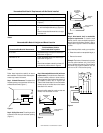
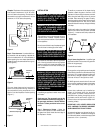
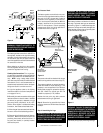
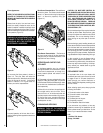
ures 1 through 7 for clearances.
Note: The following steps represent the normal
sequence of installation. Each installation is
unique, however, and might require a different
sequence.
When local codes require the damper to be
fixed open, a damper stop must be installed to
prevent full closure of the fireplace damper
and provide a minimum 29 square inch flue
opening at all times. Refer to accessories for
damper clamp.
If damper clamp is not available, the damper
may be fixed open in the following manner. Drill
a hole in the end of the damper. Screw in a bolt
of sufficient size and adjust to provide the
minimum 29 square inches of flue opening.
CAUTION: HEATERS CREATE WARM AIR CUR-
RENTS. THESE CURRENTS MOVE HEAT TO
WALL SURFACES NEXT TO HEATER. INSTALL-
ING HEATER NEXT TO VINYL OR CLOTH WALL
COVERINGS OR OPERATING HEATER WHERE
IMPURITIES IN THE AIR (SUCH AS TOBACCO
SMOKE) EXISTS, MAY DISCOLOR WALLS.
• Turn off gas supply to the fireplace or firebox.
• Position heater in fireplace or firebox.
• Connect gas line.
• Secure heater.
• Assemble logs and test flame.
• Sprinkle volcanic rock over base plate in front
of and below the main burner.
Check Gas Type
This heater can only be connected to the gas
type specified on the heater rating plate. This
heater can not be modified in the field for a
different gas type. If the gas supply differs, DO
NOT INSTALL the heater. Contact your dealer to
obtain the correct heater.
CLEARANCES
WARNING: DO NOT INSTALL THIS GAS
HEATER:
• IN SLEEPING QUARTERS, BATH-
ROOMS, A MOBILE HOME, OR A REC-
REATIONAL VEHICLE.
• WHERE CURTAINS, FURNITURE,
CLOTHING OR OTHER FLAMMABLE OB-
JECTS ARE LESS THAN 42" FROM THE
FRONT OF THE GAS HEATER.
• IN HIGH TRAFFIC AREAS.
• IN WINDY OR DRAFTY AREAS.
Ensure the minimum clearances shown in
Fig-
ures 1 through 7
are maintained. Left and right
clearances are determined when facing the
front of the heater.


