


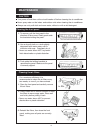
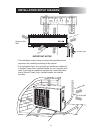
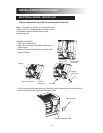
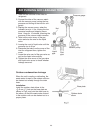
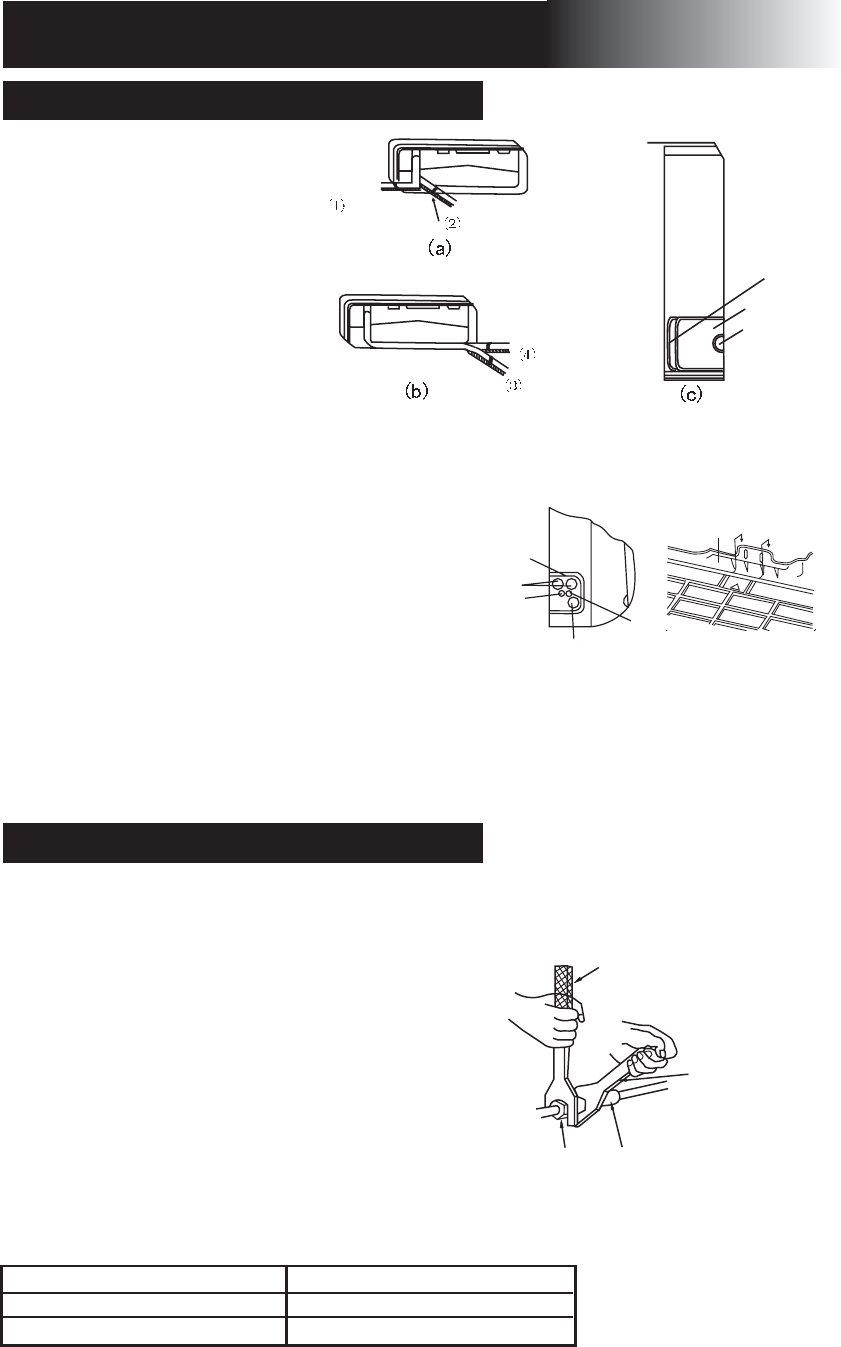
1. When routing the piping and
wiring from the left or right side
of the indoor unit, cut off the tai-
lings from the chassis in neces-
sary (shown in Fig.4, (a), (b) (c)).
(1) Cut off the tailings 1 when
routing the wiring only.
(2) Cut off the tailings 1 and tai-
lings 2 (or tailings 1, tailings 2
and tailings 3) when routing both
the wiring and piping. 1, 2 and 3
in Fig. 4 are the recommended
piping.
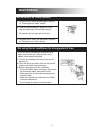
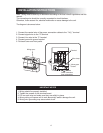
2. Wrap the piping and wiring and
pull them through the cut-off-
tailings hole (Shown in Fig. 5).
3. Hang the mounting slots of the
indoor unit on the upper tabs of
the rear panel and check if it is
firm enough. (Shown in Fig. 6).
4. The height of the installed loca-
tion should be 2 m (78-3/4”) or
more from the floor.
Wrapping tape
Connection pipes
Power connection cord
Fig.4
Drainage hose
Right piping
Right rear piping
Left piping
Tailings 3
Tailings 2
Tailings 1
Left rear piping
Fig.5 Fig.6
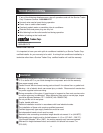
Fig.7
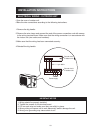
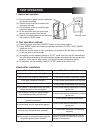
INSTALLATION INSTRUCTIONS
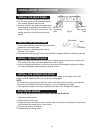
Installation of the outdoor unit
Install the connection pipe
1. Align the center of the piping flare
with the relevant valve.
2. Screw in the flare nut by hand and
then tighten the nut with spanner and
torque wrench refer to Fig.7.
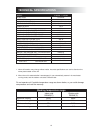
NOTE: Exceeding tightening torque will
damage the flare surface.
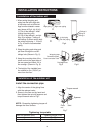
Tightening torque table
Hex nut diameter (mm)
ø 6
ø 12
Tightening torque (N.m)
15 ~ 20
50 ~ 55
Torque wrench
Spanner
Flare
nut
Joint
19
Installation of the indoor unit